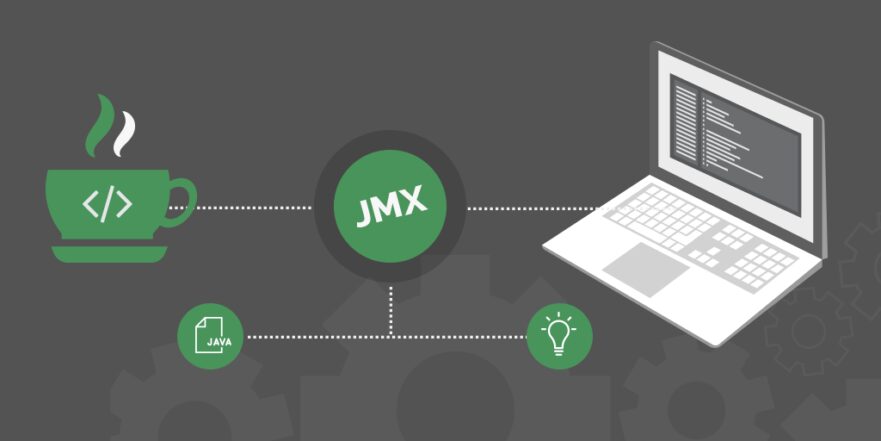
In this article, we’ll have a look at a core Java technology – Java Management Extension (JMX).
We’ll start with a quick intro to exactly what JMX is, and we’ll quickly move to some interesting things you can do with the technology.
Introduced all the way back in Java 2, JMX is a standard component of the Java Standard Edition, providing a simple API to monitor and manage your resources at runtime.
Trough the API, you can monitor your resources in real-time, which is why most production-grade Java tools out there expose metrics data over JMX.
We mentioned before that JMX provides a simple API for managing your applications. Before we dive deep into code, let’s start understanding how the core of JMX works and what its architecture looks like.
Simply put, there are three main levels of JMX:
To start managing resources, the application needs to implement and expose MBeans – which can be managed with the help of a JMX Agent.
What’s worth noting here is that the MBean – which is, at the core, an interface – is entirely decoupled and doesn’t require knowledge of the JMX agent.
Also, you’ll notice how simple, yet powerful and extensible MBeans are. You can get insight into your application with very little effort, which is an important aspect of the tool.
The JMX Agent is the standard management agent that directly controls resources and makes them available for remote management applications. The core of the JMX Agent is the MBean server – where MBeans are registered.
Since the agent is used for connection to remote management applications, it includes at least one communication adapter or connector.
After you created the MBean and registered it, you can access it in a number of different ways. Access is, of course, similar if you’re connecting to a third-party application that exposes its internal data over JMX as well.
Simply put, you can get access through JConsole or through the communication adaptor or connectors available by default.
To enable remote management, you need to use the following options when starting the application:
-Dcom.sun.management.jmxremote
-Dcom.sun.management.jmxremote.port=8008
-Dcom.sun.management.jmxremote.authenticate=false
-Dcom.sun.management.jmxremote.ssl=false
Now that you understand how the basics of the technology, let’s start focusing on how to connect to a Tomcat server with the Java Monitoring and Managment Console, or shortly JConsole.
To establish a successful connection to Tomcat, you need to enable JMX on it with options defined in subsection 3.3.
After you open the JConsole application you’ll get a window like this:

In the starting window, you can choose if you want to connect to a local process, or on a remote one. Since we’re running Tomcat as a local process, we’ll choose the first option – by selecting the right process in the menu:

On startup, Tomcat got the PID of 11320 – which is second in the list of local processes here.
After you connect JConsole to the Tomcat JMX agent – you will start seeing basic information, such as heap memory usage, number of active threads, number of loaded classes and CPU usage of the Tomcat process:

Even at this initial point, you can start understanding the real power of JMX. With a simple monitoring application like JConsole – which is included in every JDK installation – you can get a lot of useful information about your running application, with minimal setup.
Next, notice the upper bar with several other options:
![]()
Also, notice how other tabs can show us much more information about specific part of the applications:
It’s also worth noting that, beyond JConsole, there are of course other tools you can use as JMX clients. VisualVM is one such free tools – very similar to JConsole, but using a more modern and clean interface.
In the previous section, we discussed how JConsole can see all MBeans in an application. You’ll now create your own MBean, enable it and access it through JConsole.
Simply put, a MBean can represent any resource that needs to be managed; it exposes a simple interface – which lists a set of invokable operations and a set of readable and/or writable attributes.
The standard MBean declares a statically typed Java interface that explicitly reveals attributes and operations. As opposed to this – there are also dynamic MBeans – which reveal their attributes and operations at runtime.
Let’s now move on to the implementation, to better understand the process start-to-finish.
The MBean interface lists the methods for all exposed attributes and operations. By convention, implementations of the interface are named with the MBean suffix.
Let’s define a UserMBean interface exposing a print operation and the following attributes – id, userName and password – for the User resource:
public interface UserMBean {

    public void printUserInfo();

    // id getter and setter
    // userName getter and setter
}
Attributes are defined in the MBean interface using the naming conventions in the interface methods. They can either be read-only, write-only or read-write attributes.
A read-only attribute is defined by only declaring a getter in the interface. By defining this getter – for example, getId() – we are in fact defining and exposing a read-only attribute named id.
Similarly, by defining a setter method setPassword() – we are defining the password write-only attribute. By declaring both the getter getUserName() and the setter setUserName() – we’re defining read-write attribute userName.
Any method declared in the MBean interface but not recognized as a standard getter or setter, is considered a custom operation. These operations don’t have to follow any naming conventions, as long as they don’t coincide with attribute naming conventions.
In our example, the printUserInfo() operation is used for printing the contents of the User object.
So far we’ve demonstrated our example management interface for the User resource. Now let’s look into the managed resource User which implements UserMBean interface:
public class User implements UserMBean {

    private Long id;
    private Long id;
    private String userName;
    private String password;

    @Override public void printUserInfo() {
        System.out.println("This is user with username: " + userName);
    }

    // standard getters and setters without setId() setter
}
Once our User resource is instrumented by the UserMBean, the JMX agent stars doing the typical management and instrumentation. The core component for JMX agent is the MBeanServer interface – which is used for MBean manipulation.
Let’s write a simple Main class to demonstrate a basic JMX agent:
public class Main {

    public static void main(String[] args) throws Exception {
        MBeanServer mBeanServer = ManagementFactory.getPlatformMBeanServer();
        ObjectName name = new ObjectName("test:type=User");
        User userMBean = new User();
        userMBean.setUserName("Jack");

        mBeanServer.registerMBean(userMBean, name);

        Thread.sleep(Long.MAX_VALUE);
    }
}
With the User MBean registered in the MBean server, the JMX agent waits for the management operations to be performed on User. In this example, these management operations are invoking printUserInfo() and the typical getter and setter methods.
Let’s now focus on how you get information from your MBean into JConsole.
Remember that, before we start JConsole, we need to enable JMX in our application, similarly to what we did in the previous Tomtcat example:
-Dcom.sun.management.jmxremote
-Dcom.sun.management.jmxremote.port=8008
-Dcom.sun.management.jmxremote.authenticate=false
-Dcom.sun.management.jmxremote.ssl=false
After you start the application with enabled JMX, you can now start up JConsole.
Next, on the first screen, in the Java PID list, you’ll notice a new entry – which is your application:

JConsole will show the same information as it did for Tomcat, but now it will also show your custom MBean in the MBeans tab:

You can see that the tool can display all available attributes of the User class, is available through the defined methods in the UserMbean implementation. Also, notice that an Operations menu is available with the custom printUserInfo() method.
If you select the printUserInfo operation, you can invoke the method by pressing a button in Operation invocation part of the screen. Invoking the method will print user information to the console or to the standard out of your running application. You’ll also get a notification in JConsole as well.
In the previous section, we focused on how you can create your own MBeans. In this section, we’ll go little further and demonstrate how you can send notifications with MBeans.
The MBean can send notification for every event it detects. To generate a notification, your MBean needs to implement the NotificationEmiter interface or extend NotificationBroadcasterSupport.
Furthermore, you need to create an instance of the class Notification (or AttributeChangeNotification subclass) from the javax.managment library – and pass the instance to the sendNotification() method (from previously mentioned NotificationBroadcasterSupport class).
When you create the notification, you define its source. This is the object name of the MBean that generates our notification and set up sequence number of the notification. Sequence number also serves as a counter for the number of notification sent for a specific MBean.
Here’s our simple MBean implementation – which can now send notifications:
public class User extends NotificationBroadcasterSupport implements UserMBean {
    private long sequenceNumber = 1;

    private Long id;
    private String userName;
    private String password;

    public long getID() {
      return id;
    }

    // not exposed via MBean
    public void setID(long id) {
        this.id = id;
    }

    public String getUserName() {
        return userName;
    }

    public void setUserName(String userName) {
        Notification n = new AttributeChangeNotification(
          this,
          sequenceNumber++,
          System.currentTimeMillis(),
          "Username has changed",
          "Username",
          "String",
          userName,
          this.userName);

        sendNotification(n);
        this.userName = userName;
    }

    public void setPassword(String password) {
        this.password = password;
    }

    public void printUserInfo() {
        System.out.println("This is user with username: " + userName);
    }

    @Override
    public MBeanNotificationInfo[] getNotificationInfo() {
        String[] types = new String[]{
            AttributeChangeNotification.ATTRIBUTE_CHANGE
        };

        String name = AttributeChangeNotification.class.getName();
        String description = "Username of this Bean has changed";
        MBeanNotificationInfo info =
                new MBeanNotificationInfo(types, name, description);
        return new MBeanNotificationInfo[]{info};
    }
}
Notice that constructor of the notification has a number of parameters:
This article is a simple and to-the-point introduction to the JMX technology.
The goal here is entirely practical. By this point, you should have a good understanding of the core technology and how to use it with a client tool. And, beyond clients such as JConsole or VisualVM, you can naturally use a full monitoring solution such as Retrace with JMX data.
Typically you’ll use it to monitor applications like Tomcat – which already publish their internal state via JMX. However, JMX is hugely powerful for exposing metrics for your own application in a very simple way.
Simply put, the tutorial was entirely focused on the core technology and the tremendous power that’s available with JMX, right from the very beginning.
Stackify's APM tools are used by thousands of .NET, Java, PHP, Node.js, Python, & Ruby developers all over the world.
Explore Retrace's product features to learn more.
If you would like to be a guest contributor to the Stackify blog please reach out to [email protected]