
In order to release quickly and have stable application environments with minimal errors, it is of vital importance that developers work well with IT operations people and vice versa. To do this, they need to communicate well and sometimes work in the same team.
Ideally, they work in the same environment. Makes sense right? This is called DevOps. DevOps is a hyped-up term, but it comes down to implementing common sense by working better together.
One of the most important goals that DevOps helps to achieve is:
Microsoft provides some awesome services and features that can help your team to achieve this goal. You’ll learn about them in this article.
Azure App Services are services that you use to host your web application or API. When you have the source code of your application in source control somewhere, you can easily have it deployed automatically to the App Service, every time you push up a change.
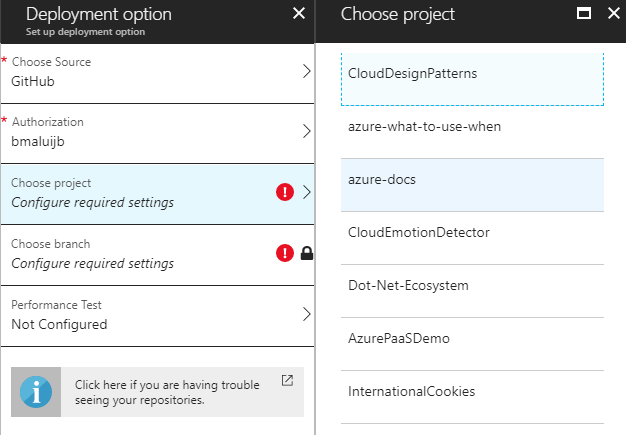
You do this by configuring the Deployment Options feature in App Services. This is really simple to do.
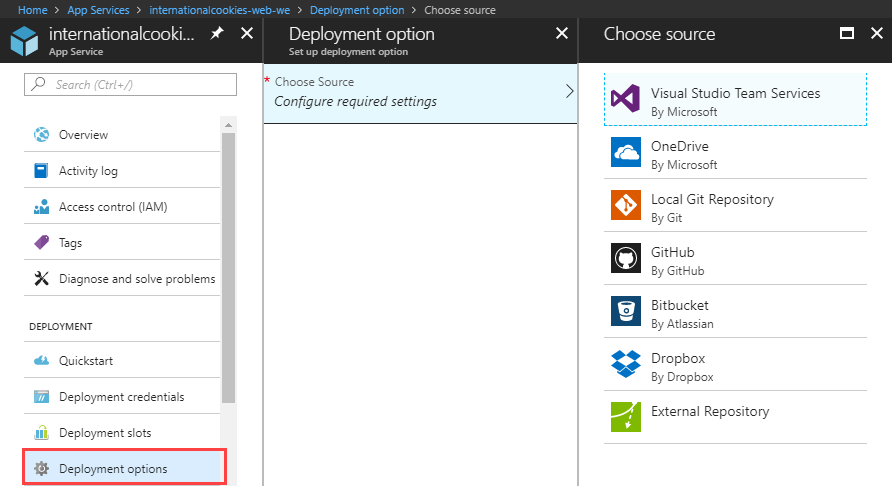
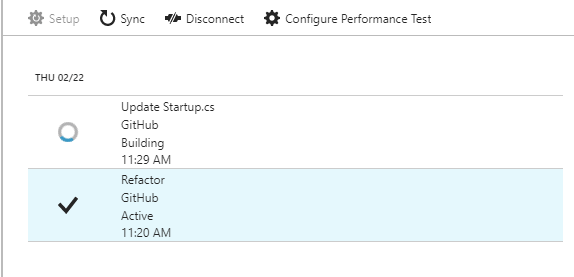
Once this is configured, every time that you commit changes to the source code repository, it will get built and deployed to the App Service automatically.
You can see the deployments in the Deployment Options blade in the App Service. From here, you can even redeploy previous deployments.
This is a pretty cool feature and very useful. Especially when you work with a team of developers that are all checking in code to the same repository. However, the Deployment Options feature in App Service is pretty restricted. It is easy to set up, but that also means that you do not have a lot of configuration choices, if you need to do more.
Currently in preview, Azure DevOps Projects is a guided experience in the Azure Portal that makes it easy for you to configure Continuous Integration and Continuous Deployment. It’s not really a service within Azure, but more of a nice UI that helps you to set things up without leaving the Azure Portal.
Under the covers, it sets a build and release pipeline up in Visual Studio Team Services, which we’ll discuss later. So any builds or releases that you do through Azure DevOps Projects don’t happen within Azure, but within Visual Studio Team Services.
You can start out easily by creating a new Azure DevOps Project. Once you’ve done this, you’ll see a wizard that starts like this:
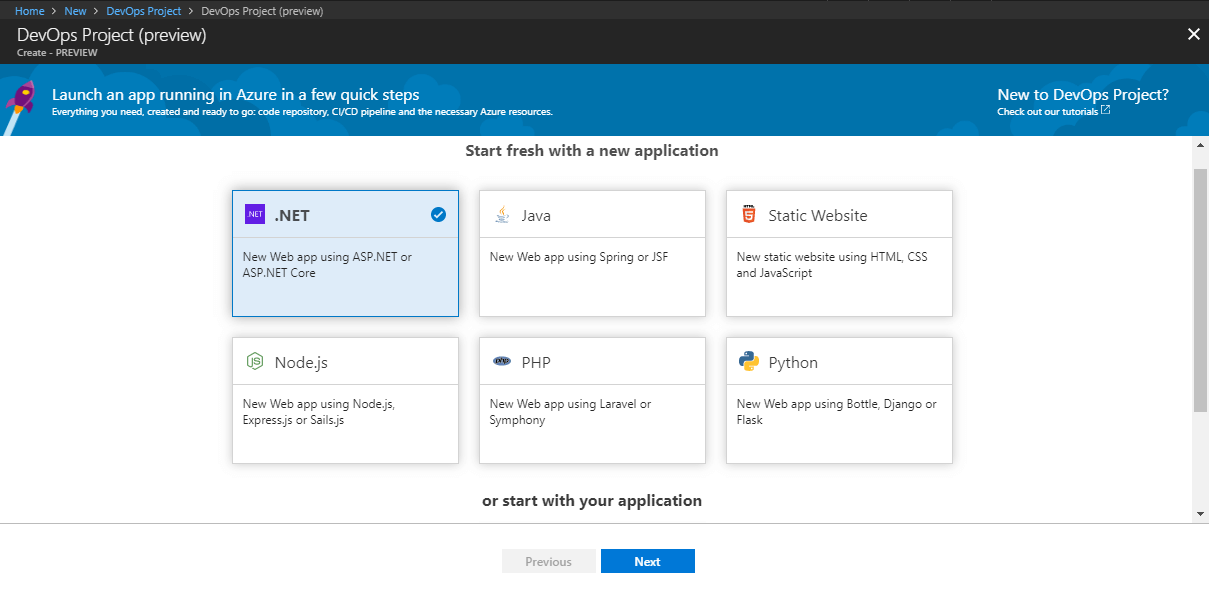
The wizard provides you with preconfigured templates to start from. You can also start without a template and create your own process.
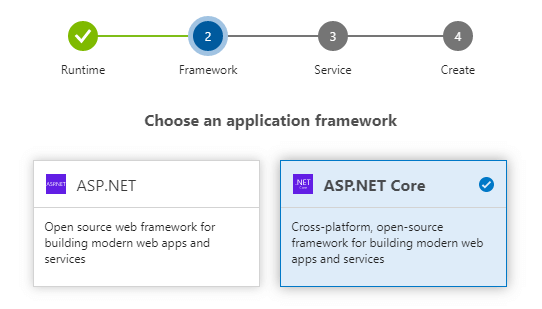
In my case, I’d like to build and release a .NET project. After selecting this, the wizard asks if I want to configure the process for ASP.NET or ASP.NET Core.
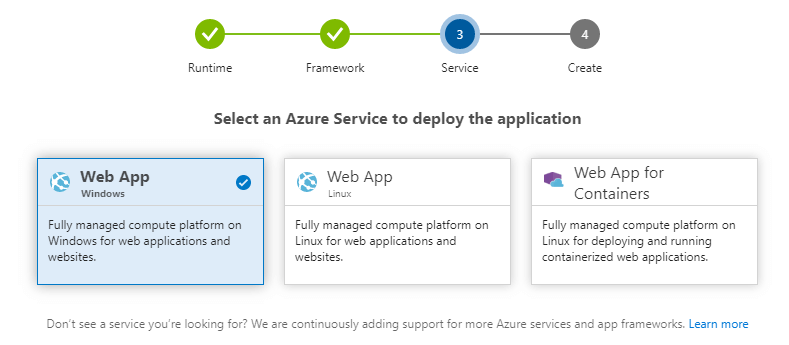
The next step is to tell Azure DevOps Projects where I want to deploy. I can choose from the usual suspects in Azure; Azure App Services Web Apps, Azure App Services Web Apps running on Linux, or Azure App Services Web Apps for Containers. This last one allows me to deploy a Docker container to an App Services Web App.
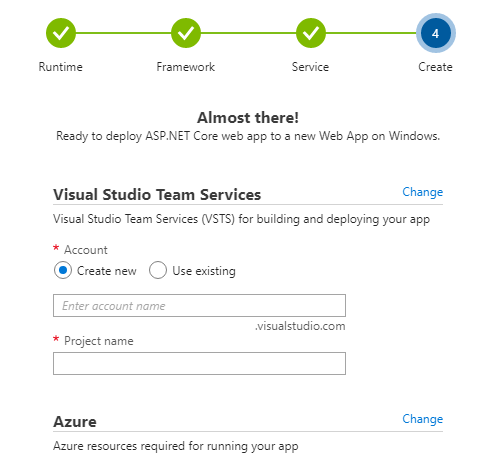
Next, It asks me to either create a new Visual Studio Team Services account, or link my existing one, and to choose the resources that I want to deploy in Azure (or create new ones).
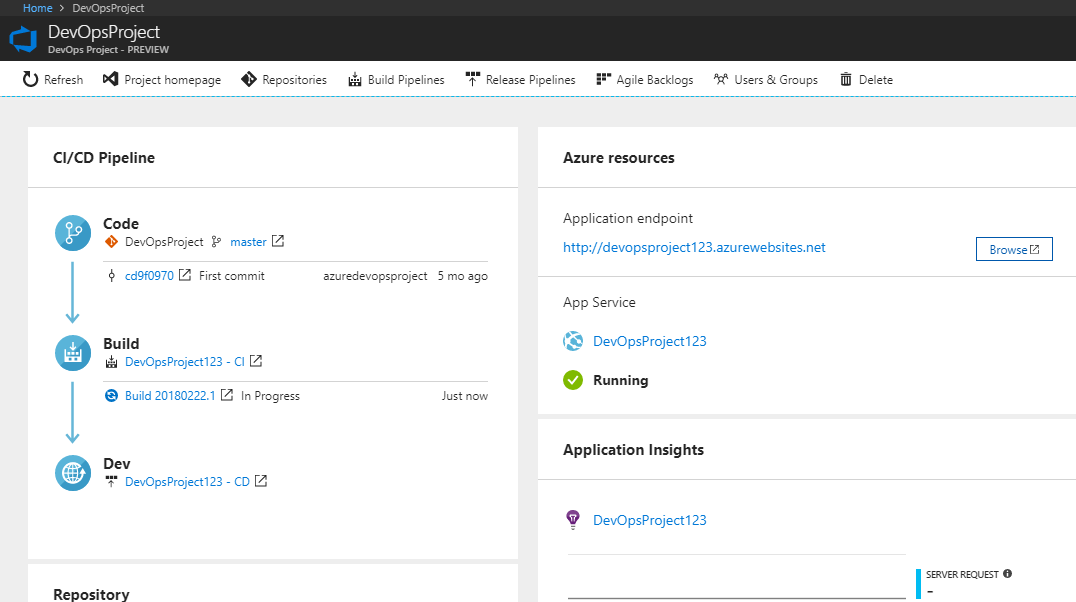
Once all of that is done, Azure DevOps Projects creates a new build and release definition within Visual Studio Team Services that works with the specified Web App and application.
The result looks like this:
Now that it is set up, you can customize the process further from Visual Studio Team Services.
Azure DevOps Projects is a great way to get started with your CI and CD pipelines and it is easy. It allows for further configuration afterwards, but if you don’t need that, you never have to leave the Azure Portal, which is great.
The most customizable and powerful way to create Continuous Integration and Continuous Deployment pipelines for Azure is with Visual Studio Team Services (VSTS).
VSTS is basically the online version of Team Foundation Server, and has grown into a very mature product that works very well with Azure.
You can use it to host and build your source code and deploy your application to Azure, on-premises, or other clouds. You can also use VSTS to track your work items and couple those to source code and deployments, and to do things like performance tests. And as we’ve seen, Azure DevOps uses VSTS under the covers to build and release your app.
Because it can do so much, it sounds daunting to start with, but it really isn’t. Once you have set up your account on Visual Studio, you can start to store your source code and create build and release pipelines. There are even templates to get you started.
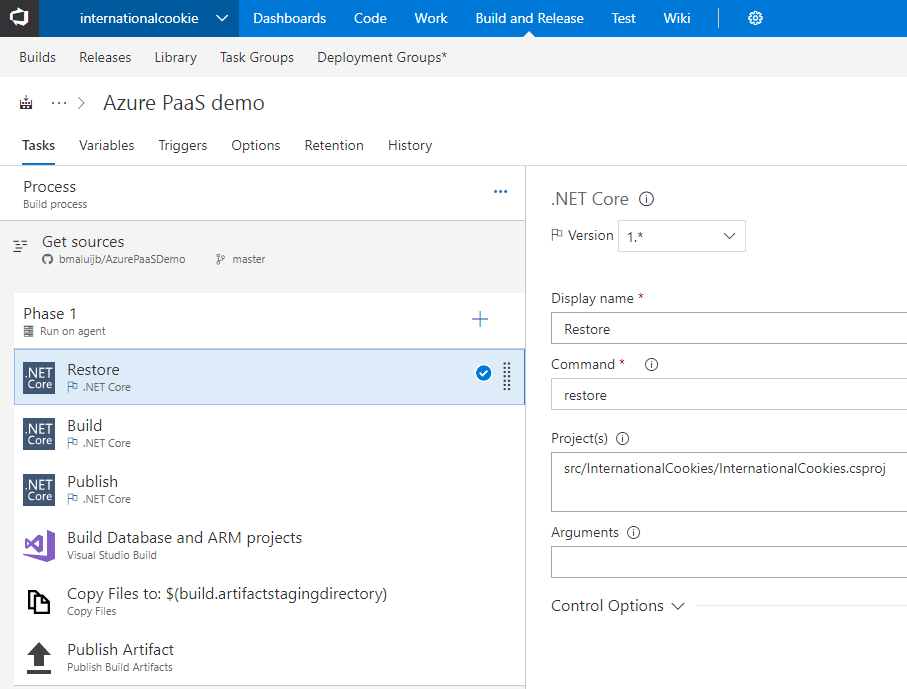
The image below shows a build pipeline for one of my projects in VSTS. This one even gets the source code from GitHub and builds it using VSTS. So your code doesn’t have to be stored in VSTS, but it can be anywhere.
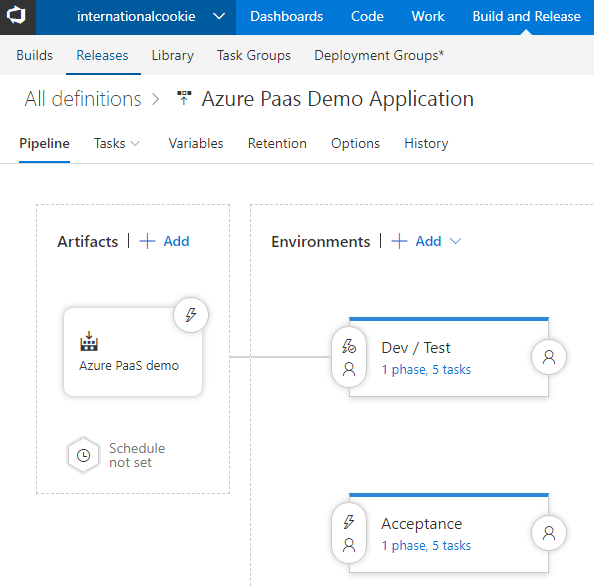
Besides building code, you can also easily set up release definitions. Within a definition, you can configure multiple environments to release, like Dev, Acceptance, and Production. And the nice part about that is that you can configure approvals to be required before release. So when your code is built and deployed to the Dev environment, your manager gets an email with a link that he can use to approve the release to the next environment. This way, it’s not your problem anymore and the right person is in control.
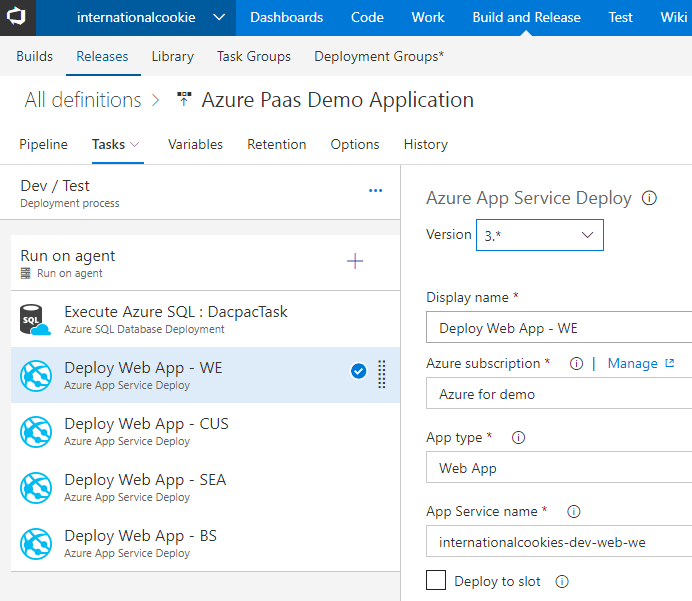
Each environment has a pipeline with tasks, like in the image below. You can make this as complicated as you want and there are tasks for deploying to specific targets, like Azure App Services. In the VSTS Marketplace, you can download more tasks for specific purposes, like for deploying to Amazon Lambdas.
Continuously building your code is extremely valuable, because it allows you to discover that everything works together (or not). And automatically releasing your application is vital, as it allows you to release fast and with minimal errors, because the process is always the same.
The Microsoft services and features that we’ve discussed in this article can help you to easily setup build and release pipelines. In fact, it is now so easy, that for most scenarios, you really have no excuse anymore to not have these processes in place.
But as always, there are many options to do kind of the same thing. So which one should you use when? The table below explains that:
| CD in App Services | Azure DevOps | VSTS | |
| Create build and release pipelines for App Services | X | X | X |
| Create build and release pipelines for Azure services | X | X | |
| Configure build and release pipelines | X |
As you can see in the table above, VSTS allows for the most configurability. Azure DevOps allows you to create pipelines for several types of Azure services, but you can’t do extensive configuration of the pipelines with it. And finally, Deployment Options in App Services is very useful, but only within the specific App Service and doesn’t allow for configuration.
With APM, server health metrics, and error log integration, improve your application performance with Stackify Retrace. Try your free two week trial today
Stackify's APM tools are used by thousands of .NET, Java, PHP, Node.js, Python, & Ruby developers all over the world.
Explore Retrace's product features to learn more.


