Regardless of what language and framework you use, proper logging is crucial to web development. Logging is key when it comes to debugging and performance monitoring. Knowing how to properly use logging frameworks is an essential part of creating high-quality software that is easy to debug.
In this article, we will discuss in-depth coverage on Laravel, which is the most popular PHP framework in 2021.
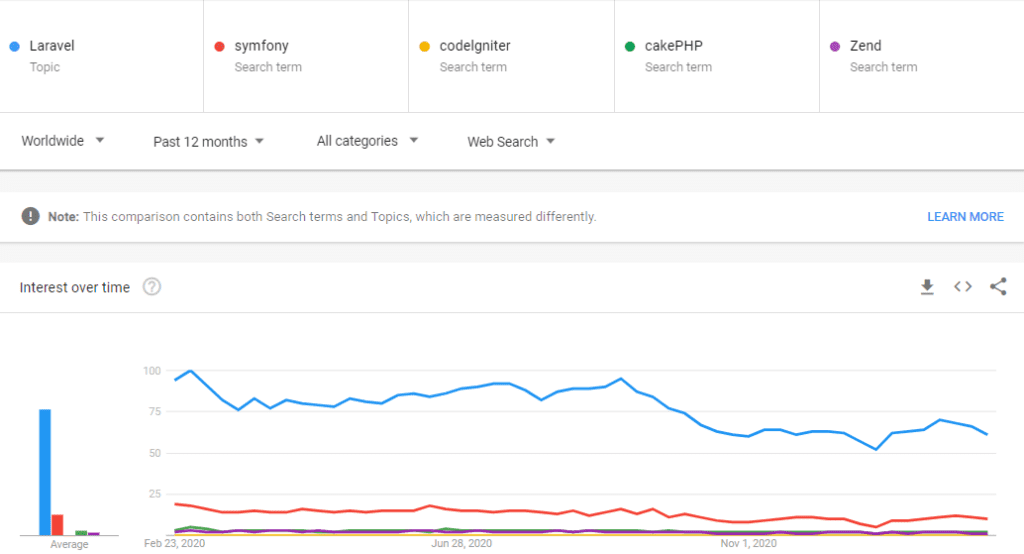
Fig 1: Google Trends comparing popular PHP frameworks
Specifically, we will cover the following with respect to Laravel 8.0:
The first four sections cover the basics of logging in Laravel. The final section takes all the knowledge you’ve learned from these sections and puts it to use by showing you how to send your log statements to an external service — Netreo Retrace.
Let’s get started!
Monolog is the highly popular PHP logging library that Laravel uses for all its logging needs. The wonderful thing about Monolog is that it provides a common interface for you to write logs to anything, from standard text files to third-party log management services.
For details about using Monolog on its own, you can check out this tutorial.
Monolog is highly flexible and can send logs to files, sockets, email addresses, databases and various web services. In a later section, we will show how Monolog provides handlers that easily help you to send logs to these various destinations. Laravel typically sets up Monolog via a logging configuration file, so now we’re going to show you how the logging configuration file works.
In Laravel, there are various configuration files found in the config folder, which holds your config files meant for database connections, email connections, caching, etc. You should expect your logging configuration also to be found here with the path in config/logging.php.
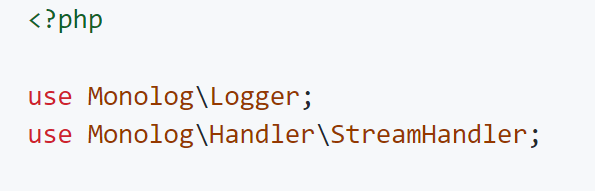
Fig 2: First five lines of config/logging.php
When you create a Laravel app, the first few lines are the imports it uses. By default, you should see the two handlers shown above being imported. As explained in the earlier section, these are two of the typical handlers that Monolog provides.
Laravel Monolog uses a concept called channels. The channels are the different places where you can send your logs. For the rest of the config/logging.php, the config file returns an associative array with two main keys — default and channels.
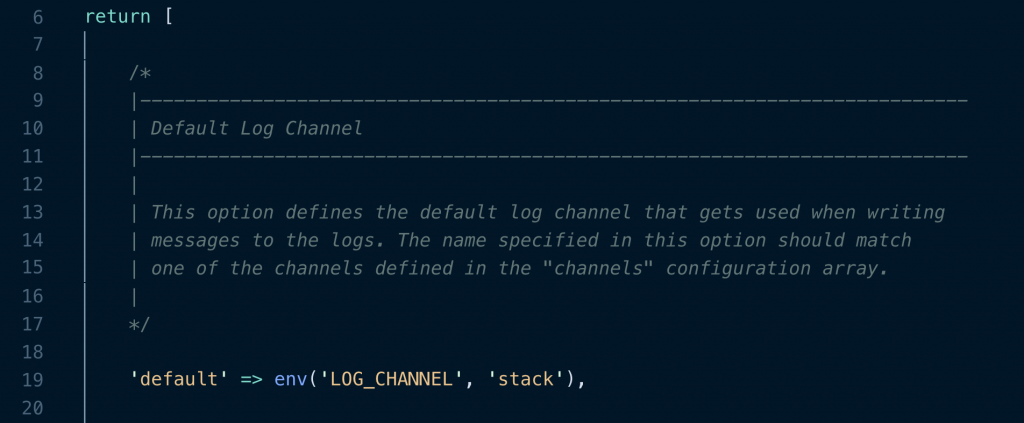
Fig 3: Default channel is usually stack
Default represents the default channel that any logging is sent to. It’s crucial that the channel you pick as default is represented in the array under the key channels. As you can see above, stack is the default channel.
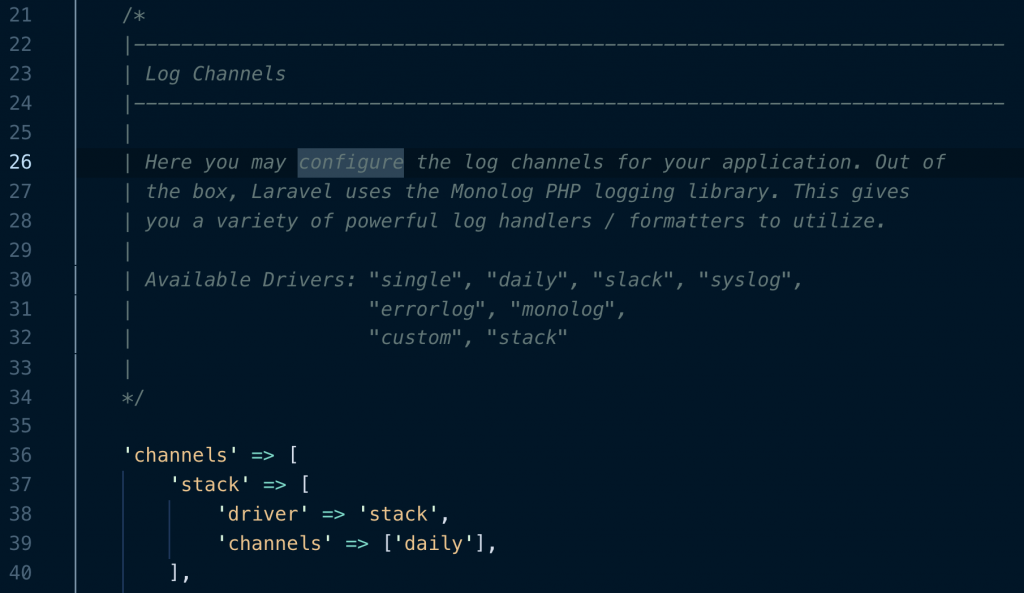
Fig 4: List of channels
Channels represent the full list of channels available for sending your logs, and stack is the first channel listed. For the rest of this article, whenever the channel list is mentioned, we are referring specifically the full list of channels.
In each channel stated under the channel list, you can see different keys being used. Knowing how each key affects logging will give you the maximum flexibility to configure the logging output you want.
The first type of key is drivers. Before Laravel 5.6, Laravel only had drivers supporting four file-based outputs:
With Laravel 5.6 and above, we have brand new drivers supporting a wider range of logging outputs. The old drivers are still available under the values “single,” “daily,” “errorlog” and “syslog.” Now we have new values for new kinds of logging outputs. Some commonly used new drivers include:
This simply means you can stack multiple logging channels together. When you use the “stack” driver, you need to set an array of values for other channels under the key “channels.” See Fig 4 for the example of a stack driver in use.
This lets you send logs to the popular social channel, Slack. When you use this driver, you need to configure the URL as well. Optional Slack-related variables include username and emoji. The Slack driver essentially allows you to output the log to a specific Slack channel. By default, when you use the Laravel command line to create a new project with 8.0, you will see an example of the Slack logging channel configuration (see Fig 5 below).
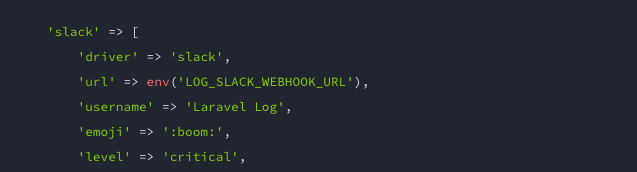
Fig 5: By default, Laravel 8.0 includes an example for a Slack channel
It’s a bit weird to see Monolog show up again, this time as its own driver. The point to remember is that when you want to use Monolog’s native handlers, then you want to use the Monolog driver. Thankfully, the default logging config file provides two examples of using two different Monolog handlers. Instead of going into too much detail on the various Monolog handler types, here’s a link to the full list of Monolog handlers so you can review at your own speed.
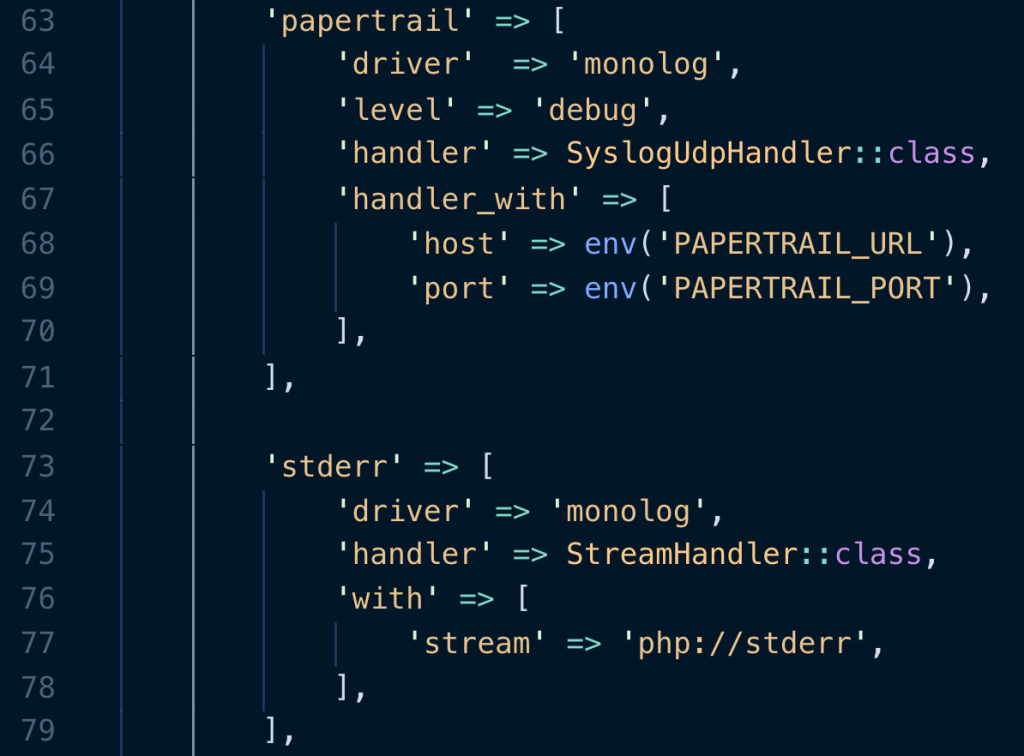
Fig 6: Default logging config file uses Monolog StreamHandler and SyslogHandler
There’s only a small write-up about this in the official Laravel documentation. Between the popular legacy drivers and the various Monolog handlers, it’s pretty hard to imagine someone writing up their own custom channel driver. Nevertheless, if that’s something you want to do, you can. Usually, a custom channel is writing logs to third-party services, like Apache Kafka and Logstash.
First, your custom channel needs to choose a custom driver and then add a via option to point to a logger factory class.
'channels' => [
    'custom' => [
        'driver' => 'custom',
        'via' => AppLoggingCustomLoggerFactory::class,
    ],
],
After you set up the custom channel, you’re ready to define the factory class. Bear in mind that you must return a Monolog Logger instance via the __invoke method.
<?php
namespace AppLogging;
use MonologLogger;

class CustomLoggerFactory
{
    /**
    * This class will create a custom Monolog instance.
    *
    * @param array $config
    * @return MonologLogger
    */
    public function __invoke(array $config)
    {
        return new Logger(...);
    }
}
Try to use the custom driver as a last resort. If you search around a bit, usually you’ll find a standardized way to use existing drivers or handlers for your special logging needs. Even if you have to write your own custom logger driver, try to see if somebody has already written an open source version or an example of the Logger factory class you need. In other words: don’t reinvent the wheel if you can help it!
Here’s a useful summary table of the various common drivers available and what they mean.
| Driver | Description |
| stack | For creating “multi-channel” channels. |
| single | For single-file or path-based logger channels. Uses Monolog’s StreamHandler. |
| daily | For daily logs. Uses Monolog’s RotatingFileHandler. |
| slack | For sending to Slack channels. Uses Monolog’s SlackWebhookHandler. |
| syslog | For sending to the system log. Uses Monolog’s SyslogHandler. |
| errorlog | For sending to the web server’s error log. Uses Monolog’s ErrorLogHandler. |
| monolog | For using any other of Monolog’s supported handlers. |
| custom | A driver calling a specified factory to create a channel for a third-party service. |
The next important thing you need to learn after channels and drivers is the concept of handlers. There is a complete list of handlers for Monolog to send logs to. You can even employ special handlers so you can build more advanced logging strategies. Here’s a list of Monolog handlers grouped into the following types:
Also, note that there’s a special option called handler_with that allows you to assign values to the individual handler’s constructor method.
For example, when you look at the SysLogHandler class and its constructor, you will notice this:
public function __construct(string $ident, $facility = LOG_USER, $level = Logger::DEBUG, bool $bubble = true, int $logopts = LOG_PID)At the individual channel configuration, you can assign the values for the parameters of the constructor this way.
'syslog_channel_name' => [
    'driver' => 'monolog',
    'handler' => MonologHandlerSyslogHandler::class,
    'handler_with' => [
        'ident' => 'some value you want to assign to the ident parameter',
    ],
],If you’ve made it this far, congratulations! You have now gone deep into the details of the configuration file for Laravel logging. Most developers have only a cursory understanding of this and didn’t let that stop them from writing log messages. Therefore, you are now more equipped than most developers at configuring Laravel logging for your team.
One key configuration detail is levels. This is partly because the previous section was already long enough, but mainly because it makes more sense to cover levels here.
At the specific file that you want to write log messages, ensure that you import the Log facade before writing out your log message, like this:
use IlluminateSupportFacadesLog;

//.. and then somewhere in your php file
Log::emergency($message);
Log::alert($message);
Log::critical($message);
Log::error($message);
Log::warning($message);
Log::notice($message);
Log::info($message);
Log::debug($message);
Typically developers want to have different levels of severity when it comes to log messages. The different log levels stated here correspond to the RFC-5424 specification. So the levels and their names are not decided willy-nilly and have an order of priority with the highest being emergency and the lowest being debug. At the channels list, you can specify the minimum level the individual channel will log any messages.
The level’s not the only factor that determines if Laravel will eventually write a specific message to the channel. The channel as a destination is another factor as well. Bear in mind when you use the Log facade to write log messages, Laravel will send these to the default channel stated in your config/logging.php.
If you leave the logging config file unchanged, and assuming you didn’t set the LOG_CHANNEL environment variable to a different value, your default channel will be the stack “multi-channel,” which in turn consists of just the “daily” channel.
This begs the question: what if you want to send a specific message to a channel other than the default channel? You can deliberately choose an alternative channel on the fly this way:
Log::channel('suspicious')->warning($suspiciousActivity);Remember to make sure that the alternative channel you choose exists in the channel list within the logging config file. Otherwise, you’ll encounter errors. In the example above, this means you need to declare a channel explicitly in the channel list called suspicious.
And if you want to send the same logging message to multiple channels, you can also perform “stacking.”
Log::stack(['suspicious', 'slack'])->info("I have a bad feeling about this!");Sometimes you want to send contextual information, such as the specific file name, the line in the file, or even the current logged-in user.
You can write your individual log messages this way to add contextual information:
Log::info('User login failed.', ['id' => $user->id, 'file' => __FILE__, 'line' => __LINE__]);This command will pass in an array of contextual data to the log methods. Laravel will then format the contextual data and display it along with the log message.
his section on formatting could be placed alongside the drivers and handlers section under “Explaining the logging config file.” Here, we let “Formatting log messages” be its own standalone section, coming after everything else, because it tends to be less crucial.
The main reason formatting is often less crucial is that you can get away with the default formatter that Monolog driver uses—the Monolog LineFormatter. That’s usually more than good enough. However, there may be times when you wish to customize the formatter passed to the handler. This is a full list of formatters that Monolog natively provides. Noticeably, Monolog arranges this list by highest frequency of usage, so it’s a good list to reference should you want to select alternatives.
When you want to customize the formatter, you need to set the formatter option under the specific channel configuration. You will also notice the formatter_with option, which works in a similar way as the handler_with option explained in the “Handlers” section. The handler_with option is a way to send values to the formatter class constructor method. Here’s an example where we use the next most popular formatter, the HtmlFormatter:
'browser_console' => [
    'driver' => 'monolog',
    'handler' => MonologHandlerBrowserConsoleHandler::class,
    'formatter' => MonologFormatterHtmlFormatter::class,
    'formatter_with' => [
        'dateFormat' => 'Y-m-d',
    ],
],
>
Sometimes a particular Monolog handler comes with its own formatter. In that case, you can simply instruct the formatter to use that handler’s default formatter.
If you are using a Monolog handler that is capable of providing its own formatter, you may set the value of the formatter configuration option to default:
'newrelic' => [
    'driver' => 'monolog',
    'handler' => MonologHandlerNewRelicHandler::class,
    'formatter' => 'default',
],Here comes the grand finale, where you can put everything you learned in the previous sections to use in a single exercise. In this section, we attempt to send Laravel logging messages to Netreo Retrace. Retrace allows you to glean insights from your logs by giving you a single place to perform code profiling, performance monitoring and centralized logging.
As you learned in the section “Explaining the logging config file,” the first step for sending your application log messages to Retrace is to have a specific log channel for Retrace added to the stack multi-channel.
Install the latest version with composer require stackify/monolog “~2.X”.
Or you can add a dependency to your composer.json file:
"stackify/monolog": "~2.X",The key variables are the API key, the application name, and the environment name. Make sure they are set in the .env file of your Laravel app. You should have different values for each different .env file depending on which environment you wish to send logs from.
We recommend altering the config file in 5 different places which we have broken up into comments using the notation Step 3.1, Step 3.2, etc.
// after the typical imports in the config file
// Step 3.1 import the following and make sure you add
use StackifyLogTransportExecTransport;
use StackifyLogMonologHandler as StackifyHandler;

// Step 3.2: assign your Retrace various variables as environment variable then call here
$retrace_api_key = env('RETRACE_API_KEY', 'api_key');

// Step 3.3: create the transport instance here. You need this in Step 3.5
$transport_for_retrace = new ExecTransport($retrace_api_key);

return [
    // for brevity I removed the comments
    'default' => env('LOG_CHANNEL', 'stack'),
    'channels' => [
        'stack' => [
            'driver' => 'stack',
            // Step 3.4 add retrace channel to stack
            'channels' => ['daily', 'retrace'],
        ],
        // Step 3.5 setting up the retrace channel
        'retrace' => [
            'driver' => 'monolog',
            'level' => 'debug',
            'handler' => StackifyHandler::class,
            // for clarity on the exact configuration look at the constructor method at
            // https://github.com/stackify/stackify-log-monolog/blob/master/src/Stackify/Log/Monolog/Handler.php#L20
            'handler_with' => [
                'appName' => env('RETRACE_APP_NAME', 'app_name'),
                'environmentName' => env('RETRACE_ENV_NAME', 'env_name'),
                'transport' => $transport_for_retrace, // set in Step 3.3
            ]
        ],
        // the rest of the channel list such as daily, syslog, etc are below
Steps 3.1 to 3.4 are pretty self-explanatory from the code above. The most complex will be step 3.5, where we create a brand new retrace channel. Because Retrace has a Monolog-compatible handler, we recommended using the Monolog driver and using the Retrace Monolog handler class under the handler option. Also, the possible keys chosen for the handler_with option follow the same parameter names given to the handler’s constructor method.
Whew! That was a pretty comprehensive look at Laravel logging. To recap, we have gone over what Monolog is and why Laravel uses it for its logging needs. We also explored the intricacies of some of Monolog’s concepts, including channels, drivers, and handlers. Plus, we extensively covered writing and formatting log messages. We illustrated examples of how to write to the default channel or alternative channels on the fly, and finally, brought all these concepts together to teach you how to write a channel for sending your logs to Retrace.
Are you interested in using Retrace for Laravel logging? Grab the FREE 14-DAY TRIAL with Stackify Retrace today!
Stackify's APM tools are used by thousands of .NET, Java, PHP, Node.js, Python, & Ruby developers all over the world.
Explore Retrace's product features to learn more.