
Today’s post is a detailed guide on how to send custom metrics to AWS CloudWatch monitoring using AWS Lambda. Starting from scratch, we’re going to finish up this post by leaving a serverless project running on Amazon Web Services (AWS). And do you want to hear the best part? Getting started will cost you less than you might spend on a cheeseburger.
I’ve used AWS Lambda to send custom metrics to CloudWatch to collect data on business metrics like purchases made in the application. At one company where I used to work, there were times where users were starting to experience problems, and system metrics like CPU or memory were in the normal trend. By sending those metrics to AWS CloudWatch, I was able to act proactively with the infrastructure, either by restarting the app or by scaling out the infrastructure.
Keep in mind that, in order to follow the tutorial, you’re going to need to be logged to your Amazon AWS account.
Let’s get started!
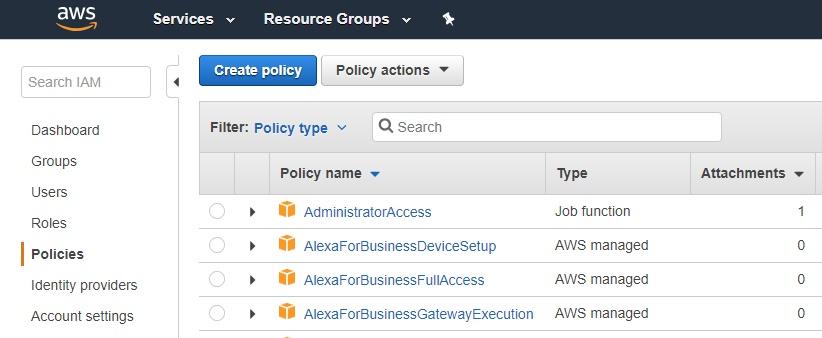
The first thing we need to do is to create an IAM policy in AWS Identity & Access Management with the fewest privileges.
Go to the IAM Policies page and click on the blue “Create policy” button:
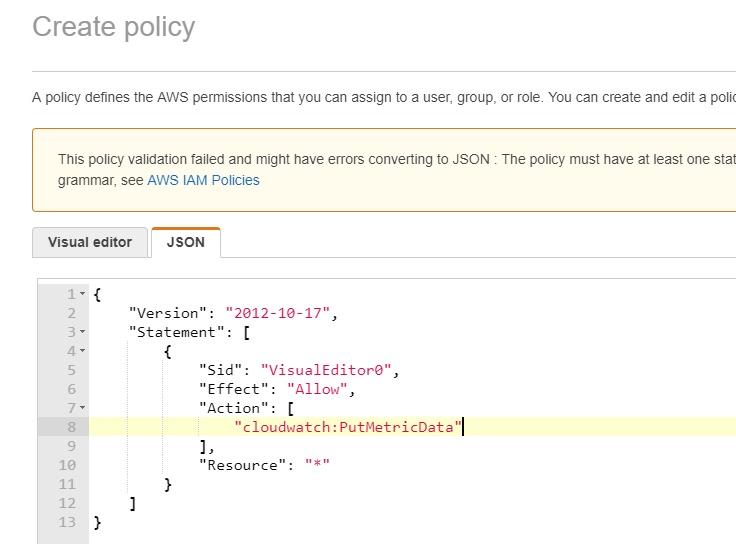
The user we’re going to create will only need to have permissions to put metric data into CloudWatch. Copy the following JSON definition for the policy:
{
    "Version": "2012-10-17",
    "Statement": [
        {
            "Sid": "VisualEditor0",
            "Effect": "Allow",
            "Action": [
                "cloudwatch:PutMetricData"
            ],
            "Resource": "*"
        }
    ]
}
Click on the “JSON” tab and paste the policy you just copied:
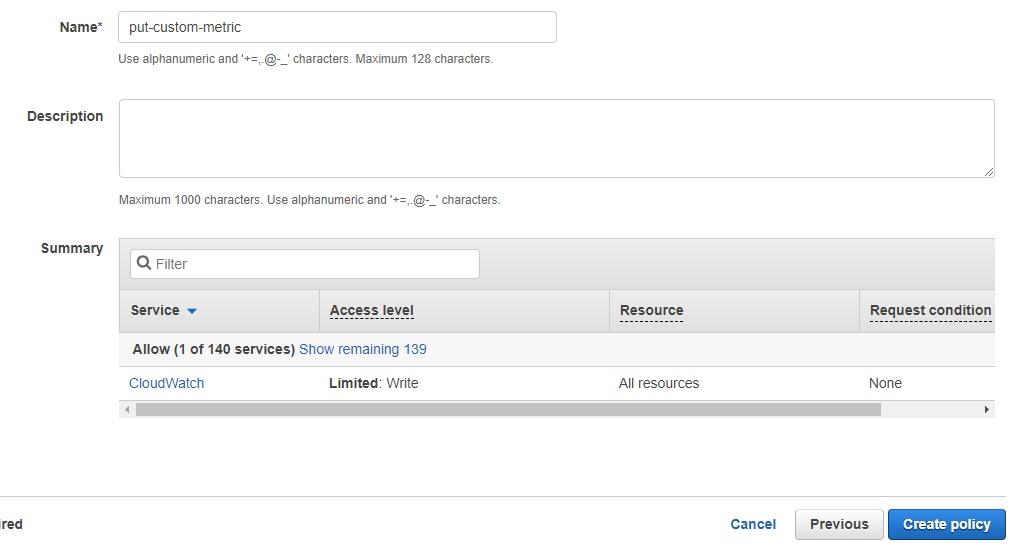
Click on the blue “Review policy” button. Name the policy (I typed “put-custom-metric”) and then click on the blue “Create policy” button:
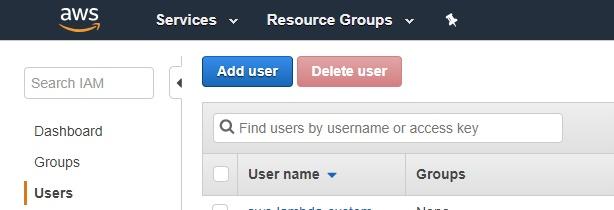
Great! The policy has been created. Now we’re going to create a user that we’ll attach this policy to.
Go to the IAM Users page and click on the blue “Add user” button:
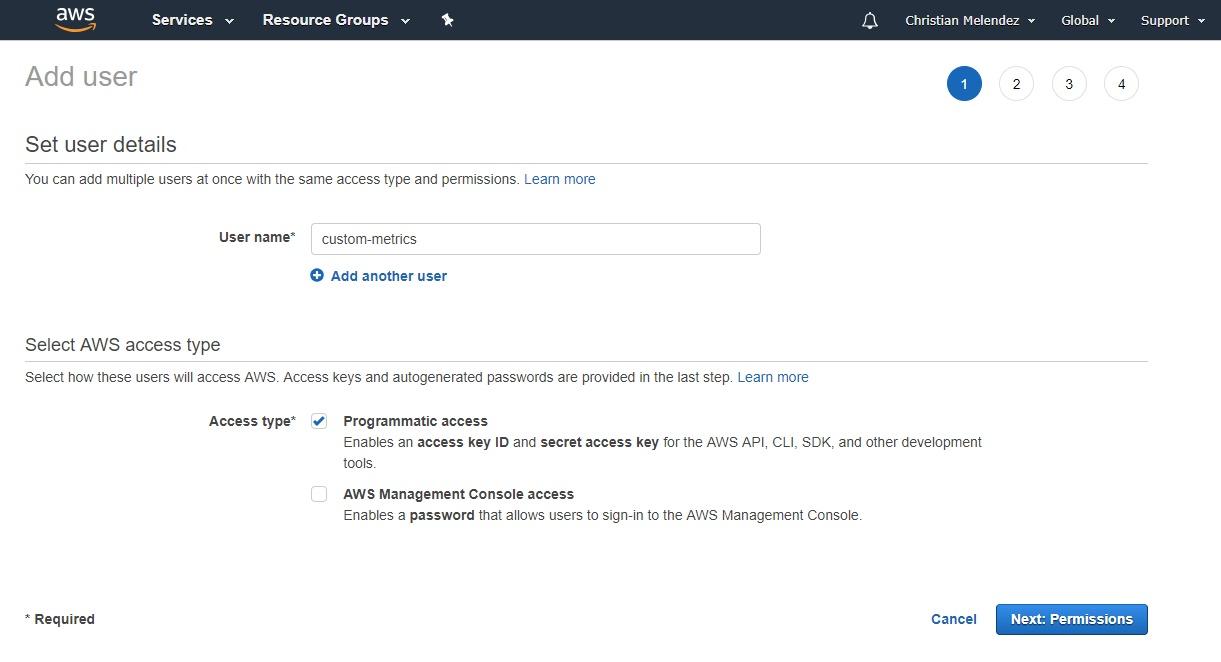
Create a username (I typed “custom-metrics”) and make sure you select the “Programmatic access” checkbox. Click on the blue “Next: Permissions” button:
Now it’s time to attach the IAM policy we created earlier to this user.
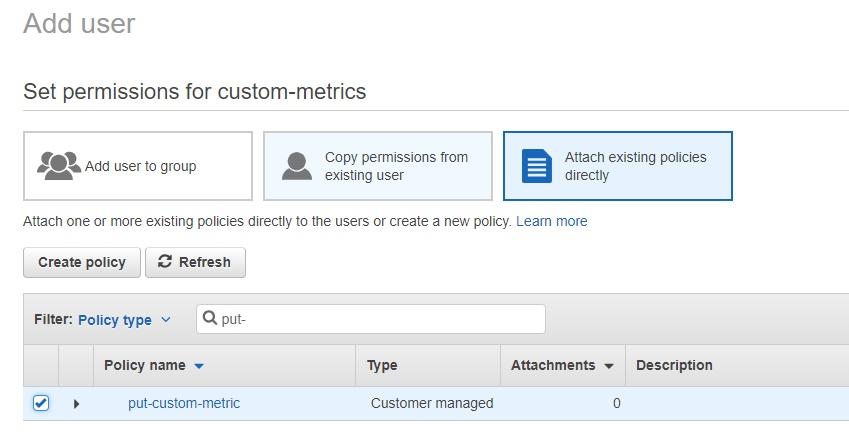
Start typing the name of the policy and it will appear in the list below. I only had to type “put-” before my “put-custom-metric” policy appeared. Check the policy, scroll down a little bit, and click on the blue “Next: Review” button:
Click on the blue “Create user” button to finish creating the user. Remember, we set this up so the user only has permissions to send custom metrics data to CloudWatch. You should now be able to retrieve an access key ID and a secret access key (credentials) that you can use on your local computer to interact with AWS.
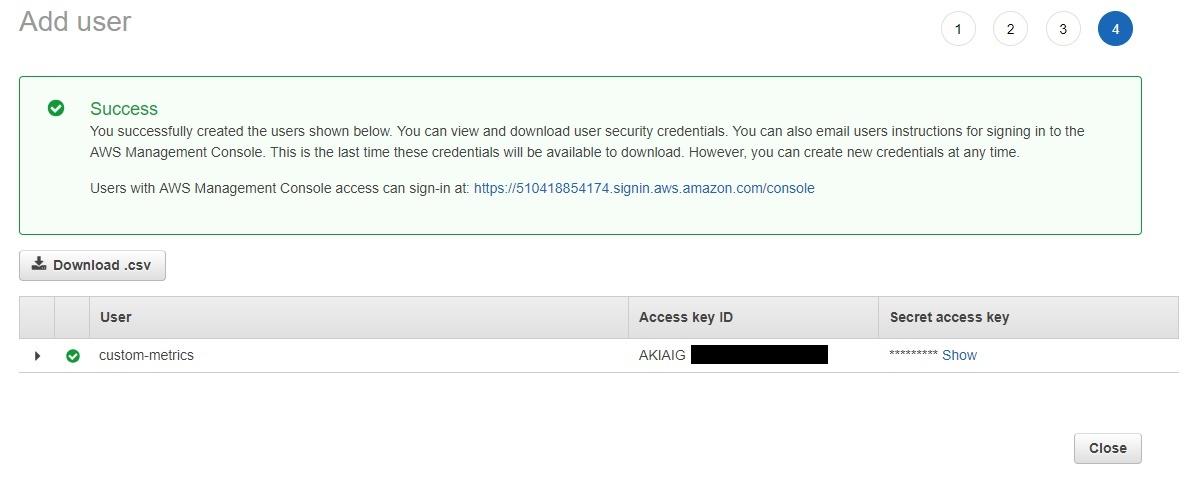
Copy or download the credentials. If you just want to copy the values, you’ll need to click on the “Show” link (see above).
We’ll create the Lambda function using Python 2.7, so let’s start by installing the Bot Builder SDK for .NET to test locally before going to AWS. If you don’t have Python installed, you can install it here. You also need to have PIP installed on your local machine. It doesn’t matter which OS you use; we’ll create a simple app using the AWS SDK.
The AWS SDK for Python is called Boto 3. You can install it simply by running this command on the terminal:
pip install boto3
In order to avoid having to put the AWS credentials in the code and risk them persisting in version control, we need to configure the AWS credentials in the local files that the AWS SDK will use to interact with the AWS API.
Go to the ~/.aws/credentials file (if it doesn’t exist, create it) and replace the content there with the following:
[default]
aws_access_key_id = YOUR_ACCESS_KEY_ID
aws_secret_access_key = YOUR_SECRET_ACCESS_KEY
YOUR_ACCESS_KEY_ID is the access key from the user you just created, and YOUR_SECRET_ACCESS_KEY is the secret access key from that user. So replace those fields with your own access keys values.
Next, configure the AWS region where you want to store the custom metrics. Go to the ~/.aws/config file (if it doesn’t exist, create it) and replace the content there with the following:
[default]
region=us-east-1
The value you put in this file is the AWS region code. The value I used in this example will persist metrics in North Virginia. You can get the full list of codes from the official docs.
Now that we have everything we need to test locally, let’s start coding.
Create a new Python file (.py extension) and start by adding the Boto 3 import:
import boto3
We need to create a CloudWatch client to send metric data using the Boto 3 SDK. It’s as simple as creating a Boto 3 client and typing the name of the service we’d like it to interact with:
cloudwatch = boto3.client('cloudwatch')
What I like about creating a client in Boto 3 as opposed to other approaches is that it’s a 1:1 relation with the AWS CLI. In this case, we’ll send metric data to CloudWatch.
How do you do that? Well, according to the official docs, there’s a command called “put-metric-data”. There’s also a function called “put_metric_data” in the Boto 3 official docs. The only difference is that in Python you use an underscore (_) instead of a hyphen (-).
Now that we’ve set up all the dependencies we’ll need, it’s time to add the code to send custom metrics.
Try Stackify’s free code profiler, Prefix, to write better code on your workstation. Prefix works with .NET, Java, PHP, Node.js, Ruby, and Python.
Add the following line below the “cloudwatch” client you just created. This line will send a custom metric for the number of purchases that have been made in the application:
response = cloudwatch.put_metric_data(
    MetricData = [
        {
            'MetricName': 'KPIs',
            'Dimensions': [
                {
                    'Name': 'PURCHASES_SERVICE',
                    'Value': 'CoolService'
                },
                {
                    'Name': 'APP_VERSION',
                    'Value': '1.0'
                },
            ],
            'Unit': 'None',
            'Value': random.randint(1, 500)
        },
    ],
    Namespace='CoolApp'
)
You can find a good explanation for each of those parameters in the Boto 3 official docs, but the name makes most of their functions pretty clear. Or you can always read the AWS official docs to get an even better understanding.
What’s interesting about the above code is that I put two dimensions (copied below) for the metric:
'Dimensions': [
    {
        'Name': 'PURCHASES_SERVICE',
        'Value': 'CoolService'
    },
    {
        'Name': 'APP_VERSION',
        'Value': '1.0'
    },
],
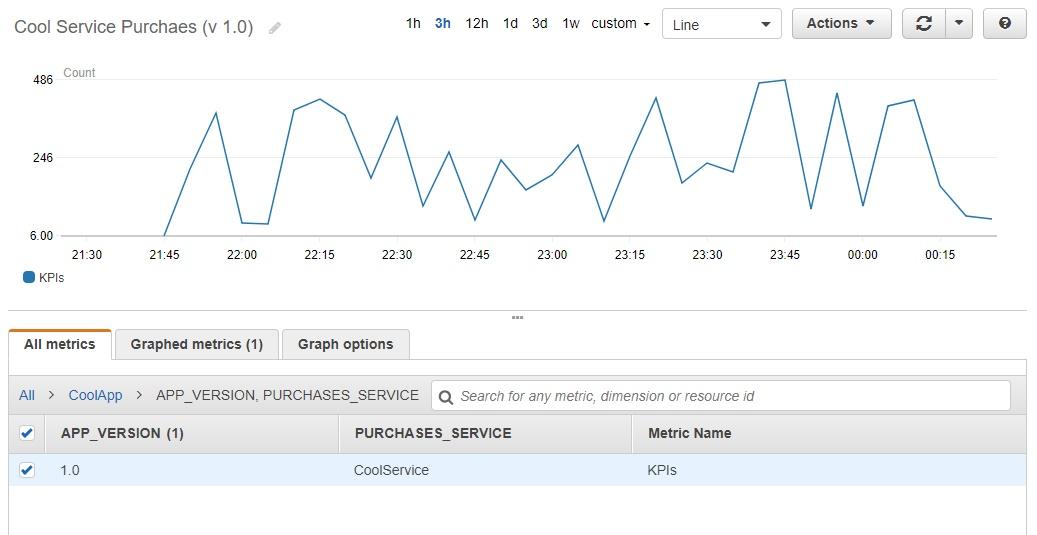
According to the AWS docs, a dimension is “a name/value pair that uniquely identifies a metric.” So first, we’re identifying the metric data by saying that the value is for the “CoolService” purchase app, then we’re specifying that it’s for version 1.0 of the app. Later, when we check that data is in AWS, you’ll get a better idea of how helpful this will be.
I’m also including a random number generator so that we can get different data when the lambda runs.
'Value': random.randint(1, 500)
For this to work, you need to include the random import line at the beginning of the script:
import random
In a real-world application, you would replace that random number with a number that you got, for example, after querying the database.
Lastly, add a print instruction to make sure that the metric data was persisted successfully. It will also be useful when there are errors because you’ll be able to see what’s happening. When this code is deployed into AWS Lambda, the message we just printed will go to the CloudWatch logs.
So, putting everything together, the code should look like this:
import boto3
import random
cloudwatch = boto3.client('cloudwatch')
response = cloudwatch.put_metric_data(
MetricData = [
    {
        'MetricName': 'KPIs',
        'Dimensions': [
            {
                'Name': 'PURCHASES_SERVICE',
                'Value': 'CoolService'
            },
            {
                'Name': 'APP_VERSION',
                'Value': '1.0'
            },
        ],
        'Unit': 'None',
        'Value': random.randint(1, 500)
    },
],
Namespace = 'CoolApp'
)
print response
Run the script. If everything went well, you should see something like this printed in the terminal:
$ python kpis.py
$ {'ResponseMetadata': {'RetryAttempts': 0, 'HTTPStatusCode': 200, 'RequestId': 'f3332a04-62d6-11e8-be03-81a0e74b2ca8', 'HTTPHeaders': {'x-amzn-requestid': 'f3332a04-62d6-11e8-be03-81a0e74b2ca8', 'date': 'Tue, 29 May 2018 00:26:36 GMT', 'content-length': '212', 'content-type': 'text/xml'}}}
Great! This code is almost ready to be deployed to AWS Lambda.
When you deploy code to AWS Lambda, one of the prerequisites is that you need to indicate what the code’s handler is. All that means is that Lambda needs the code’s starting point. For Python scripts, AWS Lambda needs the name of the file and the name of the function where the code workflow starts.
So let’s wrap the current code into a handler (or def in Python terms). Add this line right after the imports section:
def lambda_handler(event, context):
Tab the code below so that it becomes part of the function.
Now the code should look like this:
import boto3
import random
def lambda_handler(event, context):
    cloudwatch = boto3.client('cloudwatch')
    response = cloudwatch.put_metric_data(
        MetricData = [
            {
                'MetricName': 'KPIs',
                'Dimensions': [
                    {
                        'Name': 'PURCHASES_SERVICE',
                        'Value': 'CoolService'
                    },
                    {
                        'Name': 'APP_VERSION',
                        'Value': '1.0'
                    },
                ],
                'Unit': 'None',
                'Value': random.randint(1, 500)
            },
        ],
        Namespace = 'CoolApp'
    )
print response
This is the code that we’ll deploy to AWS Lambda.
Go back to the AWS Console to create an IAM role. The AWS Lambda function will use this to send metrics data to CloudWatch. To test our code locally, we created an IAM user and then configured our machine to use the credentials of the user. But that’s not a good security practice, which is why we need an IAM role.
When you work with roles, the credentials expire automatically after a short period of time. The SDK will make sure to request new credentials when it’s needed. That way you don’t need to worry about generating new credentials all the time.
We’ll use the same IAM policy that we assigned the user we created to test locally. But we also need to create a new IAM policy so that our AWS Lambda function can put logs into CloudWatch logs.
Let’s create a new policy the same way we just did before. Go to the policies page and click on the blue “Create policy” button. Click on the “JSON” tab and paste the following JSON definition:
{
    "Version": "2012-10-17",
    "Statement": [
        {
            "Sid": "VisualEditor0",
            "Effect": "Allow",
            "Action": [
                "logs:CreateLogGroup",
                "logs:CreateLogStream",
                "logs:PutLogEvents"
            ],
            "Resource": "*"
        }
    ]
}
Click on the blue “Review policy” button. Name this policy (I typed “cloudwatchlogs-write”) and then click on the blue “Create policy” button.
______________________________________________________________________________________________________________________________
NOTE: If you decide to interact with a private resource in AWS by using the VPC, you need to add the following permissions to the above policy (or create a new one) so that the AWS Lambda function can connect to the internal resources.
"ec2:CreateNetworkInterface",
"ec2:DescribeNetworkInterfaces",
"ec2:DeleteNetworkInterface"
______________________________________________________________________________________________________________________________
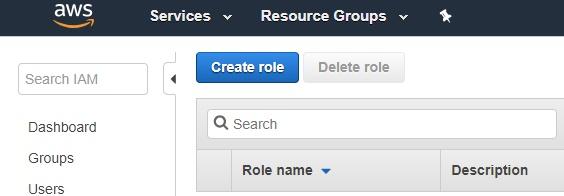
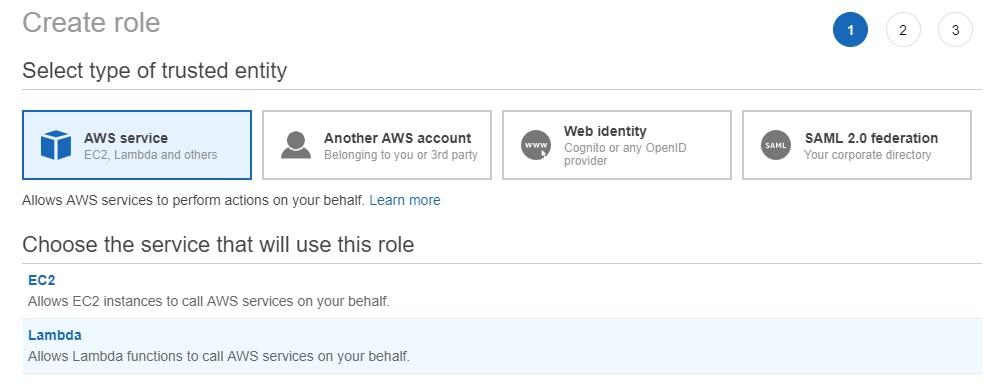
Go to the IAM role page and click on the blue “Create role” button:
Make sure the “AWS Service” is selected and click on the “Lambda” link:
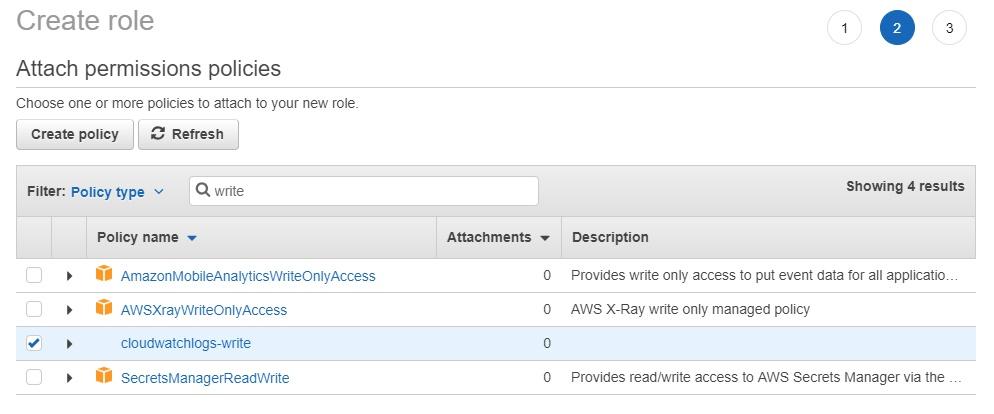
Click on the blue “Next: Permissions” button to attach the policies we just created. Type the names of the policies and then select the ones called “cloudwatchlogs-write” and “put-custom-metric”… If you chose different names, type those names here and select the policies.
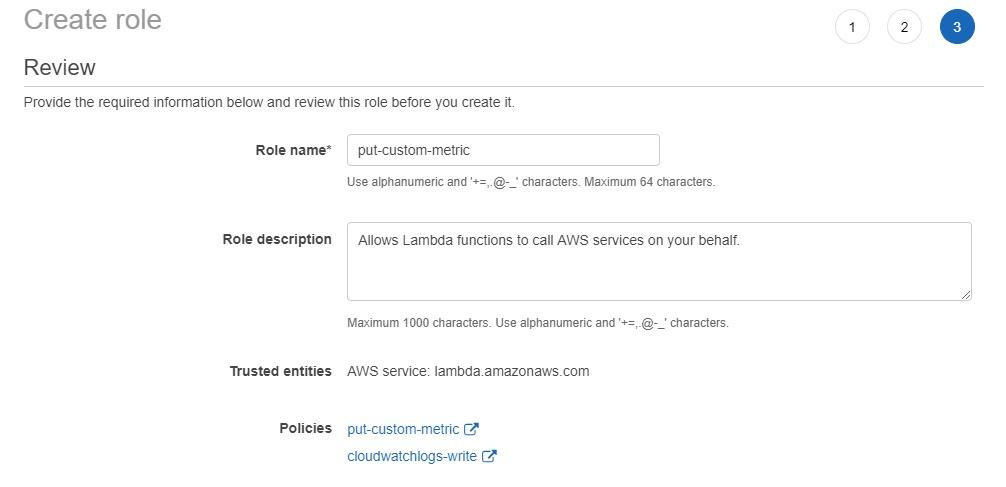
Click on the blue “Next: Review” button. Now name the role (I typed “put-custom-metric”) and at the bottom, you’ll see the policies that we just selected. Click on the blue “Create role” button.
Now it’s time to create the AWS Lambda function. Go to the Lambda page and click on the orange “Create function” button:
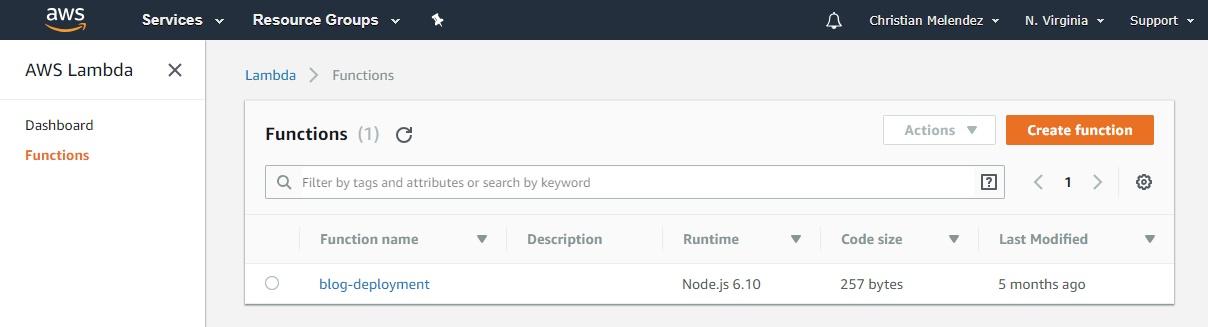
If you don’t have any function there, go to the Lambda home page and click on the orange “Create a function” button. You’ll see the following screen:
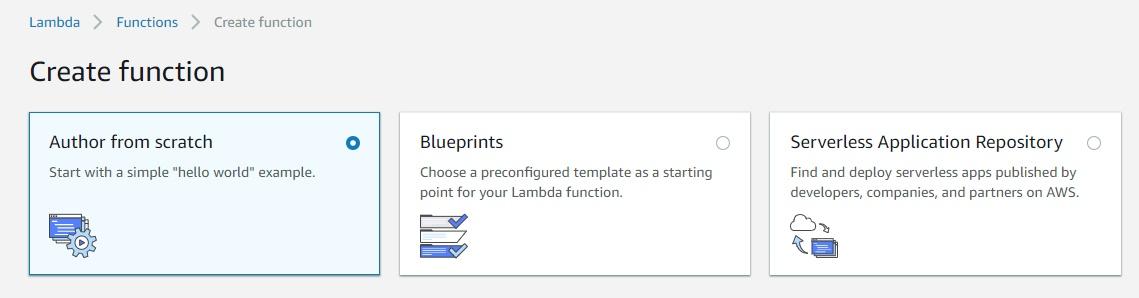
Select the “Author from scratch” option—we’ll upload the code we just created.
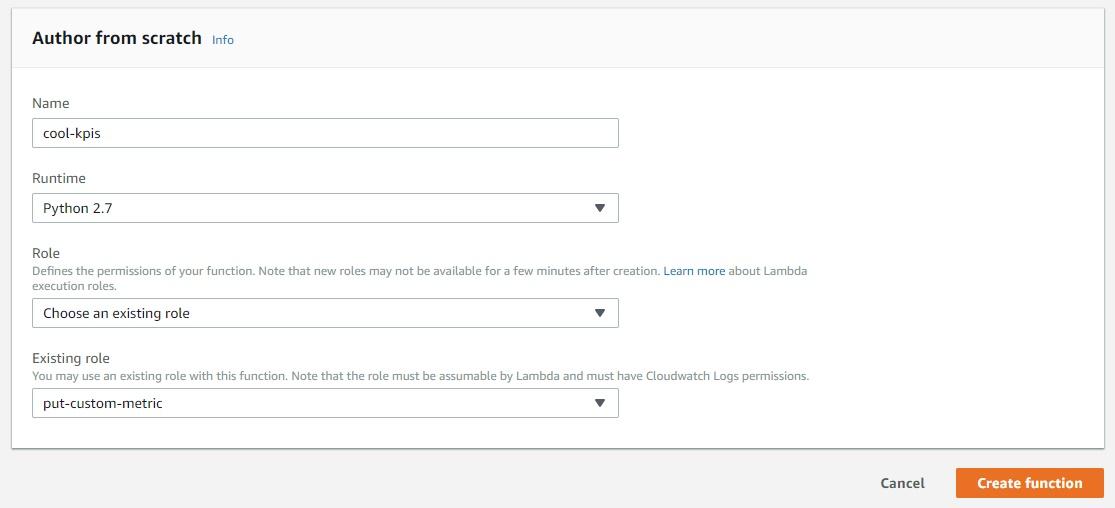
Scroll down a little bit and fill in the details for the function. Name the function (I typed “cool-kpis”) and choose “Python 2.7” for the runtime. Then select the “Choose an existing role” option for the role. You’ll now be able to choose the IAM role we created earlier. Select it.
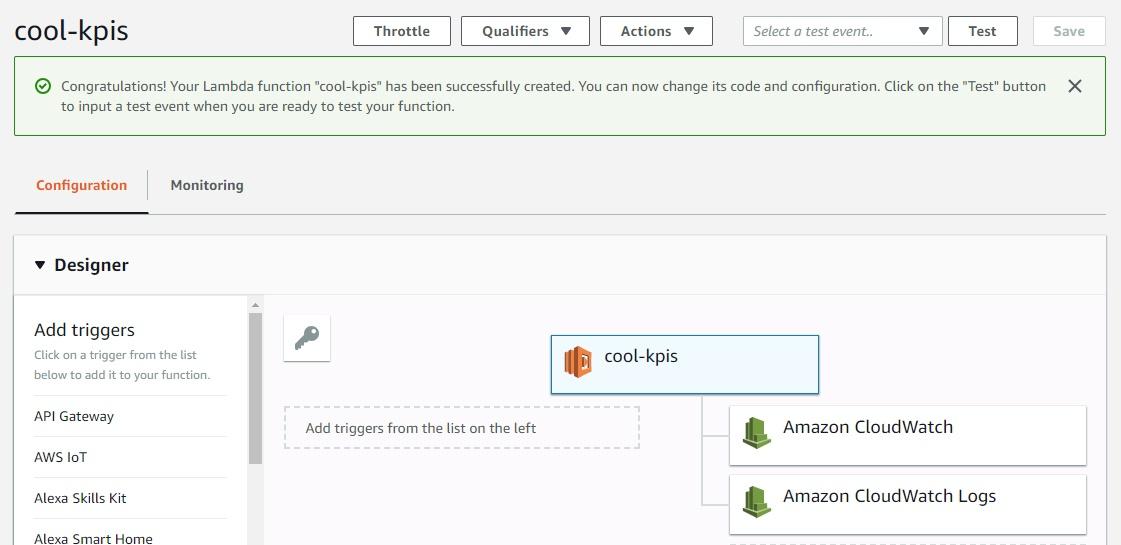
Click on the orange “Create function” button to finish. In the next screen, you’ll be able to see which permissions the lambda function has. In this case, it has permissions to CloudWatch and CloudWatch logs.
We’re going to deploy the code manually now, which I’ll admit is a bit archaic. But before I automate things, I like to do things manually so I have a chance to understand what I’m doing when automating. So let’s keep it simple and copy the code from the Wrap the code into a handler section that we created earlier in this guide.
Scroll down a little bit and replace the code that’s there with the new one:
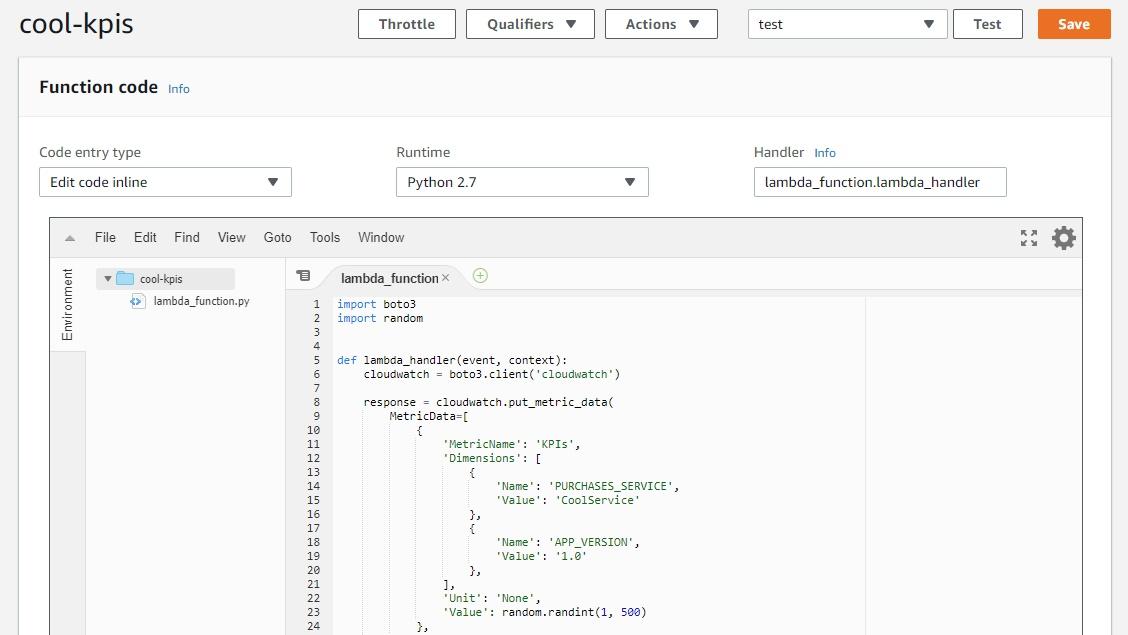
Click on the orange “Save” button in the upper-righthand corner.
Great! The lambda function is already created and it has the code we just tested locally. So how can we make sure that the function is working? Let’s configure a test event.
Scroll up a little bit and click on the “Test” button:

This time we’re not configuring a trigger for our lambda function, so it really doesn’t matter what the test event has. So leave everything as default, type a name for the event, scroll down a little bit, and click on the orange “Create” button.
Click on the “Test” button again to test the lambda function:
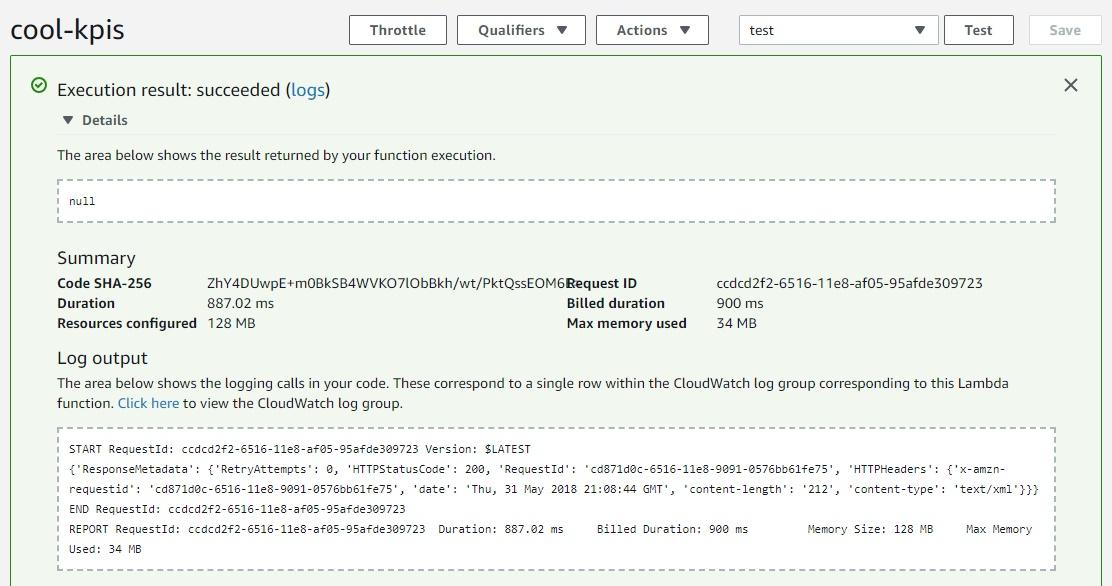
Now we wait—it will take some time to see the metrics in AWS.
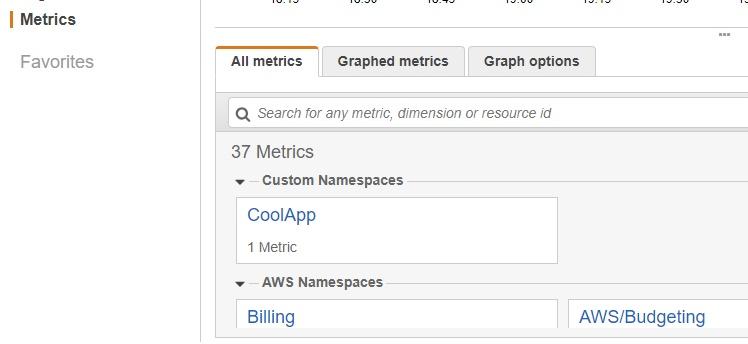
You can go to CloudWatch Metrics page to check if the metrics are visible. (If this is your first time doing this, it could take 5–20 minutes.) You should see the “CoolApp” namespace:
You can also go to the CloudWatch logs for the .lambda function to see the results:
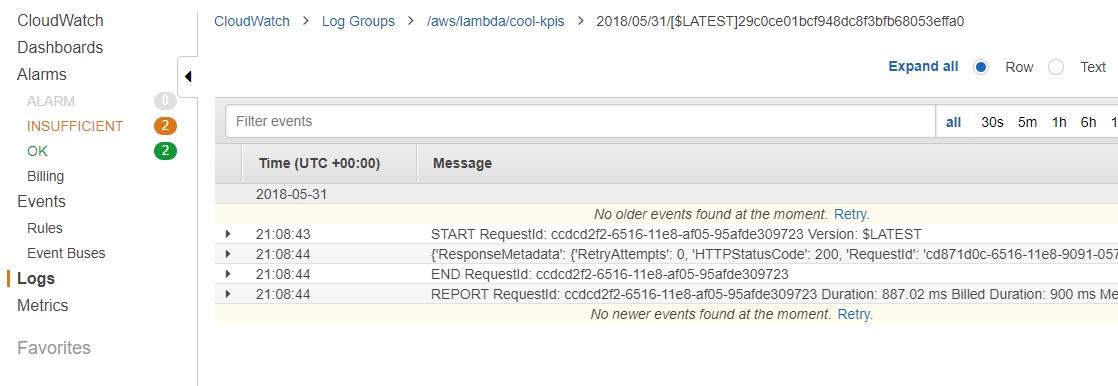
This is where you’ll go to debug when metrics are not being sent to CloudWatch.
Now let’s have some fun and do something more interesting with this project.
What if you could make the .lambda function run every five minutes to get new metric values every time? You would be able to create dashboards to see how the metrics have changed over time. In our case, it will generate random numbers, but in a real-world situation, having a schedule for the .lambda to run will be valuable because you’ll see more data in CloudWatch.
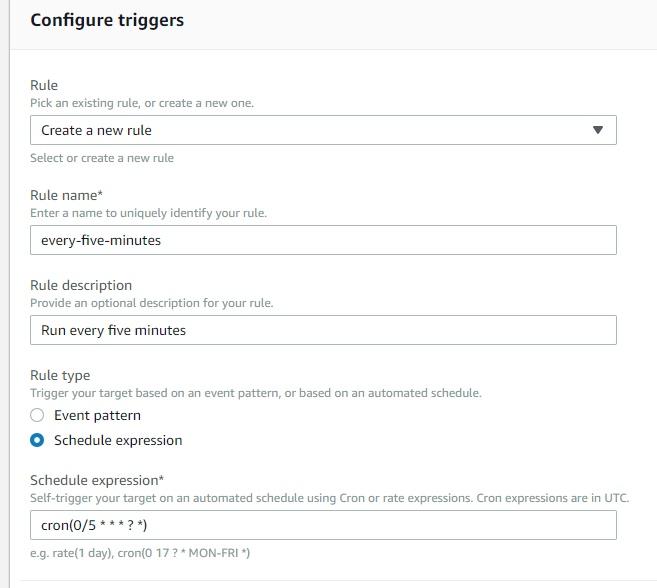
Go back to the AWS Lambda page and click on the “CloudWatch Events” trigger in the left panel. A new box will appear with the “CloudWatch Events” name.

Let’s configure the schedule. Scroll down a little bit and you’ll see the event form. Choose the “Create a new rule” option for the Rule field. Type a descriptive name for the event, something like “every-five-minutes”, and a detailed description. Then select the “Schedule expression” option and type the expression in cron format. So if you want it to be every five minutes, type “cron(0 0/5 * * * *)”. It should look like this:
Scroll down a little bit and click on the “Add” button. Then click on the orange “Save” button in the upper-righthand corner for the lambda function.
And that’s it! You just created an AWS Lambda using Python. Even though our example isn’t that complex, you had the chance to connect and interact with several AWS services.
Beware that you can’t delete metrics—you just have to wait for them to expire as the FAQ page indicates in the questions: Q: What is the retention period of all metrics? and Q: Can I delete any metrics?
Well, the code is generating random data, but now you have a placeholder to add more complex things like querying a database or making a request to another service. In the end, AWS is just a hosting service, so more complex tasks shouldn’t be a problem since you’re still working with Python code.
You may also need to send the metrics somewhere other than CloudWatch. If a library to do more complex things is not natively supported in AWS Lambda, you can pack the libraries with the code and upload it to AWS.
Everything we did here was manual, so you might need to automate at least deployments by using the AWS CLI, Serverless Framework, SAML, or similar services.
AWS Lambda is just a way to expose and host your code; it shouldn’t restrict you from doing interesting things.
Stackify's APM tools are used by thousands of .NET, Java, PHP, Node.js, Python, & Ruby developers all over the world.
Explore Retrace's product features to learn more.


