Docker is a platform for packaging, deploying, and running applications. Docker applications run in containers that can be used on any system: a developer’s laptop, systems on premises, or in the cloud.
Containerization is a technology that’s been around for a long time, but it’s seen new life with Docker. It packages applications as images that contain everything needed to run them: code, runtime environment, libraries, and configuration. Images run in containers, which are discrete processes that take up only as many resources as any other executable.
It’s important to note that Docker containers don’t run in their own virtual machines, but share a Linux kernel. Compared to virtual machines, containers use less memory and less CPU.
However, a Linux runtime is required for Docker. Implementations on non-Linux platforms such as macOS and Windows 10 use a single Linux virtual machine. The containers share this system.
Containerization has enjoyed widespread adoption because of its
We’ll look at these basic concepts as we install the Docker tools, and create images and containers.
We’ll start by installing the Docker desktop tools found here. Download the correct installer for your operating system and run the installation.
Try Stackify’s free code profiler, Prefix, to write better code on your workstation. Prefix works with .NET, Java, PHP, Node.js, Ruby, and Python.
Once we install the tools, we can run a Docker image:

docker run hello-world does exactly what it sounds like. It runs an image named “hello-world.”
Docker looks for this image on our local system. When it can’t find the image, Docker downloads it from Docker Hub for us.
Hello-world displays a message telling us everything’s working. Then it spells out the process for us before recommending some additional steps.
Let’s take a look at a few more Docker commands that tell us more about the environment.
docker ps -a lists the containers on our system:

From this, we can see that the hello-world container is still in memory. The status column tells us that it’s exited. The names column has a name, kind_bose, that Docker assigned to the container for us. We’ll cover container names below.
Let’s run this image again with docker run hello-world. The output is almost the same…

…except this time we don’t see information about downloading the image. It was already available on our system.
But what does docker ps -a show us now?

We see two stopped instances of hello-world, with two different names. Docker created an additional container. It didn’t reuse the first. When we told Docker to run an image named hello-world, it did exactly that; it ran a new instance of the image. If we want to reuse a container, we refer to it by name.
Let’s try starting one of the stopped containers:

This time, we used docker start –attach <container name> instead of docker run. We use the start command, and rather than naming the image, we specify the name of a container that’s already loaded. The –attach tells Docker to connect to the container output so we can see the results.
We stop containers with docker stop <container name> and remove them with docker rm <container name>. We’ll take a look at that below when we work with applications designed to keep running in the background.
If we check docker ps again, we still see two containers.
Let’s run a container that doesn’t exit immediately. Hello-world’s instructions gave us an interesting example:

With a single Docker command, docker run -it ubuntu bash, we downloaded an Ubuntu Linux image and started a login shell as root inside it. The -it flags allow us to interact with the shell.
When we open another window and list containers, we see a different picture:

The Ubuntu container’s status is Up. Let’s see what’s going on inside:

docker top looks inside the container and shows us the running processes. The Ubuntu container is running a single process—the root shell.
Let’s look at one last Docker command before we create a container of our own:

Docker image ls produces a listing of images on our system. We see Ubuntu and the single hello-world image since we only needed that single image to run two containers.
So far, we’ve run a couple of self-contained images. What happens when we want to share local resources from our host system with a container? Docker has the ability to share both the file system and the networking stack with containers.
Let’s create a web server that serves a web page from the local filesystem. We’ll use a public Nginx image.
First, we need an HTML file to display when we connect to the web server. Start in an empty directory that we’ll call my-nginx and create a single subdirectory named html. Inside html, create index.html:
We’re ready to go. Here’s our command line:
$ docker run -v /full/path/to/html/directory:/usr/share/nginx/html:ro -p 8080:80 -d nginx
When we execute this command line, we see Docker download the Nginx image and then start the container.
We used four command line options to run this container:
After executing this command, we should be able to reach the web server on port 8080:

We see our test page! You can also access the page from our devices on your network using your host system’s IP address.
When we ran the Nginx image, we needed to tell it where to get the web files. We did this by mounting a directory on our host system to a directory inside the container, overriding the files that are already inside the image. Docker also supports volumes, which can contain filesystems and be shared between containers.
We also needed to map port 80 in our container to a port on our host system so the web server can communicate with the outside world. Containers don’t automatically have access to the host network. With our port mapping directive, the container can be accessed via the host network. Since we only mapped this port, no other network resources are available to the container.
This exercise illustrates one of Docker’s key advantages: easy reuse of existing resources. We were able to create a web server in minutes with virtually no configuration.
Our web server is still running:

We can stop it with docker stop…
$ docker stop compassionate_ritchie
…and remove the container with docker rm.
$ docker rm compassionate_ritchie
After running these two commands, the container is gone:

Now let’s build on this example to create an image of our own. We’ll package the Nginx image with our html file.
Images are created with a Dockerfile, which lists the components and commands that make up an image.
In my-nginx, create a Dockerfile:
FROM nginx
COPY html /usr/share/nginx/html
This Dockerfile contains two instructions:
Next, build the image:
$ docker build -t mynginx .

Sending build context to Docker daemon 3.584kB
Step 1/2 : FROM nginx
---> b175e7467d66
Step 2/2 : COPY html /usr/share/nginx/html
---> Using cache
---> a8b02c2e09a4
Successfully built a8b02c2e09a4
Successfully tagged mynginx:latest
We passed two arguments to build:
The build output shows Docker using the nginx image and copying the contents of html into the new image.
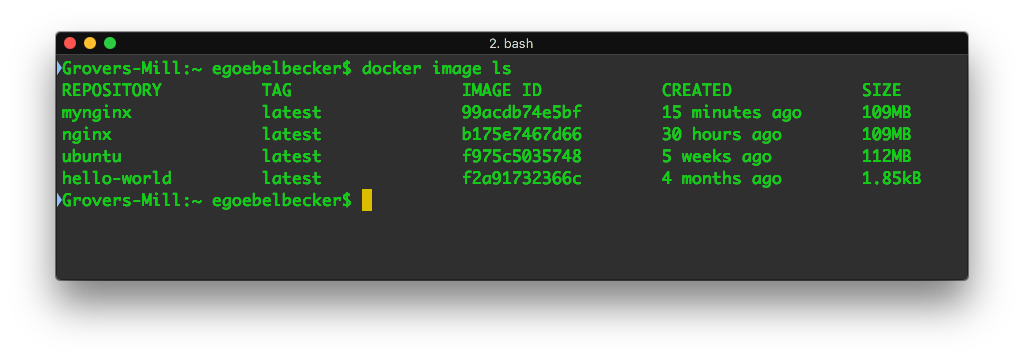
When we list images, we can see mynginx:
Next, we run our new image:
$ docker run --name foo -d -p 8080:80 mynginx
Let’s break that command down.
Now point your browser at http://127.0.0.1:8080 and you can see the test web page again.
While the web server is still running, let’s take a look at docker ps:
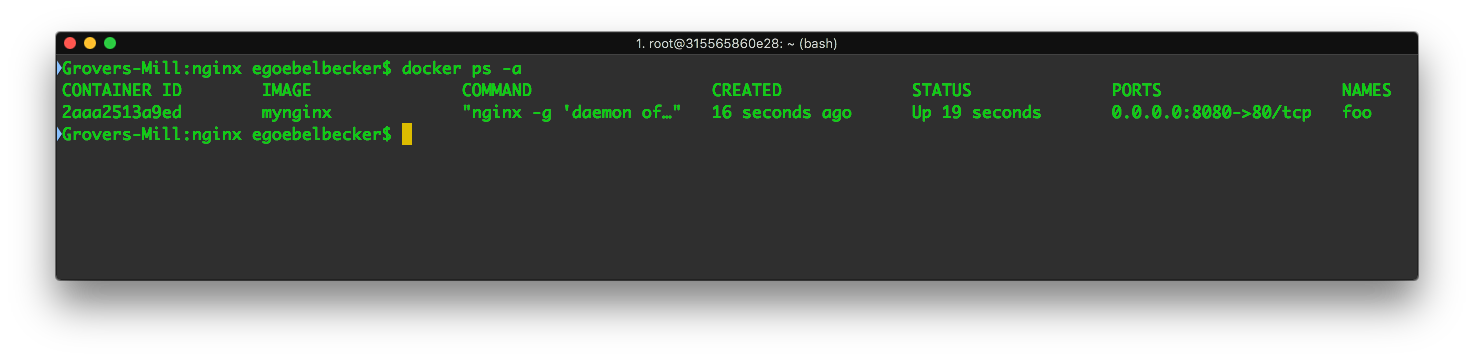
We can see that the ports column has the mapping we used to start the container, and names displays the container name we used.
We’ve created a self-contained web server that could easily contain a complete set of web documents instead of only one. It can be deployed on any platform that supports Docker.
Each Docker image executes a command when it’s run. In our Nginx Dockerfile, we didn’t define one, so Docker used the command specified in the base image.
Let’s try a slightly more complicated image that requires more setup and a specific command instruction.
Start in another empty directory. This time, we’ll create two new text files.
First, we’ll create a small Python script named app.py:
from flask import Flask
import os
import socket

app = Flask(__name__)
@app.route("/")

def hello():
    html = "<h3>Hello {name}!</h3> <b>Hostname:</b> {hostname}<br/>"
    return html.format(name=os.getenv("NAME", "world"), hostname=socket.gethostname())

if __name__ == "__main__":
    app.run(host='0.0.0.0', port=4000)
This script creates a web server listening on port 4000 and serves a small HTML document with a greeting and the container’s hostname.
Next, we’ll create a Dockerfile:
# Use an official Python runtime as a parent image
FROM python:2.7-slim
WORKDIR /app
ADD . /app
RUN pip install --trusted-host pypi.python.org Flask
ENV NAME World
CMD ["python", "app.py"]
This Dockerfile starts with an image that contains a Python runtime. We can see from the name that it provides version 2.7 in a slim configuration that contains a minimal number of Python packages.
Next, it establishes a WORKDIR (working directory) named /app and ADDs the current working directory to it.
After adding the script to the image, we need to install the Flask Python package, the library we use for the web server. The RUN instruction executes pip install for this. Dockerfiles can run commands as part of the image build process.
Next, it sets the environment variable NAME, which is used in the HTML page returned by app.py
And finally, the Dockerfile specifies the command to run when the image is run. CMD accepts a command and a list of arguments to pass to the command. This image executes the Python interpreter, passing it app.py.
Let’s build this image:
$ docker build -t mypyweb .

Sending build context to Docker daemon 4.096kB
Step 1/6 : FROM python:2.7-slim
---> b16fde09c92c
Step 2/6 : WORKDIR /app
---> Using cache
---> e8cfc6466e29
Step 3/6 : ADD . /app
---> Using cache
---> b0ed613be2d4
Step 4/6 : RUN pip install --trusted-host pypi.python.org Flask
---> Using cache
---> 255f51709816
Step 5/6 : ENV NAME World
---> Using cache
---> d79d78336885
Step 6/6 : CMD ["python", "app.py"]
---> Using cache
---> 687bc506dd46
Successfully built 687bc506dd46
Successfully tagged mypyweb:latest
$ docker run --name webapp -p 8080:4000 mypyweb
Let’s navigate to 8080 again with a browser:
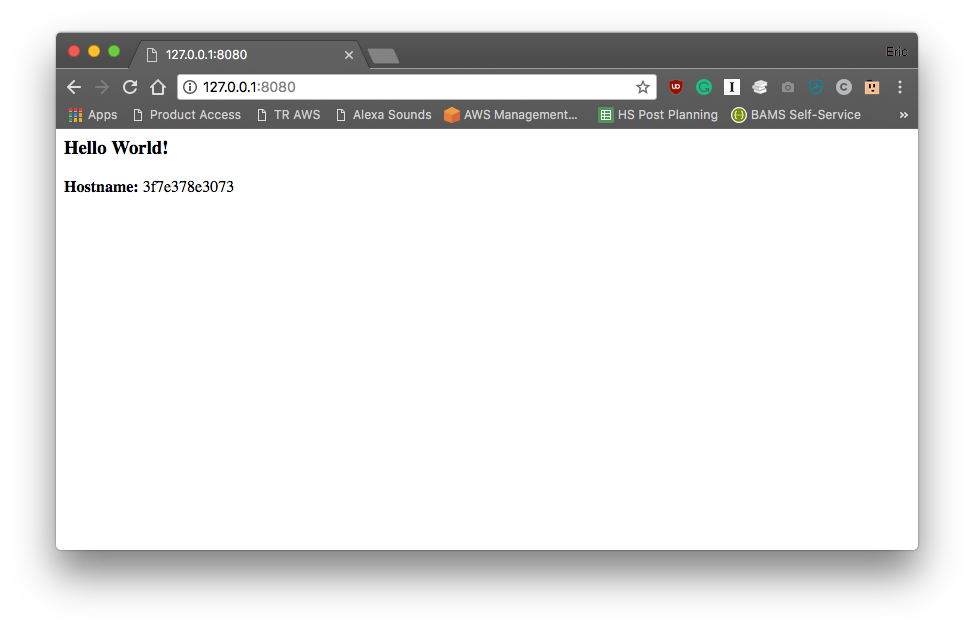
We see our new web page. We’ve created another portable web server with just a few lines of Python!
Our Dockerfile set an environment variable…
ENV NAME World
…which the Python script uses in this greeting:
html = "
Hostname: {hostname}
”
We can override this variable from the command line:
$ docker run --name webapp -p 8080:4000 -e NAME="Dude" mypyweb
Then look at the web page again:

As we’ve been running images and using them as the basis for our own, we’ve seen Docker download them from Docker Hub:
Step 1/6 : FROM python:2.7-slim
2.7-slim: Pulling from library/python
b0568b191983: Pull complete
We can upload our own images to Docker Hub for distribution, too.
The first step is to create an account on Docker Cloud. If you don’t already have an account, go and create one.
Next, we’ll log in to the Docker registry:
$ docker login
Username: ericgoebelbecker
Password:
Login Succeeded
Before uploading mypyweb to Docker Hub, you should tag it. The format for Docker tags is username/repository:tag. Tags and repository names are effectively freeform.
$ docker tag mypyweb ericgoebelbecker/stackify-tutorial:1.00
If we list our images now, we see this tag:
REPOSITORY                           TAG        IMAGE ID       CREATED                  SIZE
ericgoebelbecker/stackify-tutorial   1.00       0057736e26ce   Less than a second ago   150MB
mypyweb                              latest     0057736e26ce   Less than a second ago   150MB
mynginx                              latest     a8b02c2e09a4   41 hours ago             109MB
nginx  .                             latest     b175e7467d66   4 days ago               109MB
python                               2.7-slim   b16fde09c92c   3 weeks ago              139MB
Note that our image tag and mypyweb have the same image ID and size. Tags don’t create new copies of images. They’re pointers.
Now we can push the image to Docker Hub:
$ docker push ericgoebelbecker/stackify-tutorial:1.00

The push refers to repository [docker.io/ericgoebelbecker/stackify-tutorial]
7d7bb0289fd8: Pushed
acfa7c4abdbb: Pushed
8d2f81f035b3: Pushed
d99e7ab4a34b: Mounted from library/python
332873801f89: Mounted from library/python
2ec65408eff0: Mounted from library/python
43efe85a991c: Mounted from library/python
1.00: digest: sha256:e61b45be29f72fb119ec9f10ca660c3c54c6748cb0e02a412119fae3c8364ecd size: 1787
docker push accepts a tag name and pushes it to the default repository, which is Docker Hub.
Now, if we visit our account area on hub.docker.com, we can see the new repository, the image, and the tag:
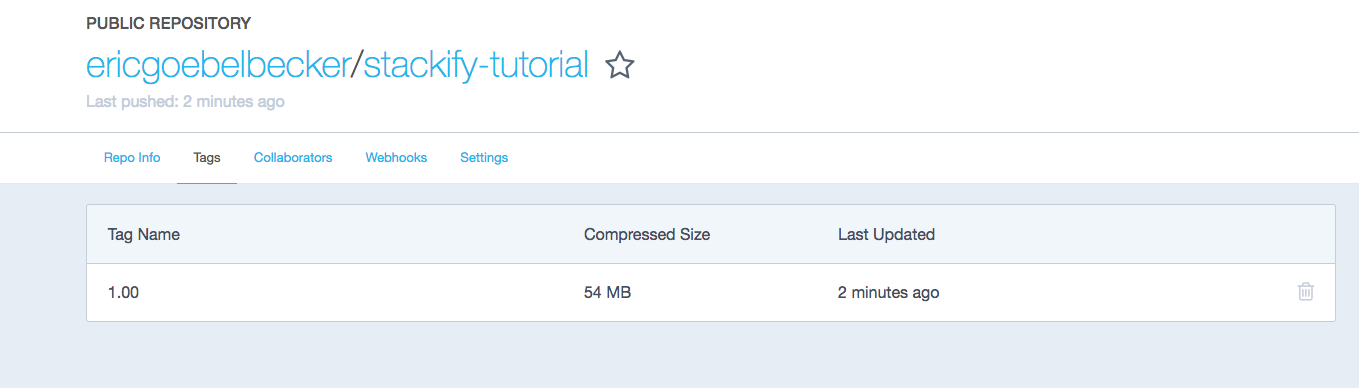
If you look closely, you’ll notice a size discrepancy. This is because the image on Docker Hub only contains the changes from the Python:2.7-slim image it’s based on.
We can pull the Docker image down and run it from any system:
$ docker run -p 8080:4000 --name webapp -e NAME="Docker Hub" ericgoebelbecker/stackify-tutorial:1.00

Unable to find image 'ericgoebelbecker/stackify-tutorial:1.00' locally
1.00: Pulling from ericgoebelbecker/stackify-tutorial
b0568b191983: Pull complete
55a7da9473ae: Pull complete
422d2e7f1272: Pull complete
8fb86f1cff1c: Pull complete
9b622183190d: Pull complete
cf5af0f3fb51: Pull complete
3292695f8261: Pull complete
Digest: sha256:e61b45be29f72fb119ec9f10ca660c3c54c6748cb0e02a412119fae3c8364ecd
Status: Downloaded newer image for ericgoebelbecker/stackify-tutorial:1.00
* Running on http://0.0.0.0:4000/ (Press CTRL+C to quit)
This is the output of run on a different system from the one originally built. Similar to the way we ran hello-world, we passed the image tag to docker run. And since the image was not available locally, Docker pulled it from Docker Hub and Python:2.7-slim, assembled the image and ran it.
We published the image, and it’s now publicly available from Docker Hub.
Docker is a powerful platform for building, managing and running containerized applications. In this Docker tutorial, we installed the tools, downloaded and ran an off-the-shelf image and then built images of our own. We published an image to Docker Hub and demonstrated how it can be downloaded and run on any Docker-enabled host.
Now that you understand the basics, keep experimenting and see how you can use Docker to package and distribute your applications.
However, you don’t have to go it alone. All superheroes need a sidekick, and developers are no exception. Stackify by Netreo works hard to make sure developers get all the help they need. We have developed tools such as Prefix, which helps you write better code by profiling and testing as you write it. If you need quality control for the big-picture moments, use Retrace to help you proactively and continuously improve and observe applications in production environments.
Not sure you want help? Hey, no guts, no glory, right? Try it free for 14 days!
Stackify's APM tools are used by thousands of .NET, Java, PHP, Node.js, Python, & Ruby developers all over the world.
Explore Retrace's product features to learn more.


