
In this article, you’ll learn how to quickly and easily configure and set up a Spring Security based web application using the Java configuration.
Security is, not surprisingly, an evergrowing concern and certainly a core focus of any developer working on applications today.
The fastest way to get on track with Spring Security is to use the Spring Boot starter dependencies, including the spring-boot-starter-parent project:
<parent>
    <groupId>org.springframework.boot</groupId>
    <artifactId>spring-boot-starter-parent</artifactId>
    <version>2.0.0.M6</version>
    <relativePath/>
</parent>

<dependencies>
    <dependency>
        <groupId>org.springframework.boot</groupId>
        <artifactId>spring-boot-starter-web</artifactId>
    </dependency>
    <dependency>
        <groupId>org.springframework.boot</groupId>
        <artifactId>spring-boot-starter-security</artifactId>
    </dependency>
</dependencies>
For the Thymeleaf template support and its integration with Spring, you’ll also need the following dependencies:
<dependency>
    <groupId>org.springframework.boot</groupId>
    <artifactId>spring-boot-starter-thymeleaf</artifactId>
</dependency>
<dependency>
    <groupId>org.thymeleaf</groupId>
    <artifactId>thymeleaf-spring5</artifactId>
    <version>3.0.8.RELEASE</version>
</dependency>
Also, you’ll require the spring-boot-starter-jdbc dependency and the h2 database to implement authentication against an SQL database:
<dependency>
    <groupId>org.springframework.boot</groupId>
    <artifactId>spring-boot-starter-jdbc</artifactId>
</dependency>
<dependency>
    <groupId>com.h2database</groupId>
    <artifactId>h2</artifactId>
    <version>1.4.196</version>
</dependency>
The latest and greatest version of Spring Security 5 comes with Spring Boot 2 which is not yet released at the time of this writing; it’s only available in the Spring Milestone Repository:
<repositories>
    <repository>
        <id>spring-milestones</id>
        <name>Spring Milestones</name>
        <url>https://repo.spring.io/milestone</url>
        <snapshots>
            <enabled>false</enabled>
        </snapshots>
    </repository>
</repositories>
You can check out the current version of Spring Boot starters over at Maven Central.
Let’s start with a barebones web application with a single Spring Web MVC controller. This controller simply produces the view which refers to a “hello world” index.html page:
import org.springframework.context.annotation.Configuration;
import org.springframework.web.servlet.config.annotation.ViewControllerRegistry;
import org.springframework.web.servlet.config.annotation.WebMvcConfigurer;

@Configuration
public class WebMvcConfiguration implements WebMvcConfigurer {

    @Override
    public void addViewControllers(ViewControllerRegistry registry) {
        registry.addViewController("/").setViewName("index");
    }
}
Note that WebMvcConfigurer is an interface with default methods. This Java 8 feature is fully supported only in Spring 5. In previous versions of the framework, you’d have to use the WebMvcConfigurerAdapter for this purpose.
The index.html page is a Thymeleaf template that currently only outputs a simple message:
<!DOCTYPE html>
<html xmlns="http://www.w3.org/1999/xhtml"
      xmlns:th="http://www.thymeleaf.org">
<p>Hello, world!</p>
</html>
The last component of the application is the Spring Boot runner class that also serves as the application configuration:
import org.springframework.boot.SpringApplication;
import org.springframework.boot.autoconfigure.SpringBootApplication;
import org.springframework.context.annotation.ComponentScan;

@SpringBootApplication
@ComponentScan(basePackages = {"com.stackify.guest.springsecurity"})
public class Application {
    public static void main(String[] args) {
        SpringApplication.run(Application.class, args);
    }
}
Just by adding the spring-boot-starter-security dependency to your project, you’ve already got a lot of functionality for free. All of it, of course, can be configured using the Java configuration, which we’ll discuss in the next chapter.
The first thing you’ll want to do to secure your application is probably adding a way for the user to log in to your system.
If you now start the application and go to http://localhost:8080/, you’ll see that you are redirected to /login URL and presented with a login page. Thus, all your application is secured behind a login page from the very start.
You can check out that the invalid login actually gets rejected by Spring Security with a reasonable error message:
But what credentials should you use to log in, if you did not yet configure any source of user credentials?
The default development configuration creates an in-memory implementation of the UserDetailsService interface with a user named “user” and a random UUID password.
To find out this generated password, you’ll have to explore the start logs of the application:
Using default security password: 306d925b-1dae-40de-b694-66274542085d
Note that this password is regenerated on each application restart. By logging in with login “user” and this password, you get to see the original secured page.
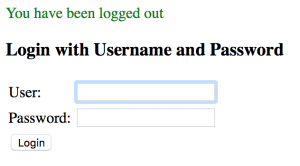
Spring Security also provides you with log out functionality. It’s registered under the /logout URL. You can actually log out if you directly enter this URL in your browser’s address bar.
But let’s add a proper log out button to your page:
<p>Hello, world!</p>
<form action="/logout" method="post">
    <input type="hidden"
        th:name="${_csrf.parameterName}" th:value="${_csrf.token}"/>
    <input type="submit" value="Log Out">
</form>
Note that your web page now uses a POST request to log out. This is good practice, as it allows us to use CSRF tokens to protect from cross-site request forgery attacks.
Now you can now log in and out of the application:
Another functionality you can implement without any additional configuration is showing some information about the current user. The current security context can be accessed via the static SecurityContextHolder.getContext() method.
To access this context from your template, you can use the following Spring EL expression:
<p>Hello, <span th:text="${
    T(org.springframework.security.core.context.SecurityContextHolder)
      .context.authentication.principal.username}"></span>!</p>
Let’s discuss what happens here. The T(..) expression is Spring EL way of accessing the static methods on a class. What follows is a chain of properties that brings us directly to the user’s login.
By “current security context” we mean the context that is associated with the current HTTP request. Technically this is an instance of SecurityContext class that is bound to the current thread via a ThreadLocal.
The authentication value is present only if the current user was authenticated. The principal is an object that represents the authenticated party (usually a user).
The type of principal is Object, which means that Spring Security does not enforce any limitations on what object can represent the authenticated principal. But in our case, this is an instance of the Spring Security User class.
If you compare the HTTP headers before and after adding the Spring Security, you’ll see that the framework has added some new headers:
Cache-Control:no-cache, no-store, max-age=0, must-revalidate
Expires:0
Pragma:no-cache
X-Content-Type-Options:nosniff
X-Frame-Options:DENY
X-XSS-Protection:1; mode=block
Let’s see what Spring Security brings to the party:
As you can see, a lot of security features are enforced by Spring Security out of the box.
Now let’s actually configure something. The first thing you’ll want to do is to change the default randomly generated user password to something more stable.
Spring Boot is highly configurable, and the easiest way to change the default credentials is the property configuration. Let’s add the file application.properties with the following content into the src/main/resources folder of your application:
security.user.name=jill
security.user.password=password
Now the password won’t be regenerated on each application restart. Many other Spring Boot configuration properties that start with security may be used to declaratively configure the application.
Let’s create a Java configuration class WebSecurityConfig and provide a similar in-memory UserDetailsService implementation to what we already have.
But now let’s specify the constant password of the user so it would not change on every restart of the application:
import org.springframework.context.annotation.Bean;
import org.springframework.security.core.userdetails.UserDetailsService;
import org.springframework.security.provisioning.InMemoryDetailsManager;
import org.springframework.security.core.userdetails.User;

@EnableWebSecurity
public class WebSecurityConfig implements WebMvcConfigurer {

    @Bean
    public UserDetailsService userDetailsService() {
        InMemoryUserDetailsManager manager
          = new InMemoryUserDetailsManager();
        manager.createUser(User.withDefaultPasswordEncoder()
          .username("jack")
          .password("password")
          .authorities("USER")
          .build());
        return manager;
    }
}
As you already know, the WebMvcConfigurer is an interface defined in the Spring MVC framework to customize the Java-based configuration of the application. The @EnableWebSecurity annotation makes the class act as the Java configuration.
The User class should be already familiar, as it represents a principal. The authority is basically the role of the user. At least one authority is required for the user.
JdbcUserDetailsManager is another useful implementation of UserDetailsService – that uses the database to do the lookup of users and their authorities. Not surprisingly, switching to this implementation should be very easy.
The JDBC backed manager is targeted at a specific database structure, although you could change and fine-tune it if you need to adhere to another schema.
To create a schema, just put the schema.sql file with the DDL statements for the database schema definition inside the resources folder. Spring Boot executes this file against the embedded database, at startup:
CREATE TABLE users (
  username VARCHAR(256) PRIMARY KEY,
  password VARCHAR(256),
  enabled  BOOLEAN
);

CREATE TABLE authorities (
  username  VARCHAR(256) REFERENCES users (username),
  authority VARCHAR(256)
);
Now add the following data.sql file to the same resources folder – which will add the specified user to the database. This file also is executed upon application start, but it contains DML statements. Note that we’re providing the user’s password as plaintext here, to keep things simple:
INSERT INTO users VALUES ('jill', 'password', TRUE);
INSERT INTO authorities VALUES ('jill', 'USERS');
Now change the contents of WebSecurityConfig class:
import org.springframework.security.crypto.password.PasswordEncoder;
import org.springframework.security.provisioning.JdbcUserDetailsManager;

// ...

@Bean
public UserDetailsService jdbcUserDetailsService(DataSource dataSource) {
    JdbcUserDetailsManager manager = new JdbcUserDetailsManager();
    manager.setDataSource(dataSource);
    return manager;
}

@Bean
public PasswordEncoder passwordEncoder() {
    return NoOpPasswordEncoder.getInstance();
}
Note that you did not define the DataSource bean, but it was automatically created by Spring Boot because you added an embedded H2 database to the classpath of the project.
In our code, this data source is injected as a method argument and used to configure the JdbcUserDetailsManager instance.
Another aspect you should configure is a password encoder. This is a strategy class that defines the way the passwords are encoded, or hashed in the database.
You’ll notice that the NoOpPasswordEncoder we used earlier is actually deprecated in Spring Security 5 because keeping the passwords as plain text is very insecure. Let’s fix that:
import org.springframework.security.crypto.bcrypt.BCryptPasswordEncoder;

// ...

@Bean
public PasswordEncoder passwordEncoder() {
    return new BCryptPasswordEncoder();
}
You’ll also have to fix the password in the data.sql file:
INSERT INTO users VALUES (
  'jill',
  '$2a$04$qUlqAEEYF1YvrpJMosodoewgL6aO.qgHytl2k5L7kdXEWnJsFdxvq',
  TRUE
);
The value in the password field corresponds to the BCrypt-hashed value of the “password” string.
BCrypt is a strong cryptographic hashing algorithm. Is currently the recommended way of hashing the stored passwords when using Spring Security.
First, let’s inherit your WebSecurityConfig from the WebSecurityConfigurerAdapter class:
import org.springframework.security.config.annotation.web.configuration.WebSecurityConfigurerAdapter;

@EnableWebSecurity
public class WebSecurityConfig extends WebSecurityConfigurerAdapter {
    // ...
Now let’s override the configure method which is the main point of extension for configuring Spring Security:
import org.springframework.security.config.annotation.web.builders.HttpSecurity;

@Override
protected void configure(HttpSecurity http) throws Exception {
    http.authorizeRequests()
      .anyRequest().authenticated()
      .and().formLogin();
}
This configuration adds authorization to all HTTP requests, a login form, and a basic HTTP authentication. These are, of course, already available by default, but the advantage of setting them up with the fluent API is that, now, we can fine-tune the configuration further.
Now, let’s configure the presentation of the login form, to switch from the default, generated login to a more custom implementation.
Let’s first change the name of the login page and the name of the page to redirect to after successful login:
@Override
protected void configure(HttpSecurity http) throws Exception {
    http.authorizeRequests()
      .anyRequest().authenticated()
      .and().formLogin()
        .loginPage("/customLogin")
        .defaultSuccessUrl("/loginSuccess", true)
        .permitAll();
}
Here, you’ve defined the custom login form which is accessible at /customLogin. You’ve also set the default authentication success URL to /loginSuccess.
You could also use fluent Java configuration to change the failure URL, form parameter names and much more.
The final touch is to make this login form available for all non-authenticated users. This is made possible by the .permitAll() fluent call.
Now let’s add the template customLogin.html with the following form. You need to provide a hidden parameter with a CSRF token, otherwise, the Spring Security backend won’t accept the POST request:
<form th:action="@{/customLogin}" method="post">
    <fieldset>
        <label for="username">Login:</label>
        <input id="username" name="username">
        <label for="password">Password:</label>
        <input id="password" name="password" type="password">
    </fieldset>
    <input type="hidden" th:name="${_csrf.parameterName}"
      th:value="${_csrf.token}"/>
    <input type="submit" value="Login">
    <div th:if="${param.error}">Bad login or password.</div>
    <div th:if="${param.logout}">Log out successful.</div>
</form>
Also, you can see that we’ve chosen to display the error and logout messages under the form. These are only visible if the respective ?error or ?logout parameters are present in the query string.
Now let’s register this login view in the WebMvcConfiguration class and modify the controller of the root page so that it now handles the /loginSuccess URL:
@Override
public void addViewControllers(ViewControllerRegistry registry) {
    registry.addViewController("/customLogin").setViewName("customLogin");
    registry.addViewController("/loginSuccess").setViewName("index");
}
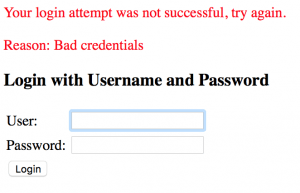
If you now run your application and proceed to the root page in the browser, you’ll see that the default login URL has changed and the form now looks different,. as the application is now serving the custom login page.
Let’s add some styling to your login form. Spring Boot searches for the static resources in the predefined places, including the resources/static folder.
So let’s create a folder resources/static/css in your project and add the styles.css file to it:
.bad-login {
  color: red;
}
You can then set this file as a stylesheet for your customLogin.html form and provide some styling for the “bad login” message:
<head>
    <link rel="stylesheet" href="/css/styles.css">
</head>

<div th:if="${param.error}" class="bad-login">Bad login or password.</div>
If you now try to login with incorrect password, you’ll see that the styles are not there. Trying to access the CSS file by the direct link in the browser will redirect you to the login page.
The reason is you have to provide some rules for Spring Security to allow anonymous access to static resources:
@Override
protected void configure(HttpSecurity http) throws Exception {
    http.authorizeRequests()
      .antMatchers("/css/**").permitAll()
      // ...
If you now go to the login page and try to login with incorrect password, you should see that the “bad login” message is styled.
In this article, we’ve introduced Spring Security in a very common scenario – building and configuring a login form for a web application.
The security framework can naturally do a lot more than providing authentication in a typical MVC application, but this scenario is certainly a great starting-point and quite well-suited to understand what Spring Security can do.
The source code for this article is available over on GitHub.
Continually improve your Java applications with Stackify Retrace, the only Full lifecycle APM. Try it for free.
Stackify's APM tools are used by thousands of .NET, Java, PHP, Node.js, Python, & Ruby developers all over the world.
Explore Retrace's product features to learn more.


