A chatbot is an application that simulates a human responding to the user. It’s a more natural way to interact with a system by using conversation.
Let’s say, for example, that you want to order a pizza. Instead of wasting your time tapping randomly or searching the Internet to figure out how to use the app, you could just start a conversation as if you were talking with a real human. The chatbot will start asking questions, and as you answer them, the bot will learn who you are and what you like. Next time, you won’t have to answer the same questions as before and you can just order the same pizza you ordered last time.
Automating a questionnaire doesn’t sound too difficult—you just add a bunch of “if” sections and you’re done, right? Not exactly. Initially, you can start simple with simple questions, but with time, making changes to the app could become too complex.
Luckily for us, Azure makes it really simple to create chatbots. In this post, I’ll show you two methods to use this service.
Azure Bot Service helps you to develop, deploy, and host a chatbot in a simple way.
One of the first things you need to do is create a chatbot. To ease this dreaded task, you can make use of the Microsoft Bot Framework (MBF). MBF supports C# and Node.js languages for production use, and you can also use Python and Java, which are already available in preview. MBF is an open source project, so you can find all of the concepts that you need to build a chatbot in MBF at GitHub. And if that’s not enough, you can also start quickly by using these samples.
When you use MBF, the chatbot logic is encapsulated and exposed by an API that will be consumed by an external channel like a mobile app. So when the chatbot is hosted in Azure Bot Service, it’s easier for your chatbot to be consumed across other channels like Slack, Facebook, Skype, Twilio, and email, among others.
And if you want to debug and test your chatbot, you can make use of the MBF emulator. You can also easily deploy from Visual Studio to Azure, but my recommendation is to set up continuous deployment, which is also supported and easy to implement.
There are three categories for how much you’ll pay for this service, which also relates to how hosting works in Azure Bot Service. Here they are:
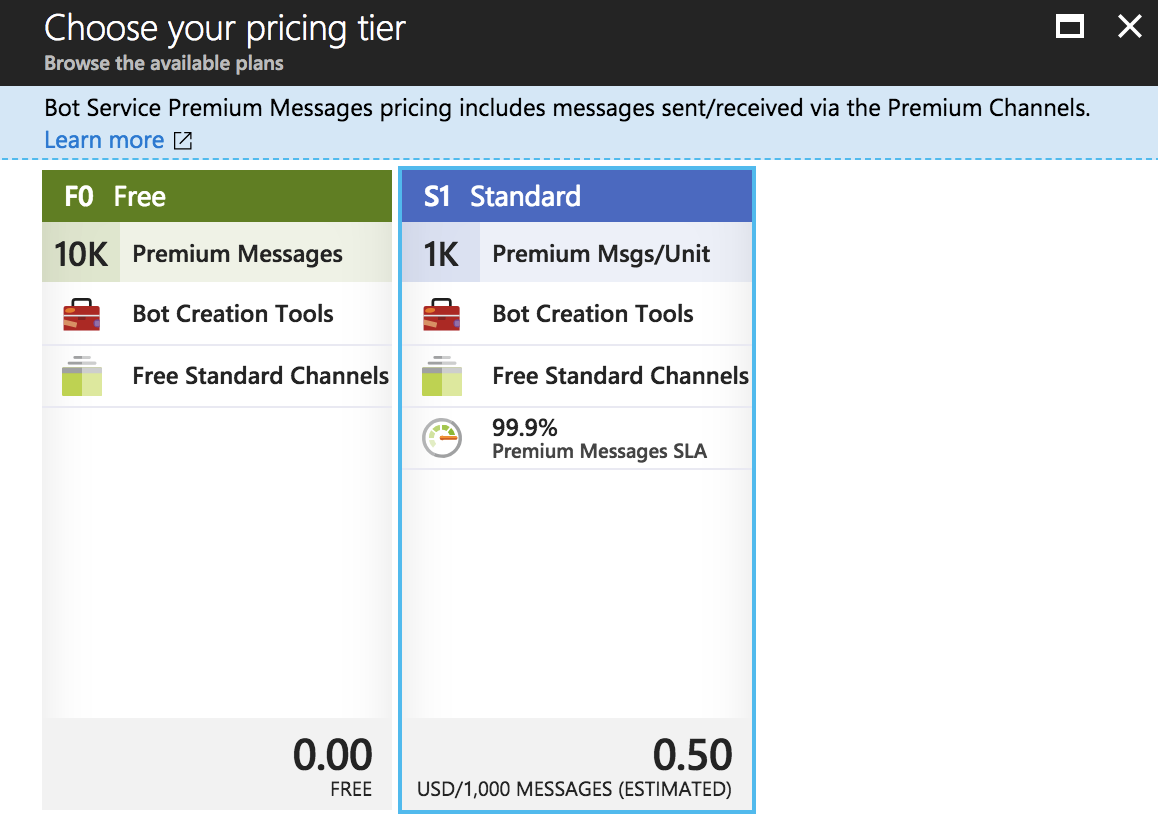
If you’re planning to host the chatbot on-premises or somewhere else for security and/or compliance reasons, you need to choose Bot Channels Registration. If you use public channels (such as Facebook or Slack) or Microsoft channels (like Skype or Cortana), you won’t be charged. But if you need to expose the API so that you can integrate it in a mobile app, you need to use the Direct Line channel. The Direct Line channel is free for the first 10,000 messages per month, then it costs $0.50 per additional 1,000 messages. Or you can decide to still not pay anything if you’ve reached the free tier—we’ll talk more about this later.
If, instead, you choose Web App Bot, that means that Azure will use App Service. Then, the same pricing as App Service will apply where you pay for the virtual machines you instantiate, plus the channel pricing that I mentioned before (if applicable).
Finally, the Functions Bot option creates a serverless chatbot by using Azure Functions. You only pay when the chatbot is used plus the channel pricing, if applicable.
So if you’re convinced that Azure Bot Service is the right option for you, let’s start.
First things first, you’re going to need the following:
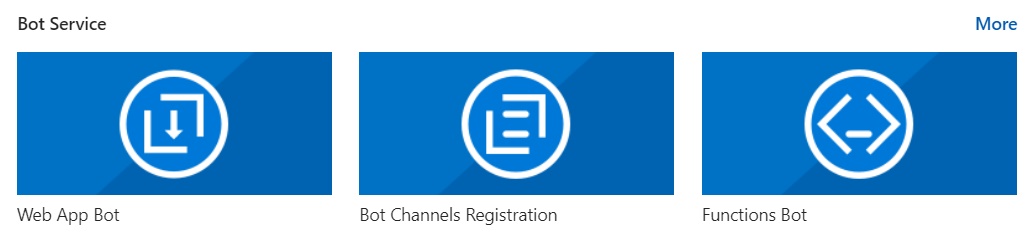
Open the Azure portal and click on the “Create a resource” link, then click in “AI + Machine Learning.” Finally, click on the “Web App Bot” link as you see in the following screen:

The following screen should appear to configure the web app bot:
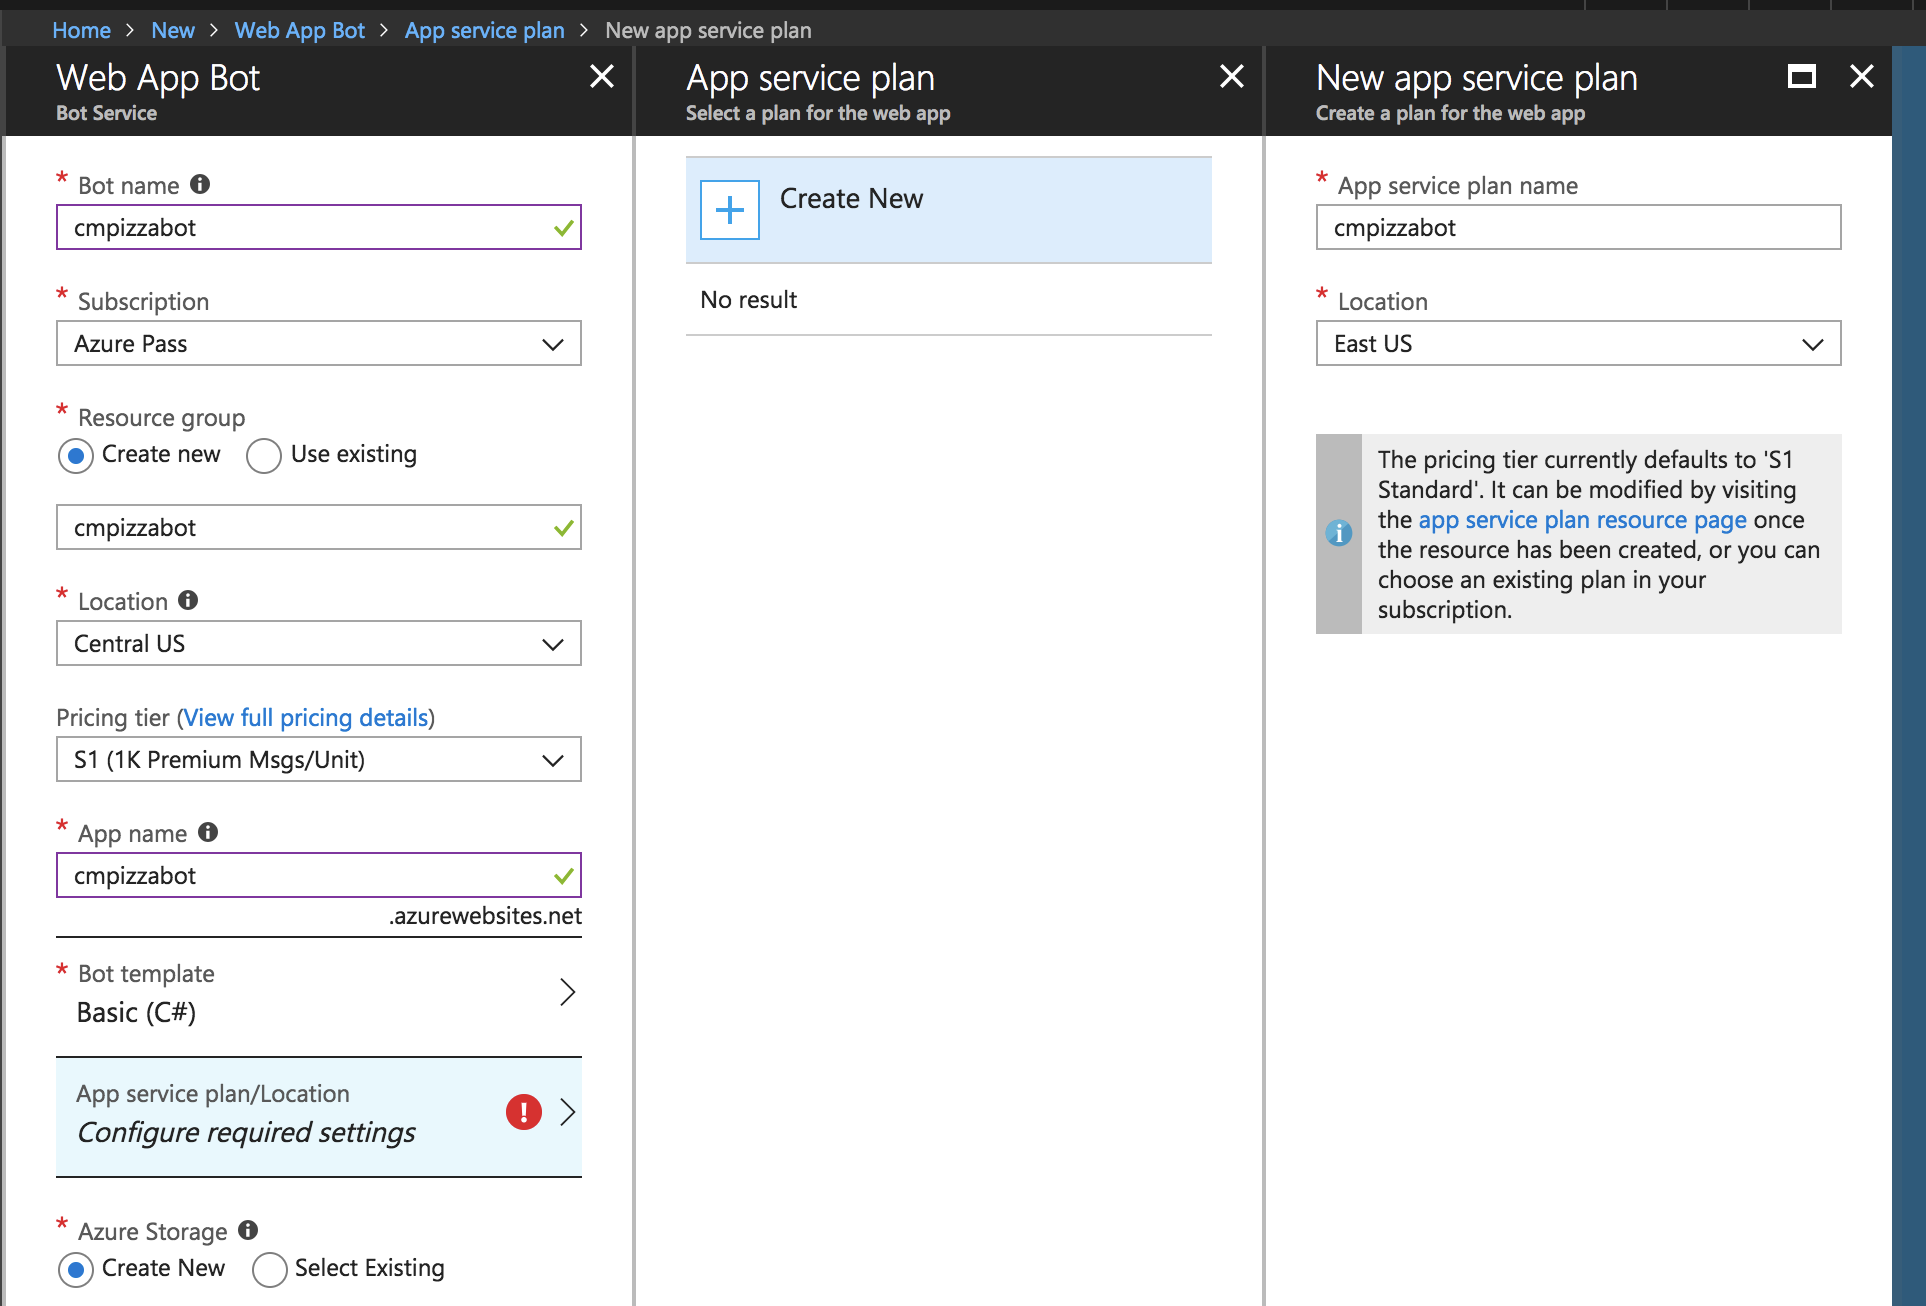
Your botname should be unique across Azure; you won’t be able to continue if the name is already taken. You can change the name later if you need to. Choose the subscription you want to use to pay for the service, or use some of your available credits. Create a resource group (or use an existing one) for the bot to easily manage all resources created in Azure.
Choose the nearest location for your customers. For example, if the bot will mainly be used by people in the U.S., choose a location in the U.S. You can’t change this option later so choose carefully. For the pricing tier option, you can choose F0 to not pay a penny because you’re just playing with the service, or because you’ll only be using public channels. We talked about this in the pricing section, but here’s a quick review:
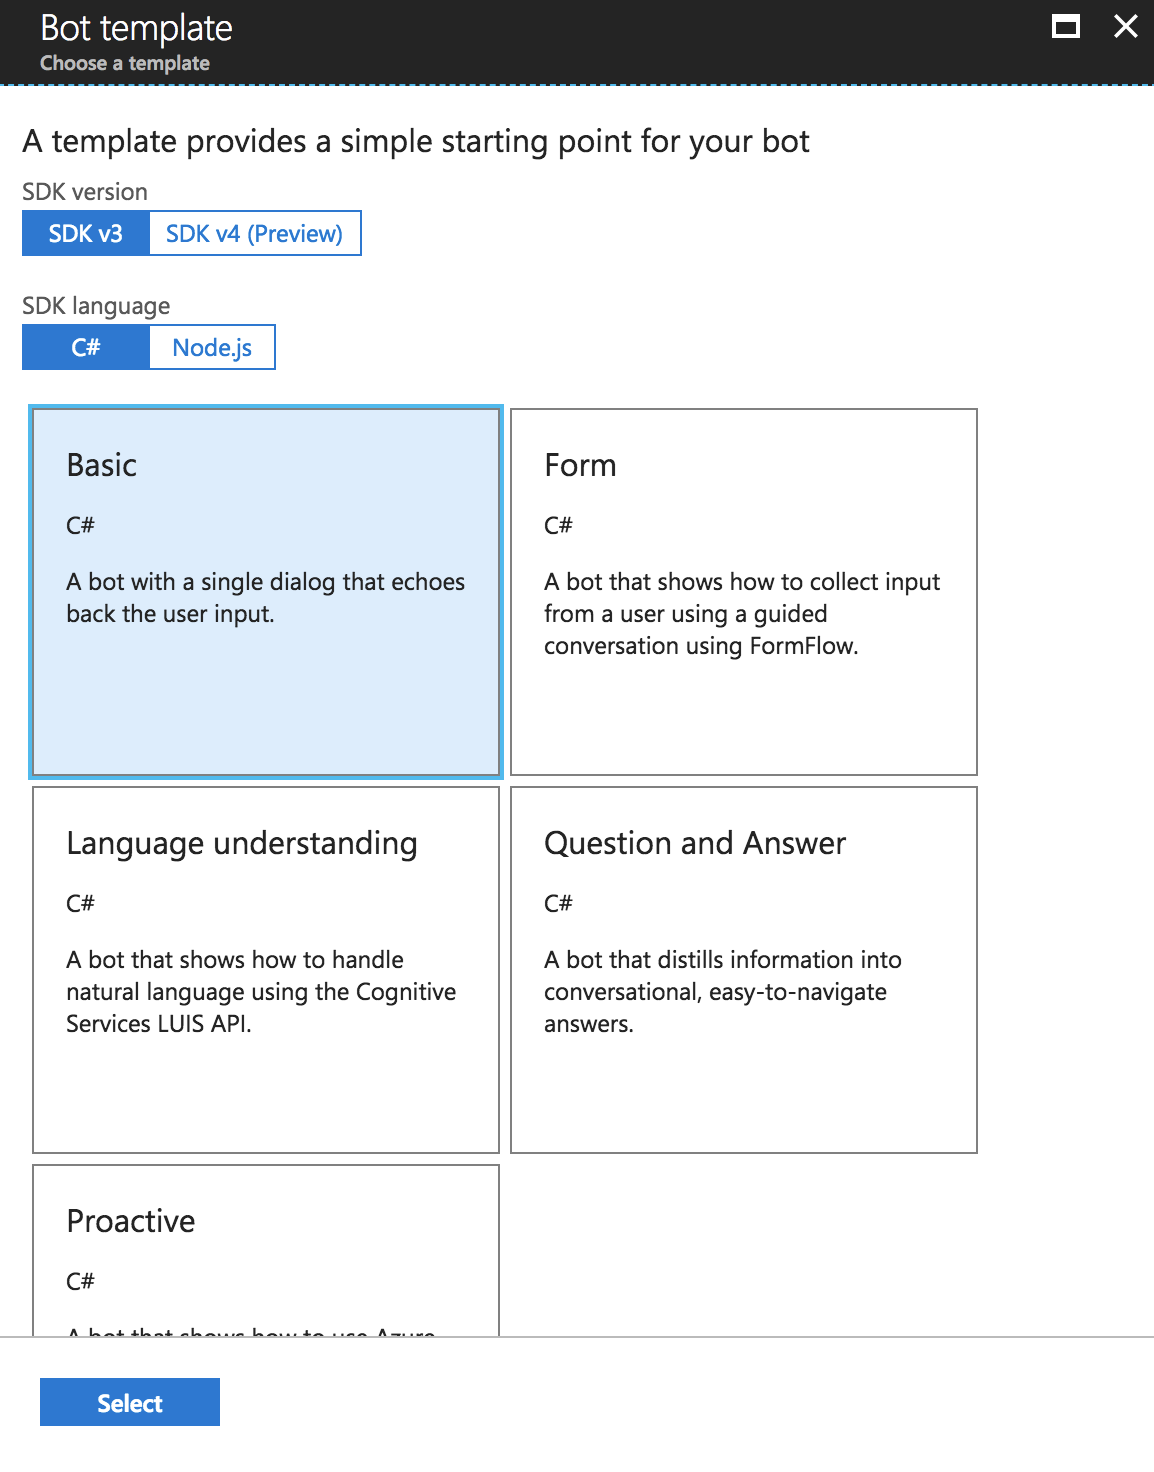
Your app name should also be unique across Azure because a subdomain will be created to access the web app bot. We’ll be deploying a pizza bot, so go ahead and leave the default selection for the bot template. But in case you’re curious, this is a starting point where you can select from a variety of basic templates to create a bot using the MBF we talked about earlier in this post. Here is a list of some templates:
Now let’s choose the app service plan for the bot. You can use an existing plan or create a new one. If you decide to create a new one from here, you don’t have too many options. The default option will be an “S1 Standard” pricing tier, but you can later change this configuration to keep the defaults for now.
We’re almost done. Scroll down a little bit and you’ll see the following screen:
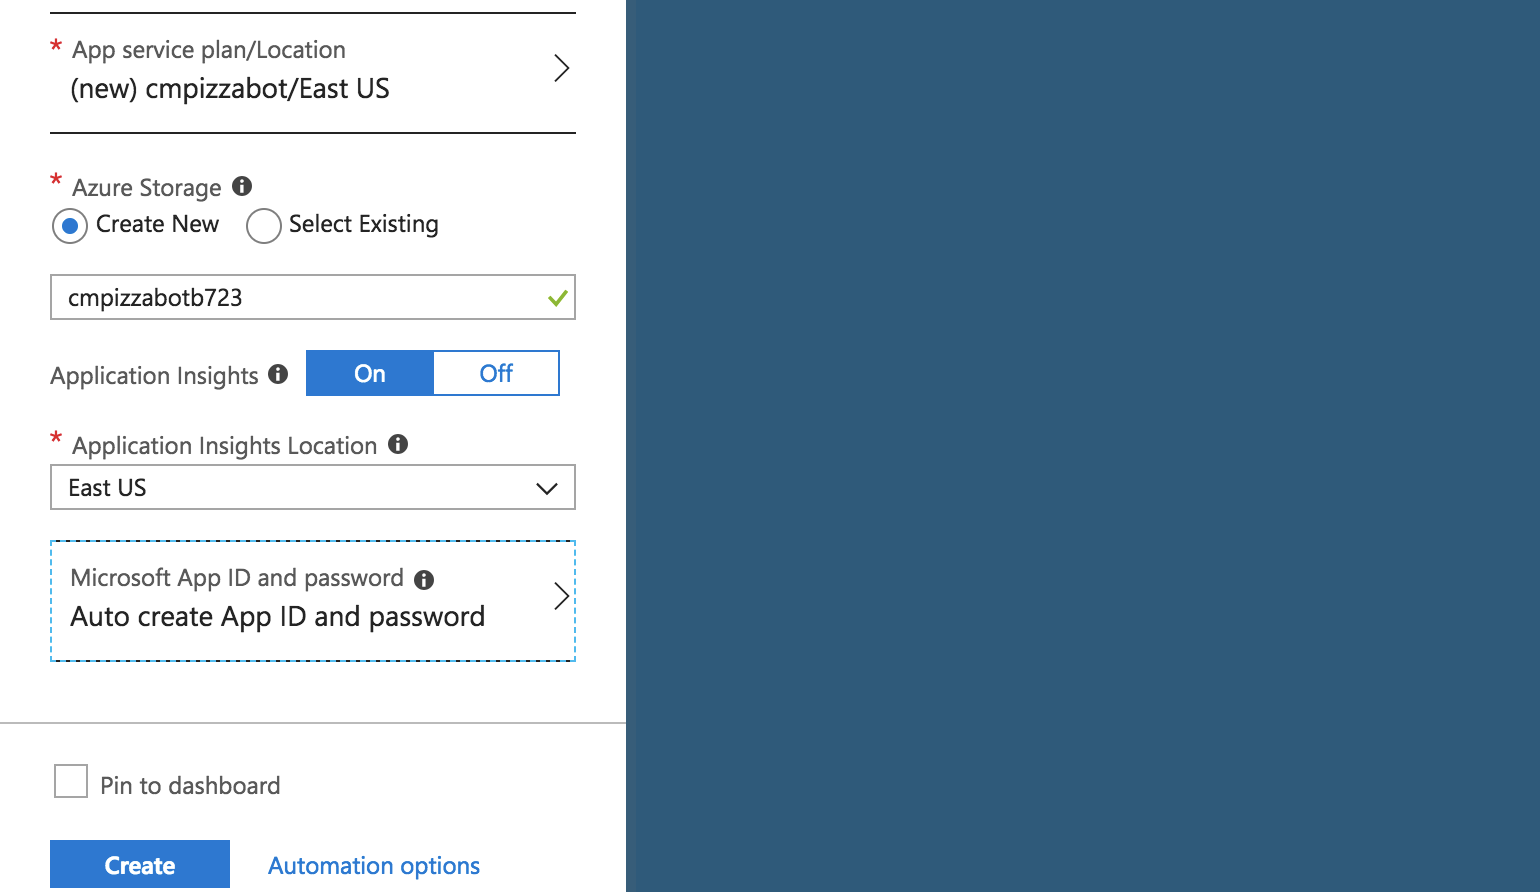
Create or select an existing Azure storage that will be used to store the state of the bot using blog storage. This is how the bot will remember things for your users and keep learning. Enable Application Insights and its location so that you can know the health of your web app bot from the very beginning.
Leave the default option for Microsoft App ID and password. This is outside the scope of the post, but basically, this is the part where you can configure an App ID that has the minimum permissions in Azure to work and a custom password. You can learn more about this in the docs.
Click on the blue “Create” button. The following screen should appear now:

If you haven’t done so already, grab a slice of pizza and relax for a bit while Azure creates all of the resources for the web app bot.
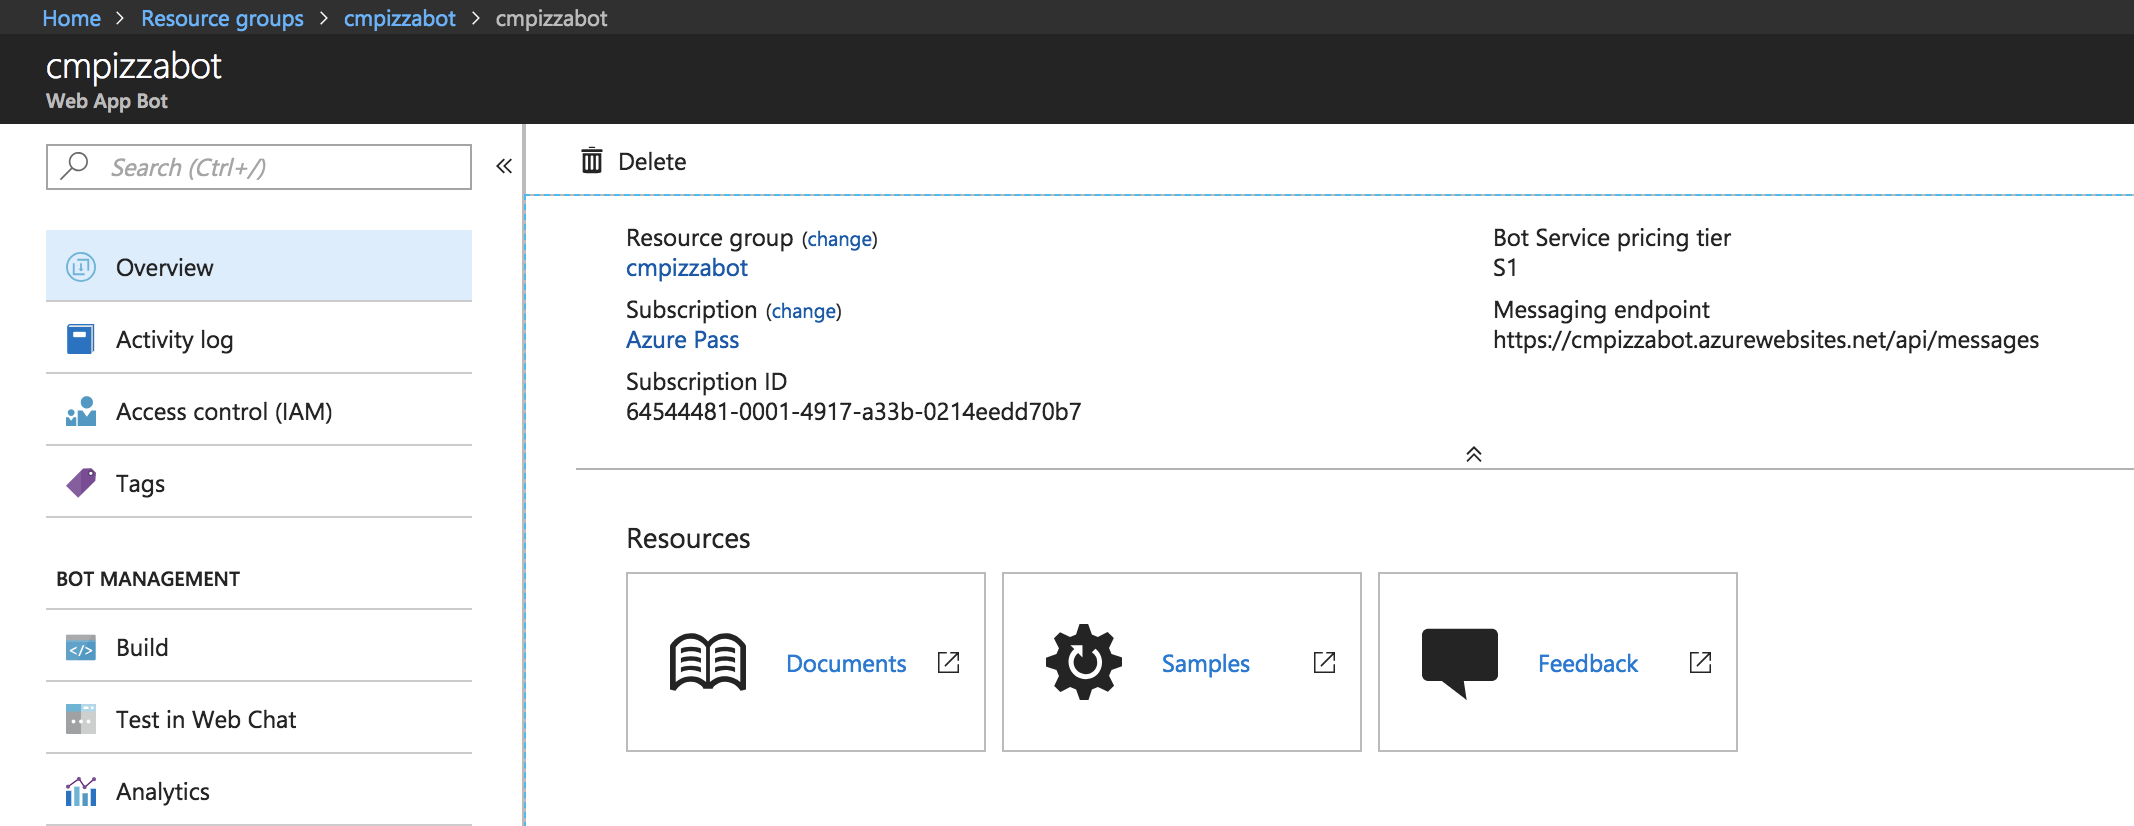
Go to the resource groups and click on the web app bot you created to get a quick overview of the app:
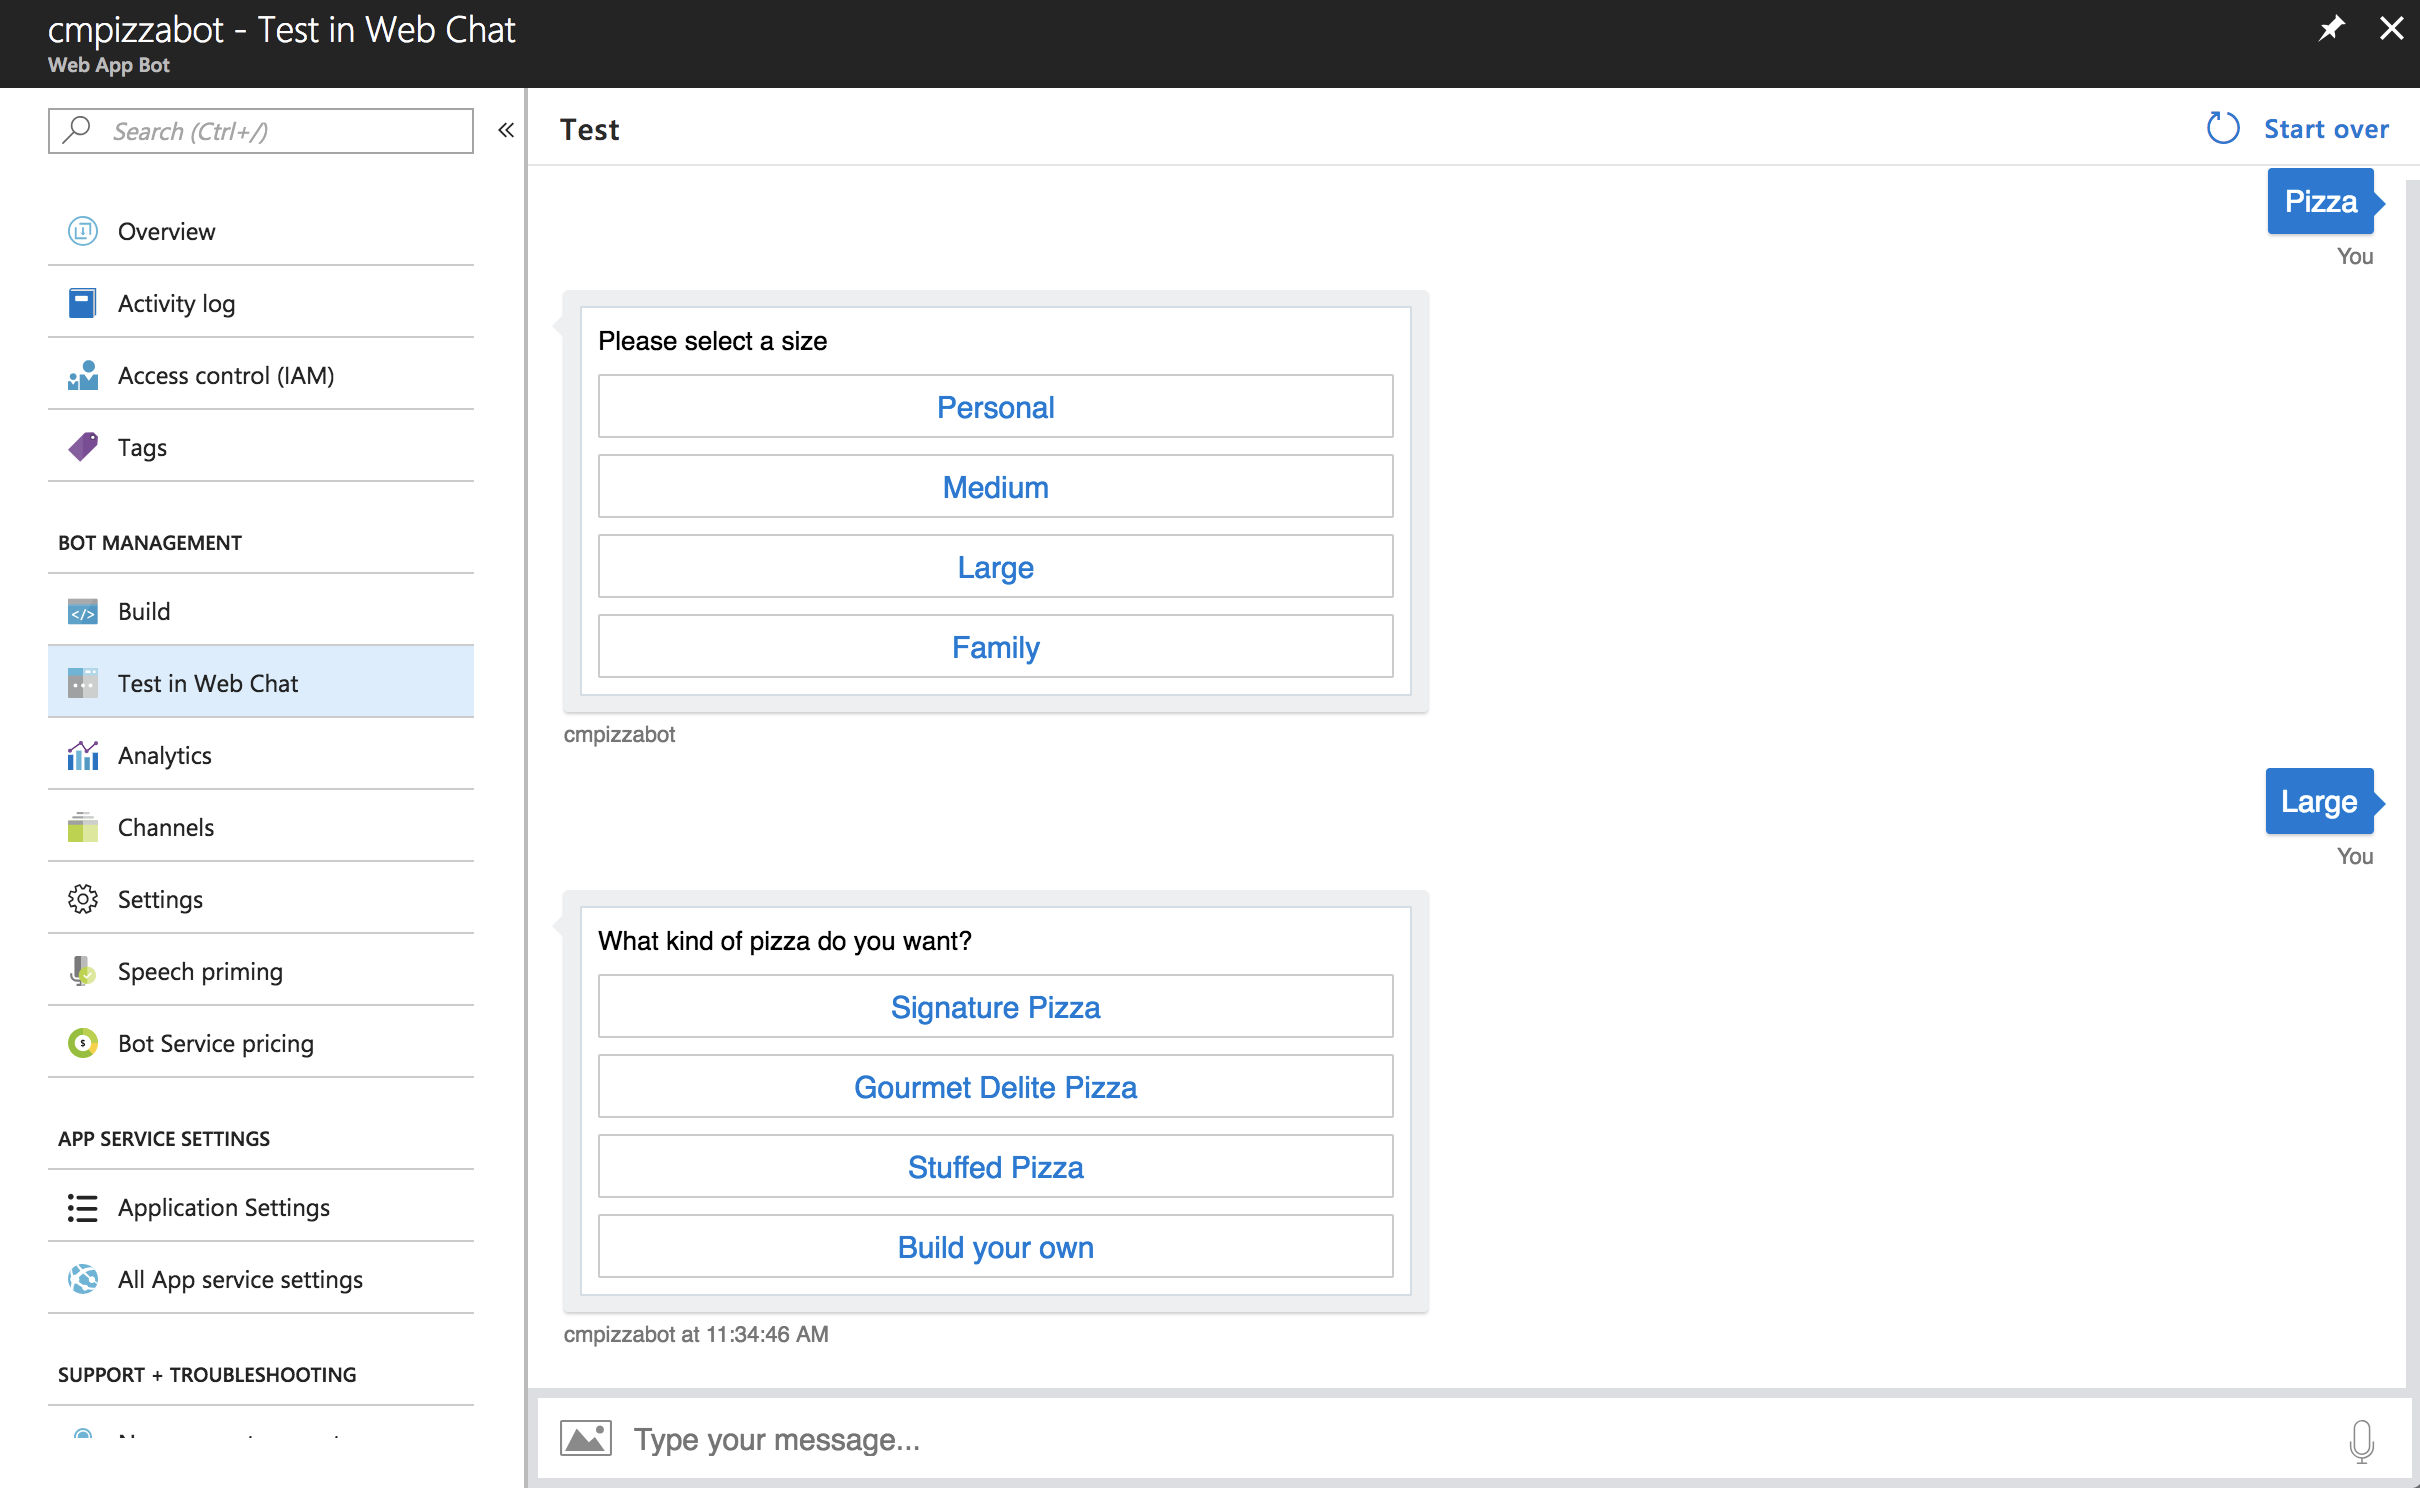
In this screen, you’ll be able to download the code, configure continuous deployment, or test the bot. Click on the “Test in Web Chat” link to interact with the bot. Because I chose the default option, the bot (basically a hello-world style app) doesn’t do anything other than reply back with what I just typed. Look:

Now let’s get rid of the “hello-world” app we just created and do some more interesting things. But before we do that, let’s take a look at an alternative option to create the web app bot in Azure by using the command-line.
In addition to the prerequisites I described above, for this method you need to have the Azure command-line installed and configured.
At the time of writing, bot service is in preview for the command line, so it doesn’t come with the defaults for the CLI—you need to enable the bot service extension in the CLI. To do so, let’s run the following command:
az extension add -n botservice
Let’s create the resource group for the web app bot with the following command:
az group create --name cmpizzabot --location centralus
To create the web app bot, run the following command:
az bot create --resource-group "cmpizzabot" --name "cmpizzabot" --kind "webapp" --description "A Pizza Bot"
Let’s explore the parameters and values we entered here:
By default, Azure CLI will choose a C# template and other types of settings like the virtual machine size, location, and pricing tier that we reviewed in the previous section.
OK, so let’s deploy our pizza bot.
We are all tired of the simple “hello world” examples, so let’s use one from the existing list of examples: a Pizza Bot.
Let’s start by cloning the GitHub repo by running the following command:
git clone https://github.com/christianhxc/azure-pizza-bot.git
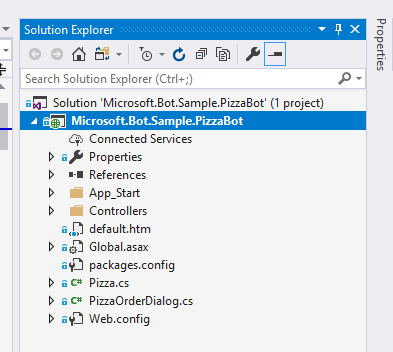
Open the solution with Visual Studio:
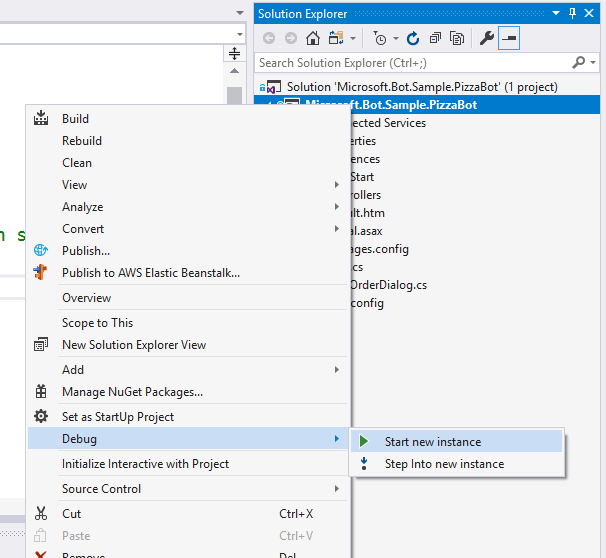
Let’s run the app locally. Right click on the project, then choose “Debug,” and then “Start new instance.”
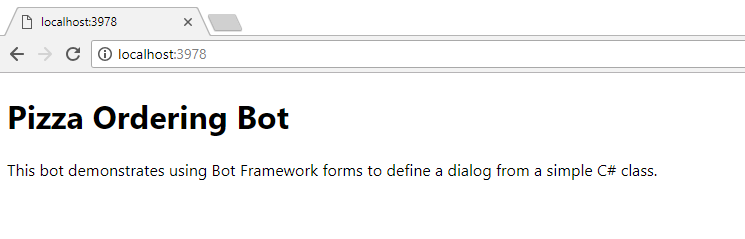
It will start running and you’ll see this:
Now, open the bot emulator you installed before when you were setting the prerequisites. Enter the local URL of the bot. In my case, it’s http://localhost:3978, as you saw in the above image. In order for the emulator to work, you need to enter the URL that Visual Studio created as well as the message’s path. As seen in the screen below.
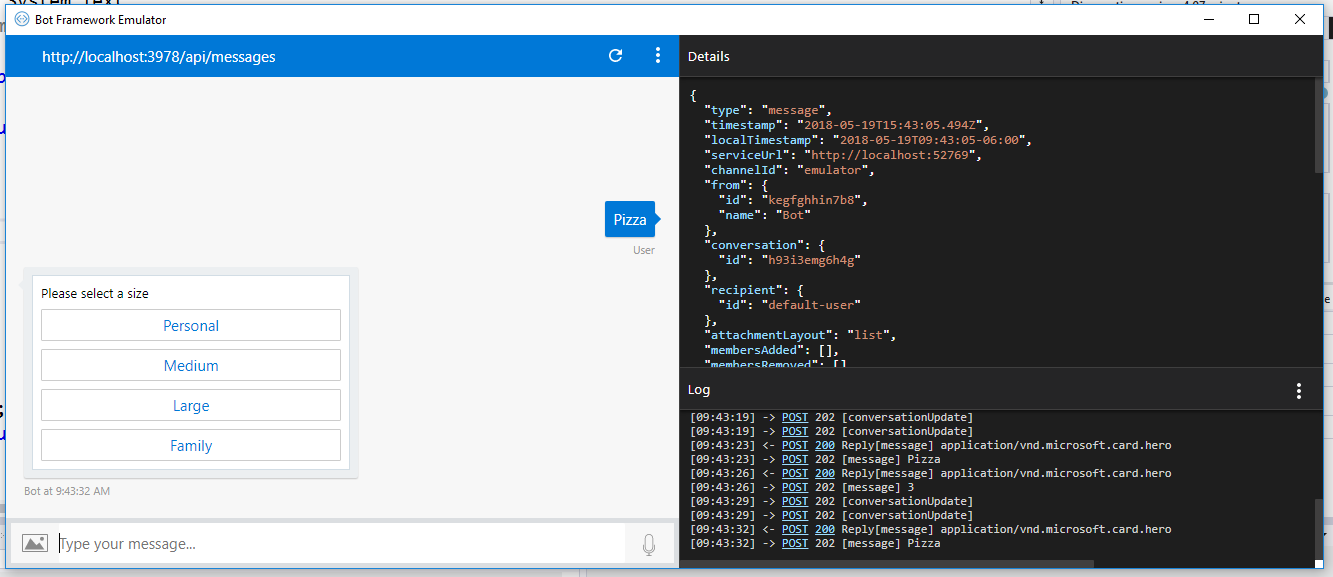
Just enter “pizza” and the bot will reply back with the options configured to select a pizza size.
So how do we deploy this bot to Azure? Well, you could do it using Visual Studio, but that only works if you’re the only one developing. Also, it involves a set of steps that you’ll need to run manually. But what if you could “forget” about that and deploy the changes you just did after pushing changes to the repo? That’s way more helpful, so let’s learn how to do it.
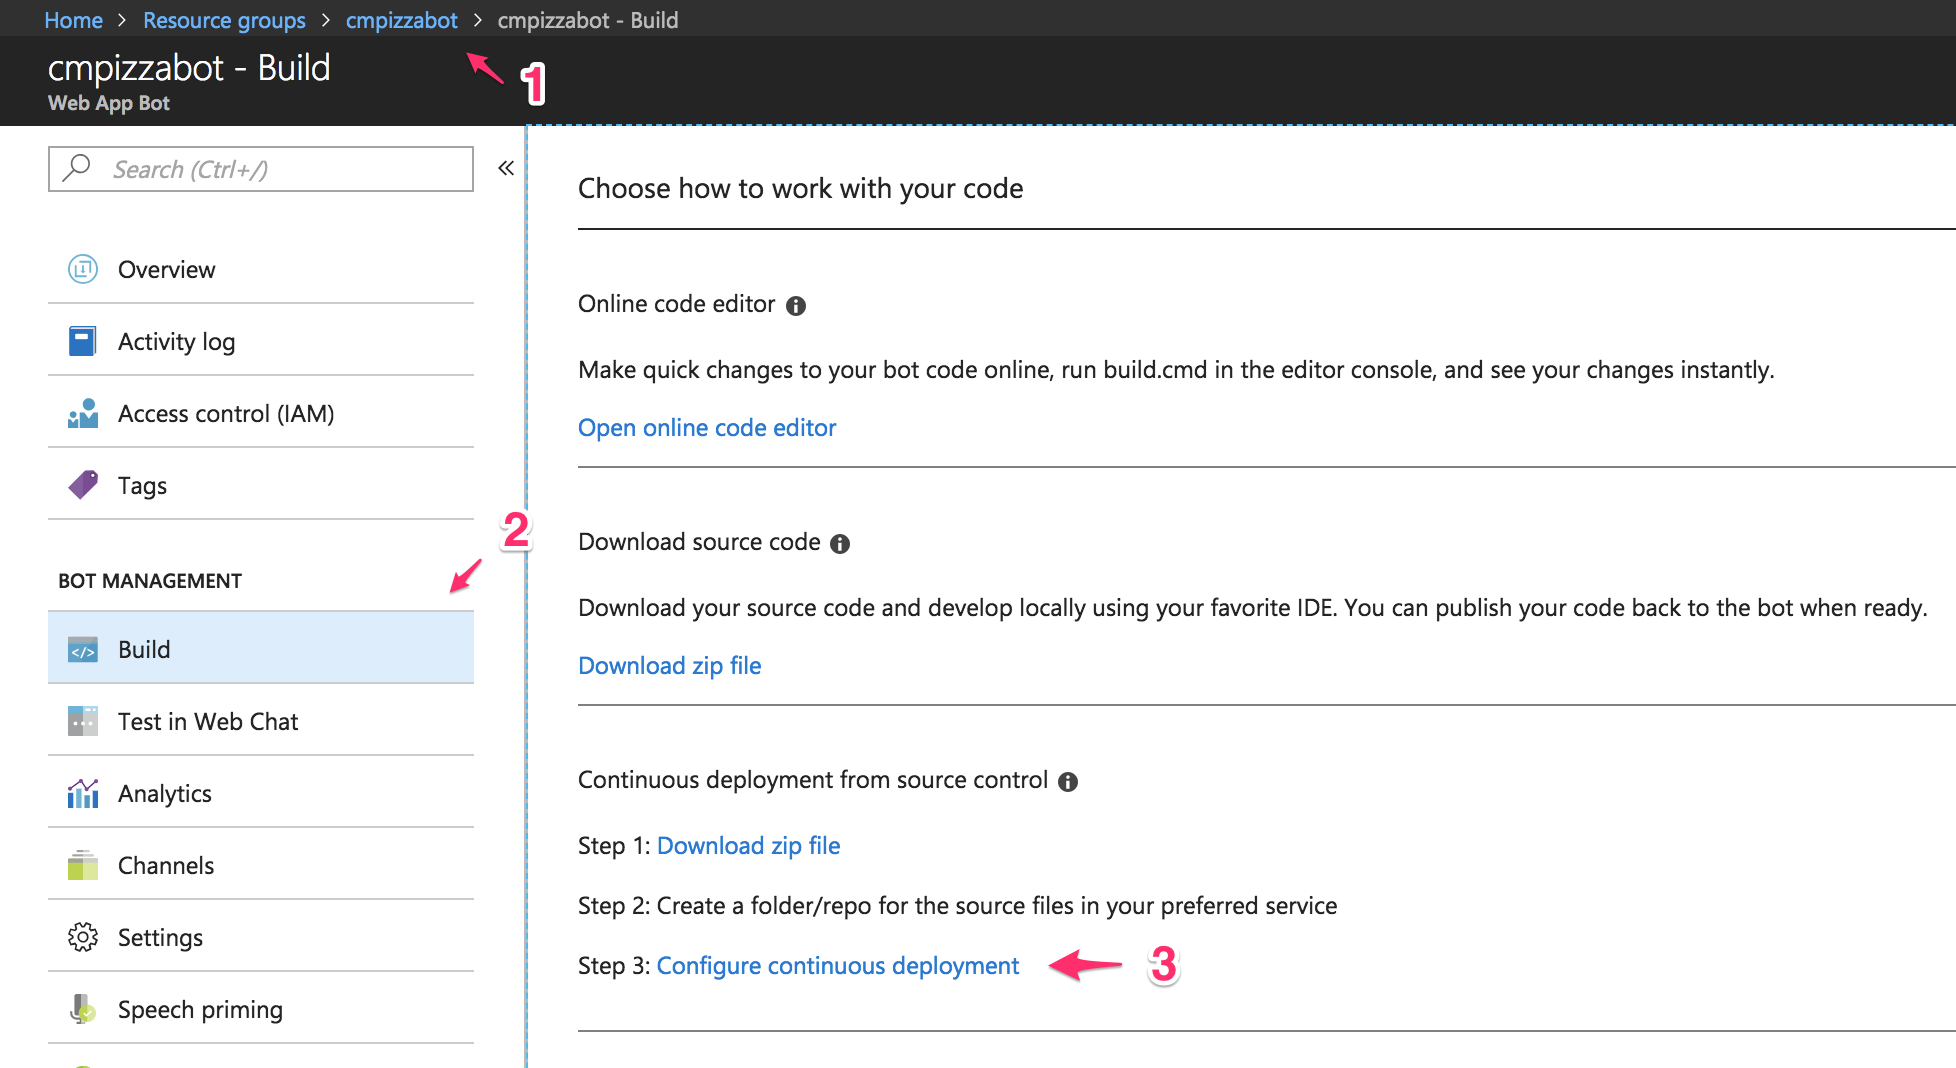
Go back to the Azure portal to the web app bot page (1) where we were testing the bot in the portal. Click on the “Build” link (2) and then click on the “Configure continuous deployment” link (3) as seen in the image below:
We’re going to configure the continuous deployment (CD) process with GitHub. So you’ll need to push the pizza bot to a repository in your GitHub account. In Azure, you’ll need to create a connection with GitHub—if you don’t, this guide won’t work.
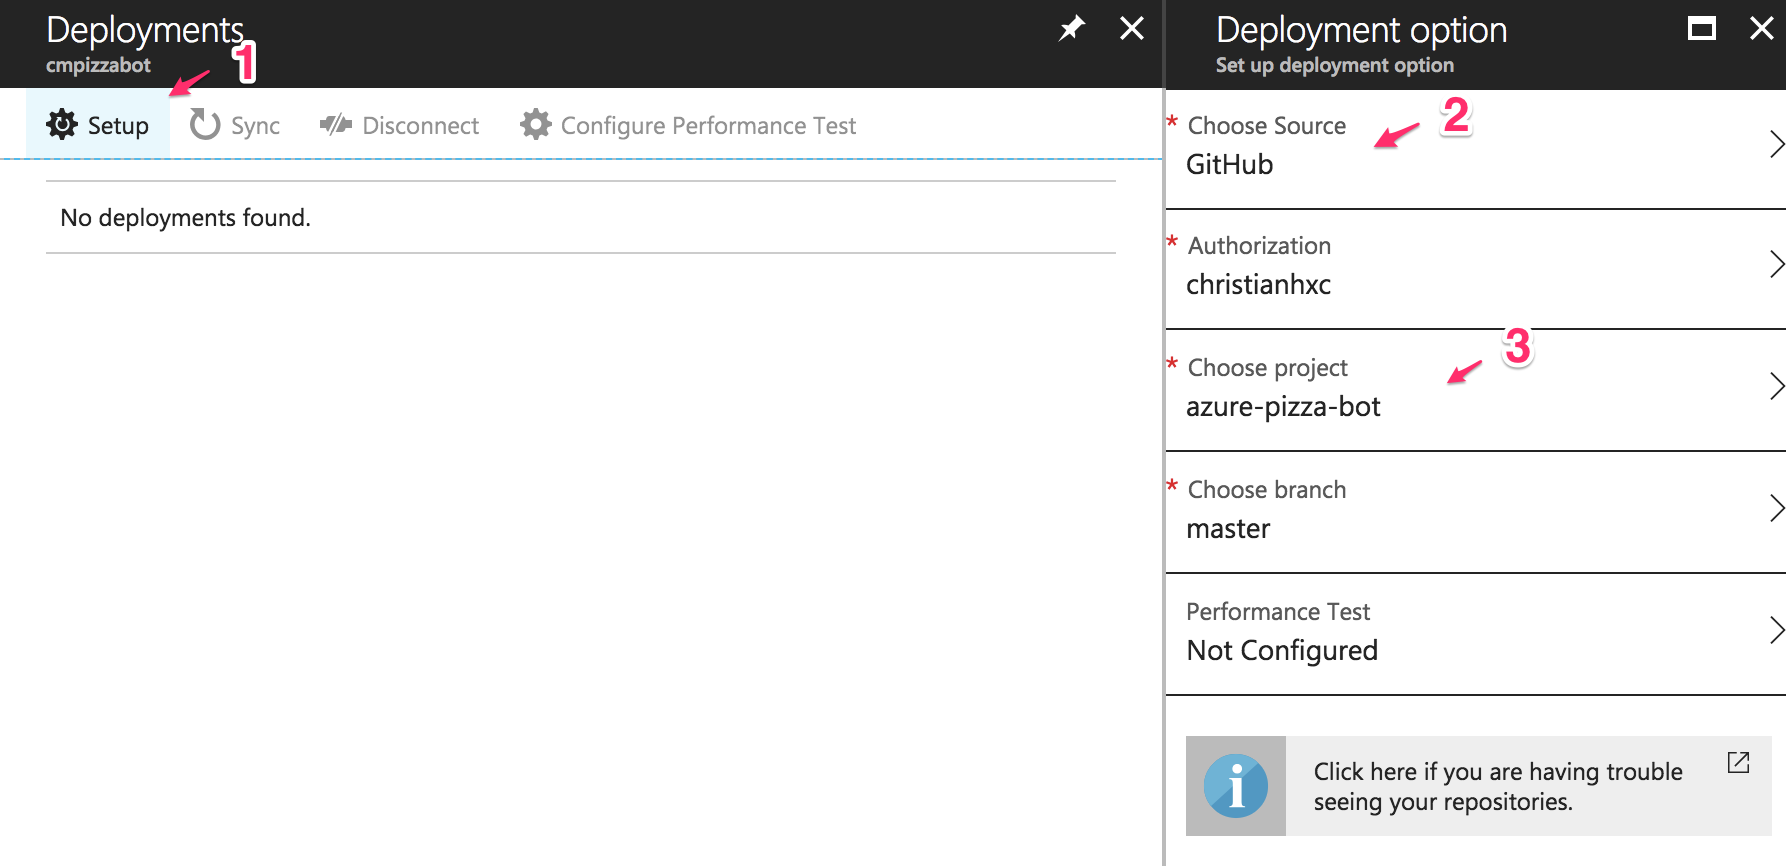
The below screen should appear. Click on the “Setup” link (1) and then choose GitHub (2). You’ll have to configure access by logging in to GitHub and creating the authorization. Choose the repository you just created for the pizza bot code (3).
Click on the blue “OK” button and then wait. It’s a nice opportunity to grab another slice of pizza. A new deployment will be triggered, and you’ll see the new bot running when testing it in the portal:
NOTE: If for some reason after deploying the new source code the bot stops working, make the initial deployment using Visual Studio, and make sure you’ve removed any additional files in the server before doing the deployment.
Next time you do a change in the project and push it to GitHub, Azure will automatically update the web app bot with the latest changes.
And that’s all for now! You can easily create bots using the Microsoft Bot Framework and then host it using Azure Bot Service. You’ll be able to scale the app as necessary to support traffic increases in case the bot gets famous. Azure Bot Service will continue to evolve, so I invite you to keep up to date by reading the official docs.
With APM, server health metrics, and error log integration, improve your application performance with Stackify Retrace. Try your free two week trial today
Stackify's APM tools are used by thousands of .NET, Java, PHP, Node.js, Python, & Ruby developers all over the world.
Explore Retrace's product features to learn more.


