ASP.NET Core is the latest version of ASP.NET. It is built from the ground up using .NET Core, the lightweight, composable new .NET Framework. Some people love it, some don’t. However, this is the future. Microsoft will move forward with .NET Core and in the future, the regular, full-fledged versions will go away.
I like ASP.NET core a lot. It has a ton of new features, is much more streamlined and it is fast, really fast. And, of course, it runs on Azure.
In this post, I’m going to show you how to deploy a simple ASP.NET Core application to Azure. I’ll also show you how to instrument the application with Stackify Retrace, which is an Application Performance Management tool.
In this post, I’m going to use an example application called SimplCommerce. This is an open source e-commerce application, based on ASP.NET Core, hosted on GitHub. Basically, the application consists of a web application and a database.
I’ll guide you through the following steps:
The SimplCommerce application uses a SQL database to store its product catalog and other data. To start using the application, you first need to setup a database. You can do this on your local machine, or somewhere else.
My plan is to deploy the whole application to Azure. When I work in Azure, I’d like to work with a database that runs there as well, as that provides me with confidence that whatever I’m doing runs in Azure SQL and I’m not going to run into any weird differences with an on-premises SQL Server.
To setup up an Azure SQL Database and connect to it, we need to execute the following steps:
Step one is to create an Azure SQL Database to host the SimplCommerce data. I do this by creating new database in the Azure Portal. This takes me through a wizard that lets me create a database, an accompanying Azure SQL Server and configure them.
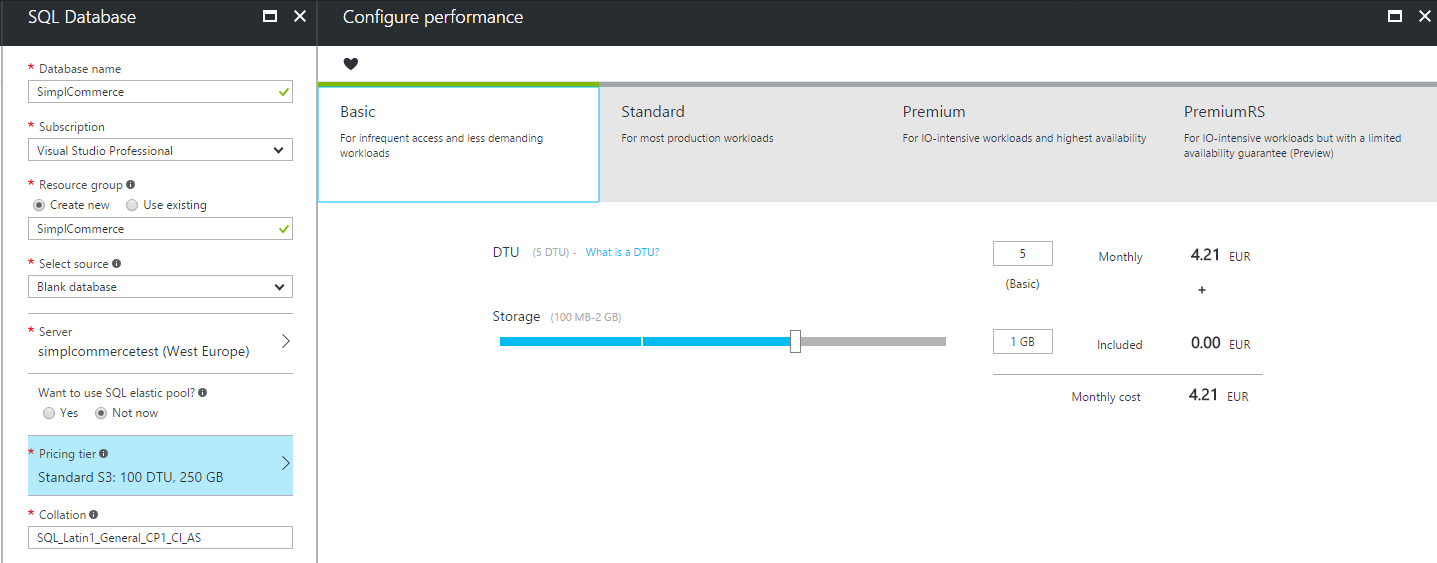
As you can see in the image above, I chose the basic pricing tier, as this is just a test application and won’t need a lot of horsepower.
That’s it, Azure SQL server and database created. Now to connect to it. I like to connect to the Azure SQL Database from my local machine and use it for local development. Although this seems slow because the database is somewhere else than my code, it really is fast enough to work with.
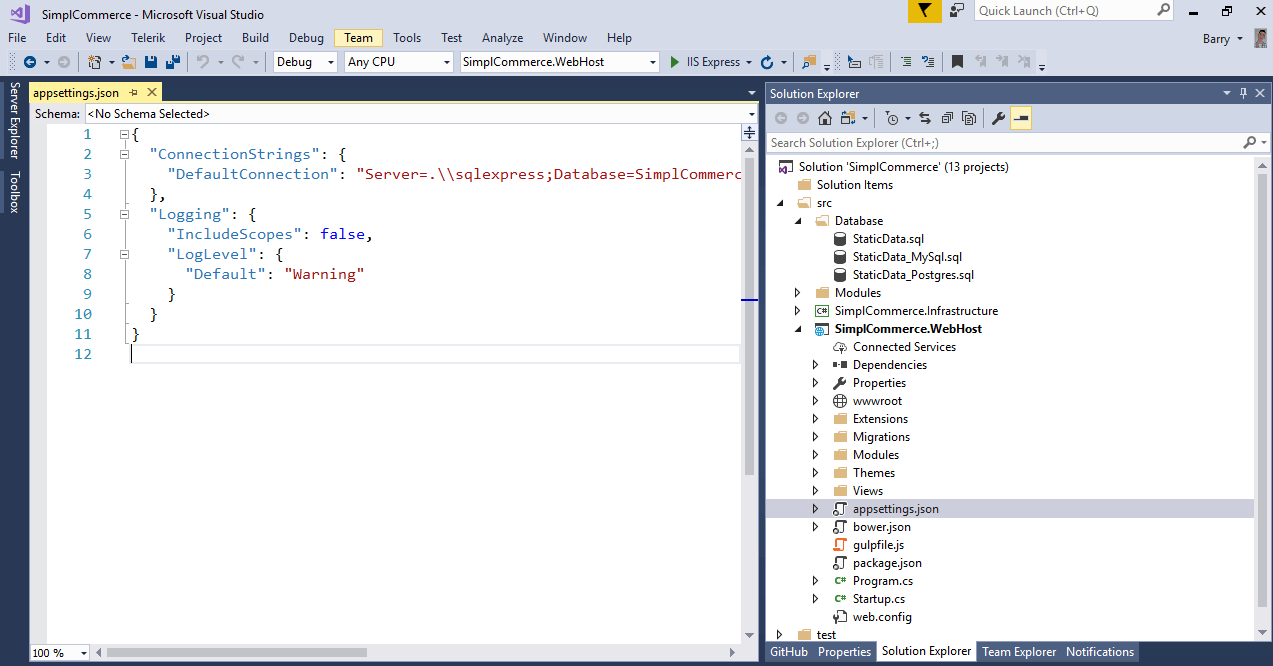
To connect the SimplCommerce application to the database, I need to change its connectionstring. In ASP.NET Core, this is located in the appsettings.json file and underlying file(s). These are .json files, that contain configuration, just like the web.config did in the past.
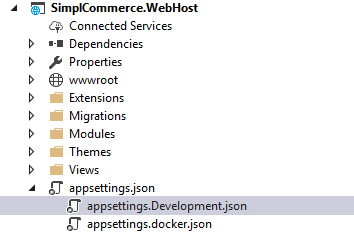
The beauty of these is that they work, based on the environment variable that you set. For instance, you can create an appsettings.development.json file for when the environment variable is development, like this:
The environment variable that I’m talking about is the ASPNETCORE_ENVIRONMENT variable. By default, when you debug in Visual Studio, ASP.NET Core uses this variable with the value ‘development’. When you deploy your application, by default, the variable will have the value ‘production’. You can overwrite this variable in whatever hosting environment you use or even in the settings of the projectfile in Visual Studio.
Anyway, to connect to the database from my local machine, I have put the connectionstring to the database in the appsettings.development.json file.
But that’s not enough. By default, Azure SQL Server has a firewall enabled, blocking all IP-addresses, except addresses within Azure, from accessing the server. Therefore, I need to add my IP-address to the firewall, so that I can reach the server. You can do that from the Azure Portal, in the settings of the Azure SQL Server.
That should do it. However, the database is empty and doesn’t even have any tables in it. On the SimplCommerce GitHub page, you’ll find the steps that you need to execute to fill the database with tables and data. This mainly involves running an Entity Framework migration and running a SQL script to fill the database with data.
Before I deploy the application to Azure, I want to get it ready to send data to Stackify Retrace, so that we can monitor the app and see how it’s doing. This is a very powerful monitoring tool that allows me to monitor things like:
That first one is really important. I want to see the complete performance of the application. This means that I also want to see how my dependencies, like my Azure SQL Database, are performing and how I can improve that.
And the ability to be alerted when an error occurs in the app and drill down into it is of vital importance. Without it, I wouldn’t even know that errors are happening until I hear about it from a user, which is bad. Also, Retrace allows me to dive deeply into the error so that I can trace back what caused it and fix it.
All of this is really simple to set up.
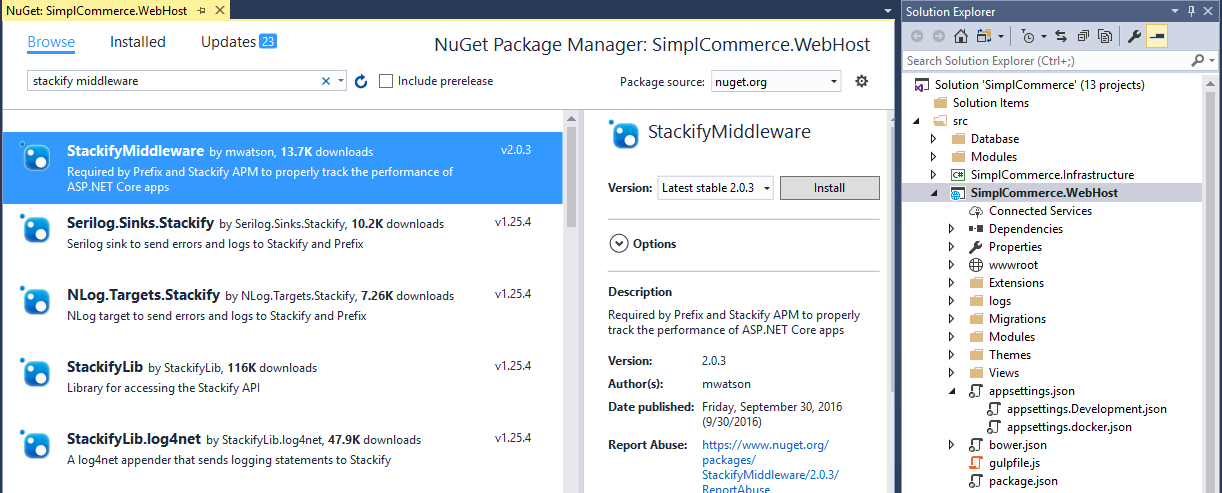
First, I add a nugget package called StackifyMiddleware which you can do in Visual Studio like in the image below or by typing the following into the package manager console window: Install-Package StackifyMiddleware
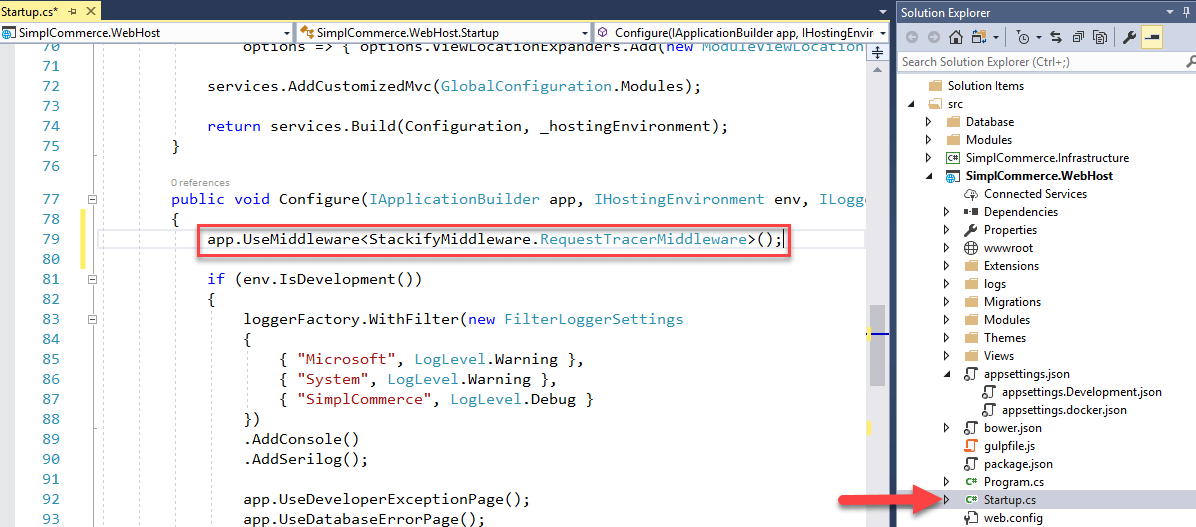
After that, you need to activate the Stackify middleware, which you can do in the class of the application. Here, in the Configure method, you need to type the line app.UseMiddleware<StackifyMiddleware.RequestTracerMiddleware>(); Be sure to insert this line before the app.UseMvc statement.
And that’s it. Now, we are ready to deploy the application to Azure.
I want this application to run in Azure. To do that, I will create an Azure Web App and deploy the application to it. ASP.NET Core applications run in Azure Web Apps, just like any other applications. Bear in mind though that older ASP.NET Core applications (based on the project.json format), will not be supported in Azure past the end of May 2017.
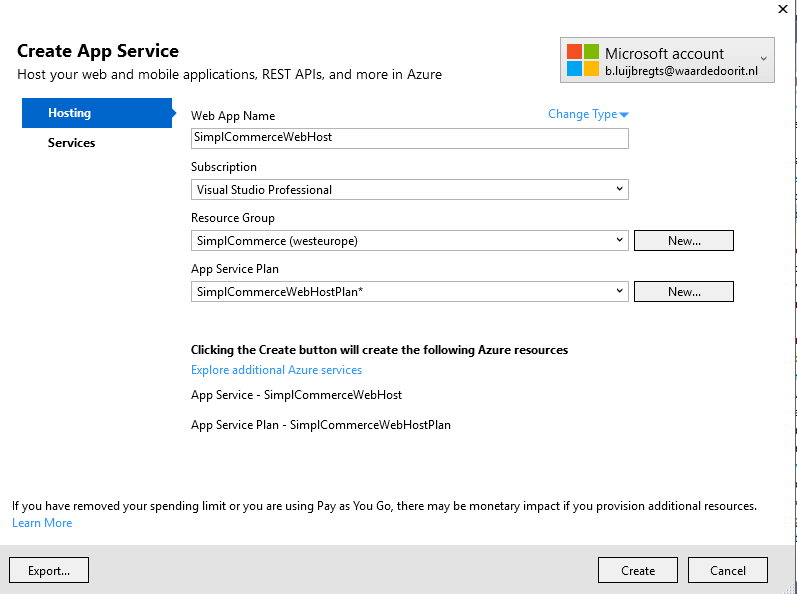
I will deploy the application to Azure using Visual Studio. This is really simple. You just right-click the project file of the ASP.NET App and choose publish. After that, a wizard like this appears that guides you through the process. It will even create a new Web App for you if you didn’t have one already.
After this has completed, I have a Web App, with the application running in it. But it is not working yet.
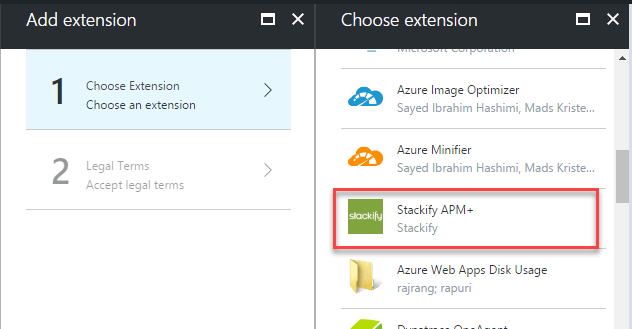
First of all, I need to install an extension in order for Stackify Retrace to capture the data of the Web App. I can do this from the Azure Portal. Here, you can choose the extensions menu from the options of the Web App and choose the Stackify APM+ extension and install it. This will enable Stackify to capture metrics of the resources that run the Web App, like CPU, Memory and so on.
Make sure to restart the Web App after installing this extension.
The next thing that I need to do is to configure the Web App.
Remember that I’ve put the connectionstring to the database in the appsettings.development.json file? Because of that, the application can’t connect to the database, because by default, it doesn’t use the .development.json file when it is deployed. Therefore, I need to put a connectionstring value in the ApplicationSettings of the Web App. This will override the configuration setting for the database connection, allowing the application to connect to the database.

Also, I need to insert the Stackify.ApiKey and its value into the application settings. This will tell Stackify that this Web App belongs to my account and allows me to see the data for the app. You can find the value of the key in your Stackify account panel. If you don’t have an account yet, register for a 14 day trial.
It is also recommended to set the Stackify.AppName and Stackify.Environment properties. These will show up in the Stackify portal and will help you to identify your application.
You can read the full instruction on setting up Stackify Retrace in an Azure App Services here.
With Stackify Retrace running in the background, I can see some interesting information about the application. Stackify is a SaaS product, so you can see your data when you log in to https://stackify.com. Here, I have access to all sorts of dashboards and metrics, which I can customize to my heart’s content.
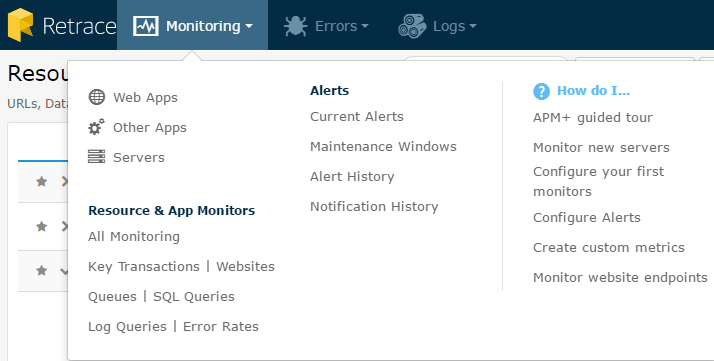
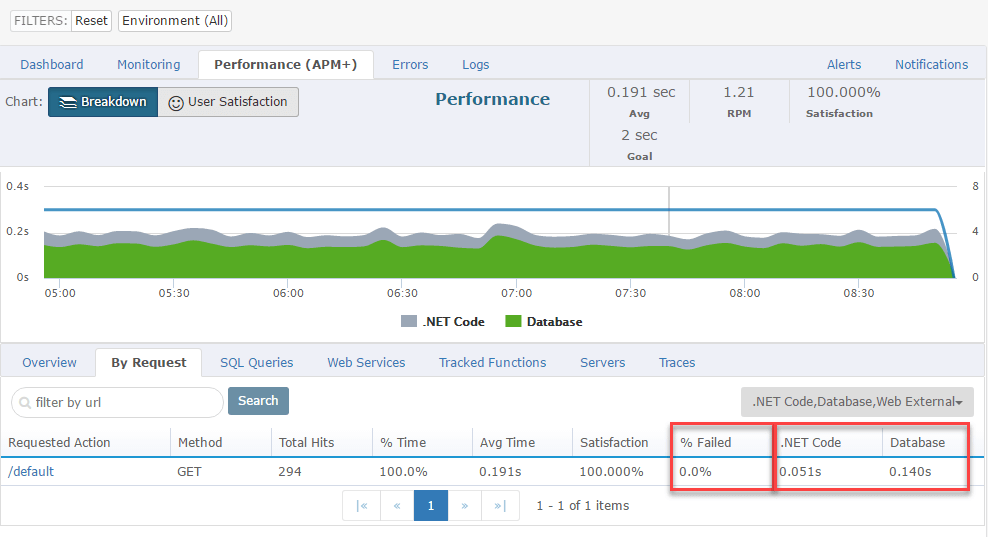
One of my favorite dashboards is the Performance dashboard. Here, I can see very easily what the performance of my app is and where my performance comes from. Retrace can tell what my dependencies are, and look into those. In this case, I’m calling into an Azure SQL Database, which, according to the graph, takes the most time. I can also see very quickly how many failed requests there are in the current time period.
Next to that, the error overview is very helpful. I’ve introduced an error in the application and let it run for a while to be able to show you this overview. This shows the amount of errors that are happening and what they are, including a short stacktrace.
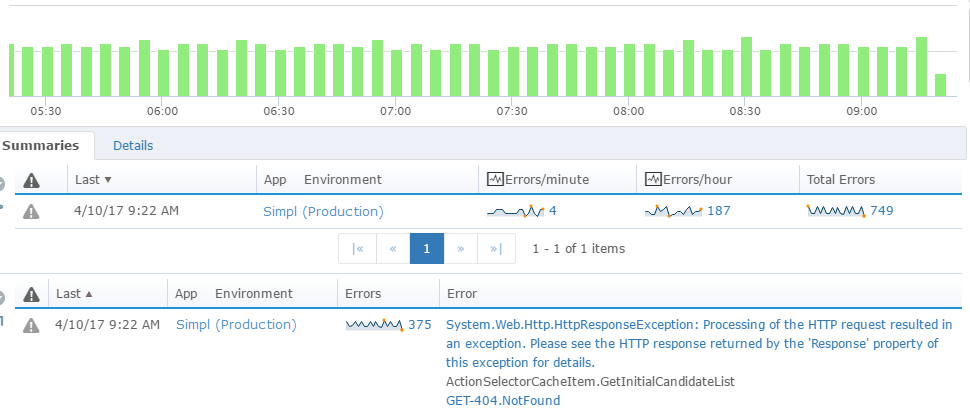
You can drill down into the stacktrace to see everything about that error, including everything about the HTTP request, like the HTTP headers.

This is very powerful and allows you to get to the bottom of an error quickly so that you can resolve it.
Start your own free trial of Retrace: Start 14 Day Free Trial
Stackify's APM tools are used by thousands of .NET, Java, PHP, Node.js, Python, & Ruby developers all over the world.
Explore Retrace's product features to learn more.
If you would like to be a guest contributor to the Stackify blog please reach out to [email protected]