
It’s the night before a big deadline, and just before you press the button to deploy, you notice a small but important bug! You open a terminal, type in the command to run the code—and all you see is a page of errors. It’s these palm-sweating moments that make us wonder whether we made the correct career decision. Configuring our systems and keeping them working is a struggle most of us deal with regularly. Ruby Version Manager (RVM) attempts to solve this problem.

Ruby Version Manager (RVM) creates an isolated installation of Ruby in your $HOME directory. This concept makes it easy to run multiple versions of Ruby at the same time, and removing it is as easy as deleting one folder. In the looming deadline scenario, it’s easy to check which version you’re using, remove it, and reinstall it with the knowledge that it’s isolated from the rest of the system.
This post covers in detail how to install RVM from scratch, along with the latest version of Ruby for a single user on Linux, macOS, and Windows Subsystem for Linux. We also go in depth on how to install and manage different versions of Ruby. These instructions are designed for a single user wanting an isolated installation in their $HOME directory. This is suitable for individual users, but not for system administrators requiring multiple users to access one installation or wanting to use RVM to deploy production software.
Before installing RVM, there are three libraries you need to install:
Most operating systems will come with these packages pre-installed, so check first before downloading.
Throughout this guide, I’ll be referencing the terminal. For most operating systems, that’s the name of the application that lets you enter commands that are interpreted by the system. acOS has a terminal emulator, Linux has a console, and Windows also has a console.
RVM cryptographically signs each release, which requires validation on download. Configure the corresponding keys RVM requires to verify the signature by running the following in the terminal:
gpg --keyserver hkp://pool.sks-keyservers.net --recv-keys 409B6B1796C275462A1703113804BB82D39DC0E3 7D2BAF1CF37B13E2069D6956105BD0E739499BDB
When run, this command will add the given keys to your local key store and enable verification of the RVM installation and display the following output:
gpg: directory '/Users/peter.grainger/.gnupg' created
gpg: keybox '/Users/peter.grainger/.gnupg/pubring.kbx' created
gpg: key 105BD0E739499BDB: 5 signatures not checked due to missing keys
gpg: /Users/peter.grainger/.gnupg/trustdb.gpg: trustdb created
gpg: key 105BD0E739499BDB: public key "Piotr Kuczynski <[email protected]>" imported
gpg: key 3804BB82D39DC0E3: 105 signatures not checked due to missing keys
gpg: key 3804BB82D39DC0E3: public key "Michal Papis (RVM signing) <[email protected]>" imported
gpg: no ultimately trusted keys found
gpg: Total number processed: 2
gpg: imported: 2
The above output shows that two public keys have been added to a local store. When RVM is installed, the release will be checked against these keys to verify the file came from the correct source.
Installation has slightly different steps for Ubuntu compared to other operating systems. Windows is only supported if using the Windows Subsystem for Linux and uses the same instructions as for macOS and Linux (excluding Ubuntu).
Ubuntu has a dedicated package available to install through the apt-get package manager.
To allow the addition of the Personal Package Archives (PPA), install the Ubuntu package software-properties-common.
Open a terminal, and run the following:
sudo apt-get update
sudo apt-get install -y software-properties-common
The above will update the apt-get package manager with the latest references, then install the software-properties-common library, which allows the addition of the RVM PPA.
To verify if the previous command was successful, run the following command:
dpkg-query -Wf'${Status}' software-properties-common
This command queries the package manager to verify the given package was installed correctly. If the above command was successful, the terminal will display:
install ok installed
Add the PPA specifically for RVM using the following command. This will add the repository containing the RVM binary and allow installation.
sudo apt-add-repository -y ppa:rael-gc/rvm
This command will add the ppa:rael-gc/rvm repository to the internal list Ubuntu holds to enable installation of RVM.
Update the installer and install RVM by entering the following into the terminal:
sudo apt-get install -y rvm
This command installs the RVM application and gives the application the correct permissions. The -y skips a confirmation prompt on install.
All other operating systems are configured by following one step that downloads a script using curl, which it then executes using Bash. Don’t use root when running this script; it will install RVM as the root user, and it won’t work correctly for any other user. Enter the following into the terminal:
\curl -sSL https://get.rvm.io | bash
The above command first downloads a shell script, then pipes that shell script to Bash. The script is executed, and the application along with any configuration is downloaded and configured on your machine. No more input is required for the installation.
To start using RVM for the first time, run the following in the terminal. This only needs to be run once after installation.
source /etc/profile.d/rvm.sh
This command will execute the rvm.sh script and allow you to run RVM in the current terminal.
To make sure RVM is working correctly, instruct RVM to return the currently installed version by entering the following into the terminal:
rvm --version
This command will show the current version of RVM installed on the operating system. If the installation was successful, the output should be similar to the following, but may display a different version:
rvm 1.29.8 (manual) by Michal Papis, Piotr Kuczynski, Wayne E. Seguin [https://rvm.io]
If you’re already running your application in production, then use the version of Ruby that environment is running. Running a different version of Ruby locally than what is run in production may cause you unintended consequences. APIs are deprecated between versions of Ruby, and some methods behave differently or unexpectedly. In Ruby 1.8, the system method proc returns a lambda; in Ruby 1.9, this is fixed to return a proc. Although they have similar functionality, there are some significant differences. Edge case issues like this are very frustrating and cost valuable time finding the solution.
If you aren’t sure which version you’re using, a tool like Retrace can help work that out. You could also find out how the server is configured and how the application is deployed to work out which version you should use.
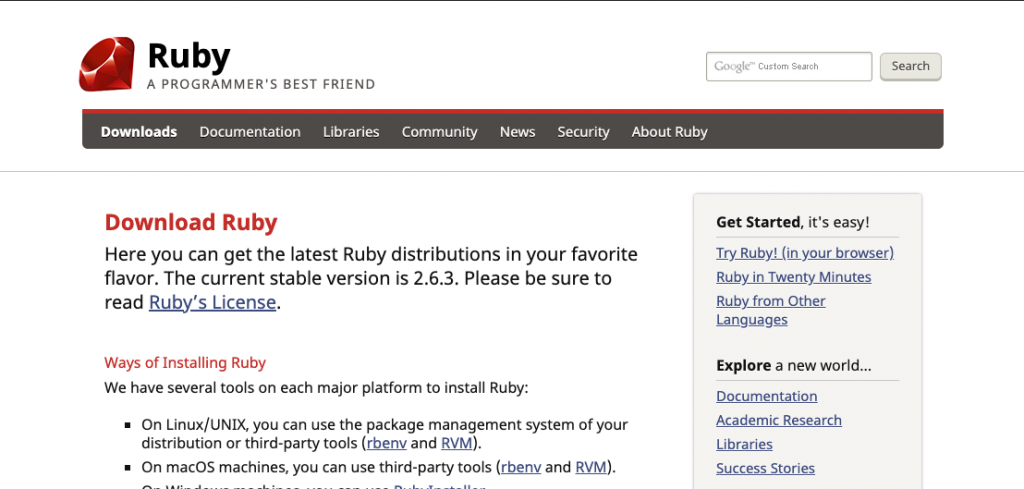
If you aren’t restricted to a specific version of Ruby, it’s best to choose the latest stable one. The easiest way to get this information is to visit the official Ruby website. See the screenshot below, taken from the website, stating the current stable version is 2.6.3. This site also contains a list of the version numbers of all Ruby releases.
To install a version of Ruby using RVM, use the command rvm install <version number>. So to install version 2.6.3 of Ruby enter the following into the terminal:
rvm install 2.6.3
Depending on your operating system, the above command may use precompiled binaries or compile the Ruby binaries from source. If compiling from source, this may take a long time to complete.
To check this installation worked correctly, run the following in the terminal:
rvm list
This command will list all of the installed versions of Ruby managed by RVM. The output of this command will be similar to the output below:
=* ruby-2.6.3 [ x86_64 ]
# => - current
# =* - current && default
# * - default
This output shows every version of Ruby that RVM manages. Only one version of Ruby has been installed, and that version is the default and current version. If you close the terminal or restart your machine, the current version of Ruby will be 2.6.3.
To verify the current version of Ruby, run the following:
ruby -v
This will show the current version of Ruby running in the terminal. The output should be similar to this:
ruby 2.6.3p62 (2019-04-16 revision 67580) [x86_64-darwin18]
Installing a gem using RVM is the same as when installing through a system installation of Ruby. The following command will install the pry gem:
gem install pry
If installation of the pry gem is successful, the last line of the output will be what follows:
Done installing documentation for method_source, coderay, pry after 3 seconds
3 gems installed
This output shows that pry was installed along with two dependencies, coderay and method_source. These dependencies are required for pry to function.
To test the gem was successfully installed, run the following in the terminal:
pry
The above command will start the pry REPL and verify the installation of the gem was successful.
If you’re working on more than one project and each project uses a different version of Ruby, you may need more than one version of Ruby installed. To install an old version of Ruby using RVM, enter this into the terminal:
rvm install 2.5
This command will install version 2.5 of Ruby, but will not set it as the current version being used. The default current version of Ruby will remain as 2.6.3.
To see the current version of Ruby, enter the following into the terminal:
rvm list
This command will now output two versions of Ruby, 2.5.5 and 2.6.3, but will have 2.6.3 as the current and default version shown in the following output:
ruby-2.5.5 [ x86_64 ]
=* ruby-2.6.3 [ x86_64 ]
# => - current
# =* - current && default
# * - default
To change the version of Ruby you’re using temporarily, for as long as you have your terminal open, use the following command:
rmv use 2.5.5
The above command will set the current working version of Ruby to 2.5.5. Running the command rvm list in the terminal will output the below:
=> ruby-2.5.5 [ x86_64 ]
* ruby-2.6.3 [ x86_64 ]
# => - current
# =* - current && default
# * - default
The output shows that ruby-2.5.5 is the current version, indicated by the symbol =>, and ruby-2.6.3 is the default version, indicated by the symbol *.
This can be verified by typing ruby -v in the terminal, which will output this:
ruby 2.5.5p157 (2019-03-15 revision 67260) [x86_64-darwin18]
This output shows that the current version of Ruby is 2.5.5.
Open a new terminal and enter the command ruby -v. This will output the following:
ruby 2.6.3p62 (2019-04-16 revision 67580) [x86_64-darwin18]
This output shows that version 2.6.3 is the default version RVM and will be used when starting a new terminal session.
To set version 2.6.3 as the default Ruby version across all sessions, enter the following in the terminal:
rvm use 2.6.3 --default
This command will set the default version of ruby to 2.6.3.
To verify this works across all sessions, open a new terminal and type ruby -v. The output will be as follows:
ruby 2.6.3p62 (2019-04-16 revision 67580) [x86_64-darwin18]
To uninstall any version of Ruby you previously installed using RVM, use this command:
rvm uninstall 2.6.3
This command will uninstall version 2.6.3 of Ruby. Running rvm list again will result in the output below:
ruby-2.5.5 [ x86_64 ]
# Default ruby not set. Try 'rvm alias create default <ruby>'.
# => - current
# =* - current && default
# * - default
The output shows that now only version 2.5.5 of Ruby is installed.Version 2.6.3 has been uninstalled and no longer appears in the list.
But what if you have multiple applications with different versions of Ruby for each? How do you keep track of which version to use and remember to change to the correct version? RVM has the solution in the form of a file named .ruby_version. This file tells RVM to automatically change the current Ruby version to the one defined in the file.
To make a .ruby-version file, open your terminal in the root of your Ruby application directory and enter the following:
echo '2.6.2' > .ruby-version
The above command will create a file called .ruby-version with the contents 2.6.2. Each time you navigate to that application folder, the version of Ruby will automatically change to 2.6.2.
If that version isn’t installed, then the output from the terminal will be as follows:
Required ruby-2.6.2 is not installed.
To install do: ‘rvm install “ruby-2.6.2″‘
Now that you have RVM installed and are able to switch between different versions, it should remove some of the headache when configuring your system. However, this is just the tip of the iceberg. RVM is a powerful tool that can be used locally and also deployed to your production server. I would encourage you to head over to the official RVM website with information about the powerful integrations with Capistrano, Heroku, Jenkins, and many more. For the full list of integrations, see the integrations page on rvm.io.
I can’t promise RVM will make your software releases less stressful, but it will make setting up your machine a lot easier.

Also read-https://stackify.com/kc-based-stackify-is-growing-fast-hiring-too-2/
Stackify's APM tools are used by thousands of .NET, Java, PHP, Node.js, Python, & Ruby developers all over the world.
Explore Retrace's product features to learn more.


