
Let’s begin with a little thought experiment. Imagine you’re responsible for the next release of your company’s flagship product, and today is the big day: you’re about to give a demo presentation for all the big shots in the company. The CTO is obviously there, since she’s your boss. The CEO is there as well, along with the VP of Marketing and some of the company’s investors. So, that’s your boss, your boss’s boss, and the moneymakers. Nothing like a little bit of pressure, eh?
As soon as everyone’s in their seats, you start the presentation. You fire up your browser, paste the URL into the address bar, press enter, and the magic happens. The new version of the product is there for all to see, the result of months of hard work and dedication.
But the presentation starts off on the wrong foot. Not because the app is ugly or doesn’t work properly; on the contrary, it looks very nice and works like a charm.
You just wish it performed like a charm, too.
Some parts of the application just aren’t fast enough. Your hands start shaking. You start sweating profusely and talking with an insecure, higher-pitched voice. Nobody is happy, including (and especially) you. But you can at least breathe a sigh of relief when you’re able to bring the presentation to an end.

After quite a bit of digging, you and your team find out the problem was none other than SQL. Not any ordinary SQL, mind you, but queries generated by your ORM, NHibernate.
What could you have done differently? How can you prevent such a problem from ever happening again? Well, you should definitely employ the quality assurance techniques and tools you have at your disposal. For instance, do you have a solid testing strategy that includes a great set of both manual and automated tests?
But here comes the sad reality: sometimes things simply go wrong despite your best efforts. You can use all the preparation you want (and you should), but in the end, real life gets you. When you find yourself in a situation like the one described above, there is something that might help you: a profiler. More specifically, an NHibernate profiler.
That’s what this post is about. We’ll show you how to get started right away with an NHibernate framework profiler, and we’re going to begin by creating a demo application to profile.
Stackify offers a free tool called Prefix that might be just what you need to fulfill your profiling needs. Prefix performs live and provides easy profiling for your applications. Read on for a quick tutorial on how to install Prefix and put it to use.
We’ll start by creating a demo application, so we can profile it using Prefix. Our demo app for this post will be a simple contact list that will allow us to create, edit, and delete contacts consisting of name, e-mail, and phone number. Let’s get started!
First, open Visual Studio. If you don’t have Visual Studio installed, download the free Visual Studio 2017 Community here.
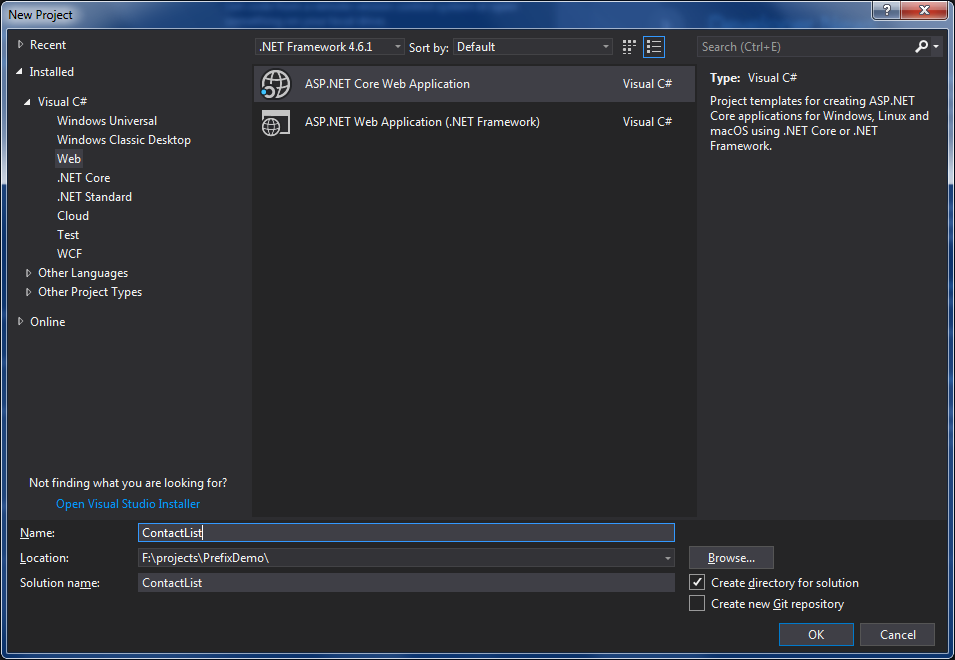
After Visual Studio is up and running, go to “File”, “New…”, and then “Project”. A new window will show up. On the panel on its left side, click on “Web” under “Visual C#”. Then, of the options shown on the panel in the center, choose “ASP.NET Web Application (.NET Framework).” Finally, set a name and location for the application, like in the image below:
After hitting the OK button, you’ll see a window like the one in the image below:
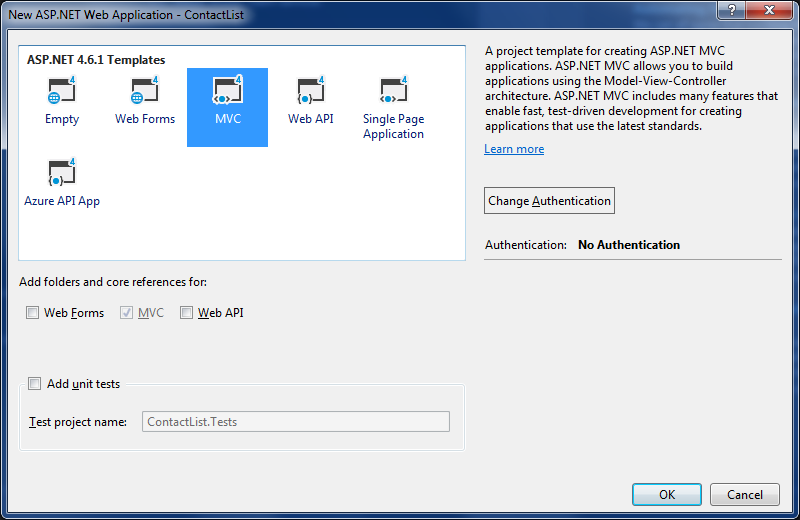
ASP.NET offers you a lot of templates to choose from. Like in the image, select the “MVC” template and click on OK. After doing that, you’ll have a full VS solution ready for you. Time to write some code!
On the Solution Explorer window, right-click on the “Models” folder and then go to “Add” and finally “Class.” Visual Studio will prompt you by asking for a name for the new class. Type “Contact” in and click on Add. Visual Studio will create and open the class for you. Just replace all of its content with the following code:
using System;
namespace ContactList.Models
{
    public class Contact
    {
        public virtual Guid Id { get; set; }
        public virtual string Name { get; set; }
        public virtual string Email { get; set; }
        public virtual string PhoneNumber { get; set; }
    }
}
That’s it for the model. As you can see, it’s just a POCO (Plain Old C# Object) containing the properties that NHibernate will map to columns in a table.
Speaking of which…
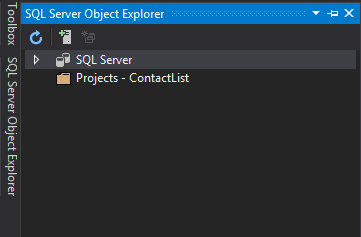
The next step is to create a database to where our contacts will be stored. For that, we’re going to use SQL Server’s LocalDB. In Visual Studio, go to “View” and then “SQL Server Object Explorer.” You should see a panel like this:
Expand the SQL Server node and after that, expand the MSSQLLocalDB node. Right-click on “Databases” and then click on “Add New Database.” Visual Studio will then prompt you for a name and location for the database. You can change the location or leave it as the default. Name the database as “ContactListDb” and confirm.
After doing that, you’ll see “ContactListDb” listed as a node under the Databases folder. Give it a right-click and then go to “New Query…”. You’ll then see the following screen:
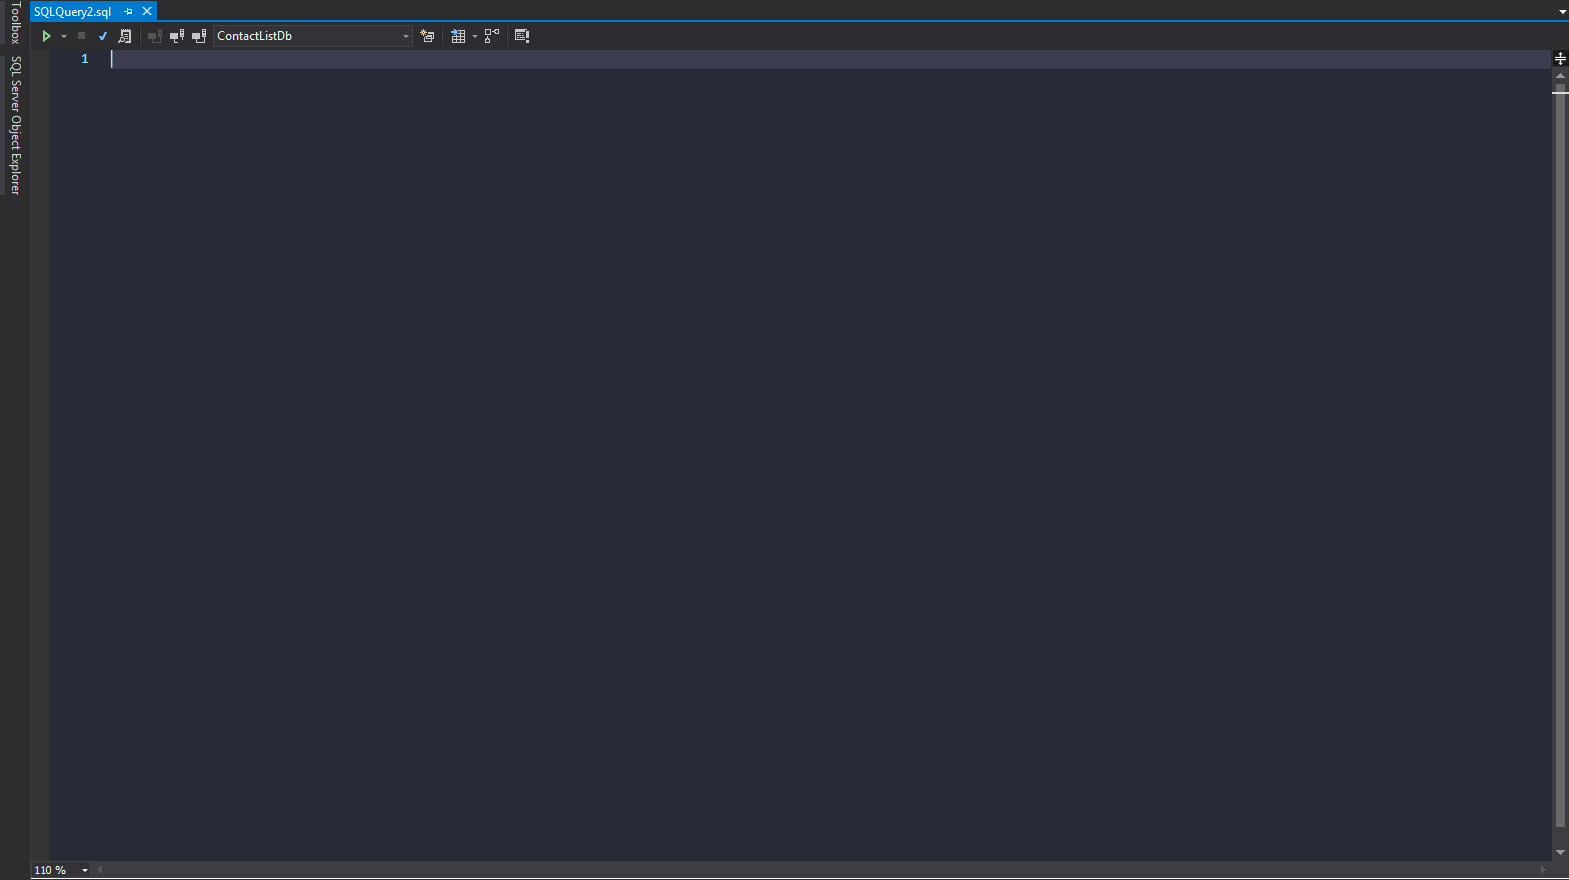
Copy and paste the following command on the screen above:
create table Contact ([Id] uniqueidentifier, [Name] varchar(100), [Email] varchar(100), [PhoneNumber] varchar(100), Primary Key(Id))
After that, click on the “Execute” button (or use the Ctrl + Shift + E shortcut). If everything goes well, you should see a message stating that the command was successfully executed. If you go back to SQL Server Object Explorer and click on “Refresh,” your newly created table should be listed under the ContactListDb database.
All right then: now we have a model class and also a table in our database. Time to bridge the gap between the two. NHibernate to the rescue!
Let’s start out by installing NHibernate itself. There’s nothing stopping you from downloading a .zip package and proceeding with a more manual installation process. But the easiest way is to just use Nuget. In the Nuget package manager console, run the following command:
Install-Package NHibernate
If everything goes well, you should see a successful installation message within seconds. With NHibernate installed, it’s now time to configure and put it to work.
Go to Solution Explorer. Right-click the Models folder, go to “Add” and then “New Item…”. You should see the following screen:
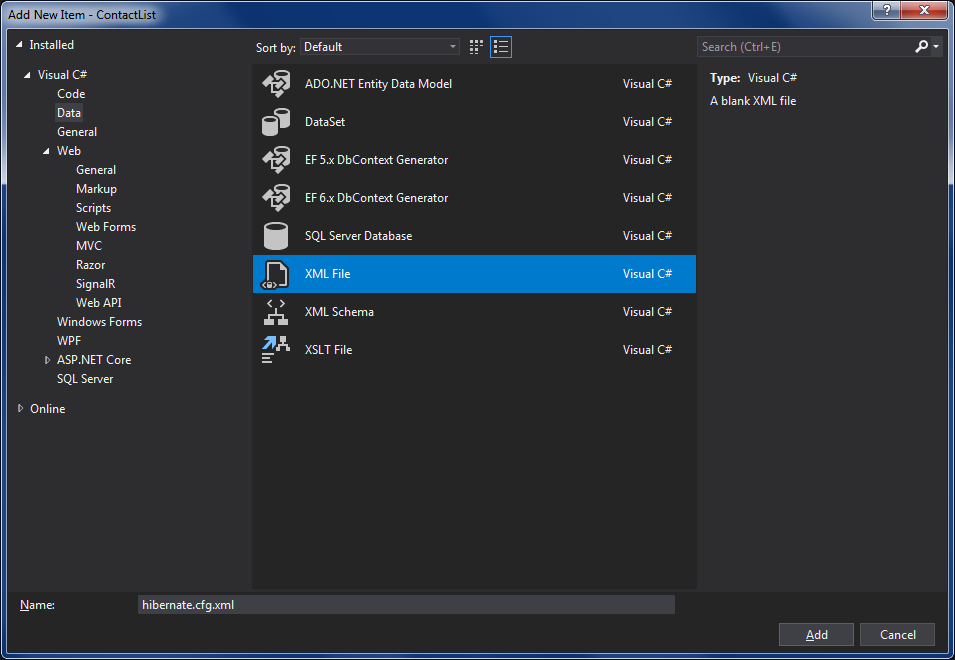
Like in the image above, you must click on “Data” under “Visual C#.” In the central panel, choose “XML File” as the type of item to add. Finally, set “hibernate.cfg.xml” as the file name and hit the “Add” button.
The file will be created and opened for you. Replace all its content with the code below:
<?xml version="1.0" encoding="utf-8" ?>
<hibernate-configuration xmlns="urn:nhibernate-configuration-2.2">
    <session-factory>
        <property name="connection.provider">
            NHibernate.Connection.DriverConnectionProvider
        </property>
        <property name="connection.driver_class">
            NHibernate.Driver.SqlClientDriver
        </property>
        <property name="connection.connection_string">
            Server=(localdb)MSSQLLocalDB;database=ContactListDb;Integrated Security=SSPI;
        </property>
        <property name="dialect">
            NHibernate.Dialect.MsSql2012Dialect
        </property>
    </session-factory>
</hibernate-configuration>
Configuration-wise, that’s pretty much all there is to it, at least in relation to NHibernate itself. The next step for us is now configuring the mapping between our database table and our model.
In order to configure the NHibernate mapping between our class and our database table, we’re going to need yet another XML file. Right-click on “Models” again, “Add,” “New Item…,” same drill as before. The only difference is the file name. This time you should name the file “Contact.hbm.xml.”
After you create the file, replace its content with the following:
<?xml version="1.0" encoding="utf-8" ?>
<hibernate-mapping xmlns="urn:nhibernate-mapping-2.2" auto-import="true" assembly="WebApplication1" namespace="WebApplication1.Models">
    <class name="Contact" table="Contact" dynamic-update="true" >
        <cache usage="read-write"/>
        <id name="Id" column="Id" type="guid">
            <generator class="guid" />
        </id>
        <property name="Name" />
        <property name="Email" />
        <property name="PhoneNumber" />
    </class>
</hibernate-mapping>
And, easy as that, we’re also done with the mapping. We’re very close to having a functional application.
The next step is to configure the NHibernate session. Unlike the previous steps, this one doesn’t consist of creating a .XML file, but rather a C# class. On Solution Explorer, right-click the solution, then go to “Add,” “Class”. When prompted for a name, type “NHibernateSession.” As soon as the class is created, replace all of its content with the following code:
using System.Web;
using NHibernate;
using NHibernate.Cfg;

namespace ContactList
{
    public class NHibernateSession
    {
        public static ISession OpenSession()
        {
            var configuration = new Configuration();
            var configurationPath = HttpContext.Current.Server.MapPath(@"~Modelshibernate.cfg.xml");
            configuration.Configure(configurationPath);
            var contactConfigFile = HttpContext.Current.Server.MapPath(@"~ModelsContact.hbm.xml");
            configuration.AddFile(contactConfigFile );
            ISessionFactory sessionFactory = configuration.BuildSessionFactory();
            return sessionFactory.OpenSession();
        }
    }
}
And that’s it. Time to wrap up our demo application by creating the controller and its views.
For the sake of brevity, we’ll only implement the list and add functionalities. Our app will allow users to create new contacts and list the existing ones, but not edit or delete them. Feel free to implement the rest of the features as an exercise.
On Solution Explorer, right-click “Controllers,” then go to “Add,” “New Item…”. On the already familiar new item windows, choose “Code” under Visual C#. In the middle, pick “Class” and name it “ContactsController” before confirming.
As soon as the class is ready for editing, replace all of its content with the following code:
using System;
using System.Collections.Generic;
using System.Linq;
using System.Web.Mvc;
using ContactList.Models;
using NHibernate;

namespace ContactList.Controllers
{
    public class ContactsController : Controller
    {
        public ActionResult Index()
        {
            IEnumerable<Contact> contacts;

            using (ISession session = NHibernateSession.OpenSession())
            {
                contacts = session.Query<Contact>().ToList();
            }

            return View(contacts);
        }

        public ActionResult Create()
        {
            return View();
        }

        [HttpPost]
        [ValidateAntiForgeryToken]
        public ActionResult Create([Bind(Include = "Id,Name,Email,PhoneNumber")] Contact contact)
        {
            if (ModelState.IsValid)
            {
                contact.Id = Guid.NewGuid();

                using (ISession session = NHibernateSession.OpenSession())
                using (ITransaction transaction = session.BeginTransaction())
                {
                    session.Save(contact);
                    transaction.Commit();
                }

                return RedirectToAction("Index");
            }

            return View(contact);
        }
    }
}
With the controller ready, it’s now time to create our views. Go yet again to Solution Explorer. But this time it’s the Views folder you’re going to right-click on. Go to “Add,” “New Folder,” and enter “Contacts” when you’re prompted for a name. Then you right-click this newly created folder, go to “Add,” and then “View…”. You should then see the following screen:
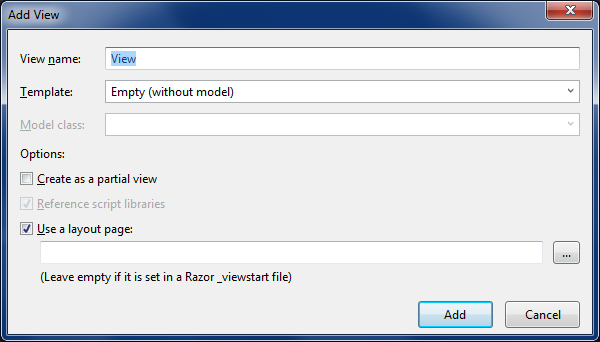
Enter Index as the view name. Then choose “List” as its template. After doing that, the “Model class” option will be enabled. Click on the suspended list and choose the Contact class. Then you can hit the “Add” button.
As soon as the view is ready for you, replace its content with the following code:
@model IEnumerable<ContactList.Models.Contact>

@{
    ViewBag.Title = "Index";
}

<h2>Index</h2>
<p>
    @Html.ActionLink("Create New", "Create")
</p>

<table class="table">
    <tr>
        <th>
            @Html.DisplayNameFor(model => model.Name)
        </th>
        <th>
            @Html.DisplayNameFor(model => model.Email)
        </th>
        <th>
            @Html.DisplayNameFor(model => model.PhoneNumber)
        </th>
    </tr>

    @foreach (var item in Model) {
        <tr>
            <td>
                @Html.DisplayFor(modelItem => item.Name)
            </td>
            <td>
                @Html.DisplayFor(modelItem => item.Email)
            </td>
            <td>
                @Html.DisplayFor(modelItem => item.PhoneNumber)
            </td>
        </tr>
    }

</table>
After that, repeat the process, but this time entering “Create” as the view name and picking “Create” as the view template. This time, we won’t edit the generated code.
Our application is finished, which means we’re ready to start profiling it! Go to https://stackify.com/prefix, enter your email, and then click the download button. After the download is complete, double-click the installer and from now on, you know the drill.
If you want, you can also install Prefix using Chocolatey:
> choco install Prefix
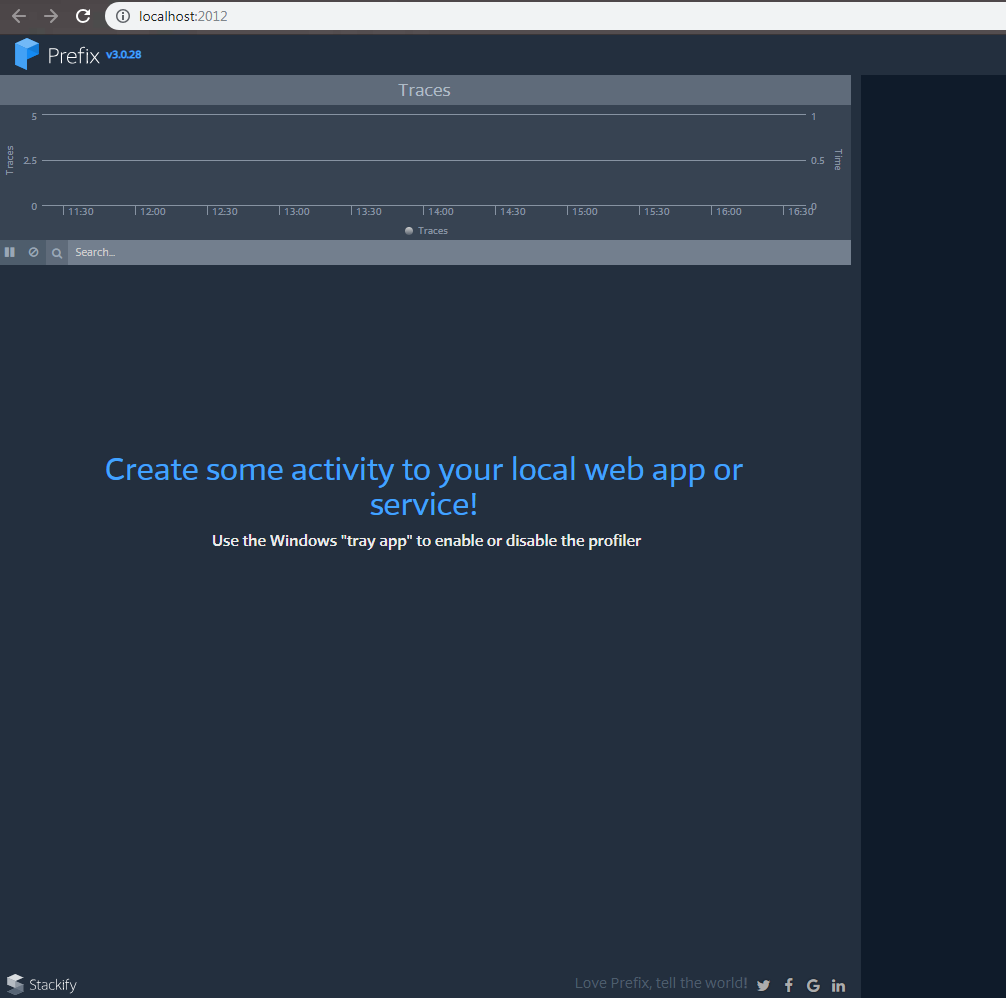
When Prefix is successfully installed, it’ll open a new tab on your browser that looks like the image below:
You can use the app in the Windows tray to enable or disable the profiler:

Click on “Enable .NET Profiler.” It’s going to ask you whether you really want to enable the profiler. Click “Yes.” Profiler up and running! You might see a message saying that, in order for the profile to work correctly, you must restart Visual Studio. Do that, and when VS is up again, press F5 to execute the application and to the “/Contacts” route. In the Prefix tab, you should see something like this:
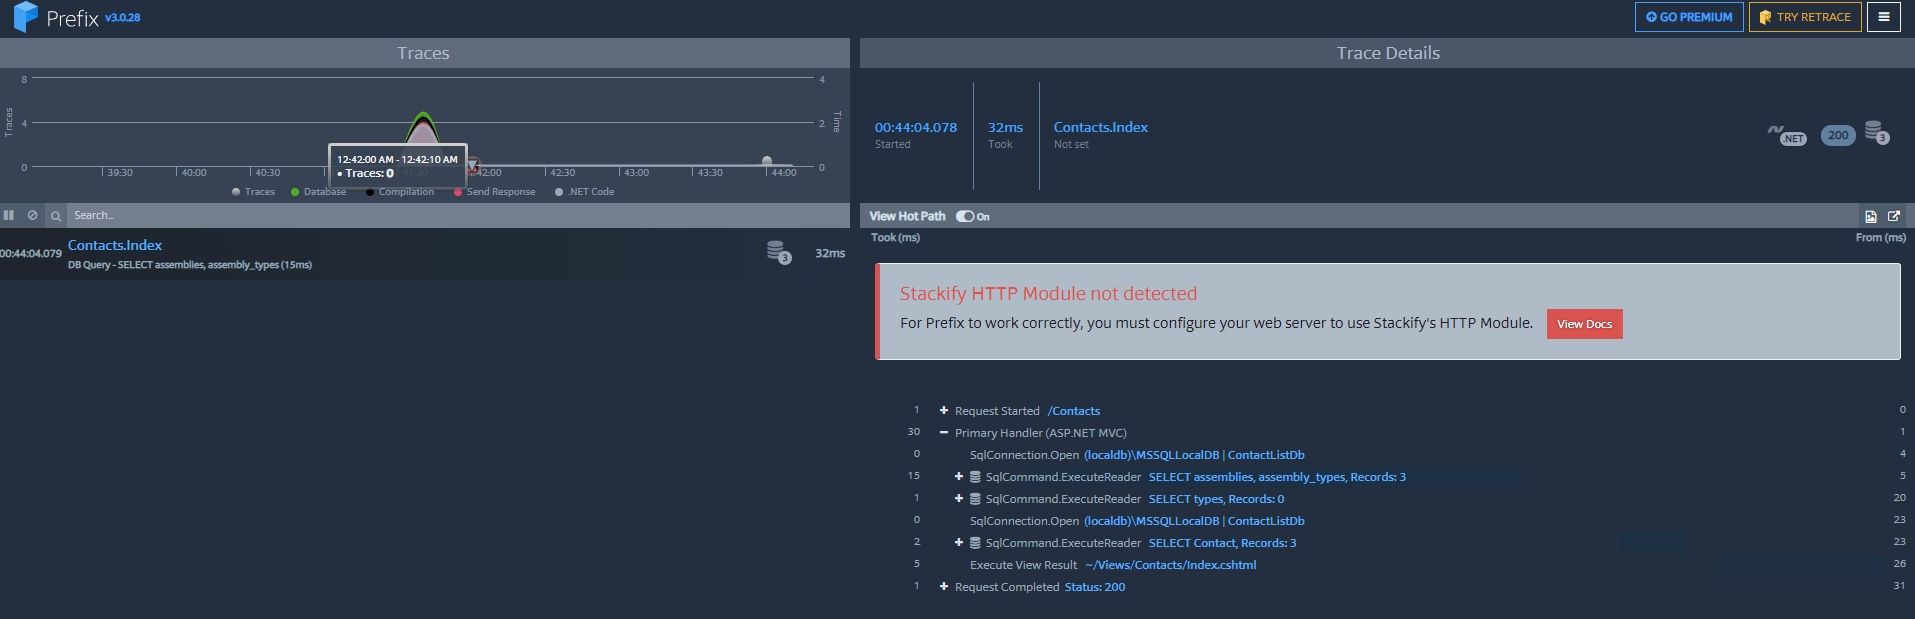
On the left panel, we can already see useful data. For instance, just that request (“/Contacts”) generated three calls to the database. On the right side, we can see in more detail:
And that’s just a small demonstration of Prefix’s power.
The story I told at the beginning of the article is fictional, but it’s not that different from what many developers experience in real life. Performance issues are all very real, as anyone who suffered because of them can attest. Your app might be gorgeous, with a slick, clean interface. None of that matters if the performance is subpar.
There are tools that can help you, fortunately. Stackify Prefix is one of them. Why not give it a try today? It might be just what you need to embrace the power of this application profile and bring amazing results to your organization.
Stackify's APM tools are used by thousands of .NET, Java, PHP, Node.js, Python, & Ruby developers all over the world.
Explore Retrace's product features to learn more.


