
AWS offers a variety of services to solve specific needs. There are some core services, like EC2 and VPC, that let you create an infrastructure for your applications that scales easily. But if you’re new to AWS and also new to infrastructure, you might need to invest some time reading before you deploy your application to AWS.
I remember my first time using AWS; the sysadmin explained to me what systems we were using in AWS to run the company’s main application. To be honest, I didn’t understand how all the services were interacting and what role each component played in the architecture of the application.
When I found out about AWS Elastic Beanstalk (EB), many things started to make sense to me because I could see how the app I was creating in EB connected all the resources for several other services, such as EC2, under the hood. EB made a potentially confusing task easy—I just followed the wizard. After a while, I had my first application running in AWS.
That’s what we’re going to do today. Keep reading to learn how to deploy a .NET application to AWS using AWS Elastic Beanstalk.
AWS offers over many services, which can be pretty overwhelming for someone who’s just starting out or hasn’t been paying attention to what’s new. Every year, AWS launches new services, as well as new features for existing services.
AWS Elastic Beanstalk (EB) makes using AWS services simple. It’s just a matter of configuring the application and the environment. AWS does all the heavy lifting and also provides you with a set of useful metrics to monitor the health of the application.
EB supports platforms for Go, Java, .NET, Node.js, PHP, Python, Ruby, and Docker. And if that’s not enough, you can make EB even more versatile by adding customization scripts in the application package you upload to the service. You can also create templates after customizing the EC2 instance with the packages or software you want the environment to have pre-installed.
EB theory is really simple; it all starts with the application. An application is a logical collection of resources where you can have different environments and versions of the application. An environment is a set of AWS resources that allow you to promote different application versions to a certain environment. Environments are really helpful when you want to roll back to a working version—you just select a working version and wait for AWS to finish the update.
So you create applications to isolate related resources and then use environments to test changes in a similar infrastructure to the one that’s live. All this so you can be sure you won’t break something important.
And that’s a basic intro for EB. If you want to know more about it, I suggest you take a look at the official docs. So let’s get our hands dirty and create our first application in EB.
Log in to your AWS account and go to the EB home page—you’ll see the screen below. Click on the blue “Get started” button:

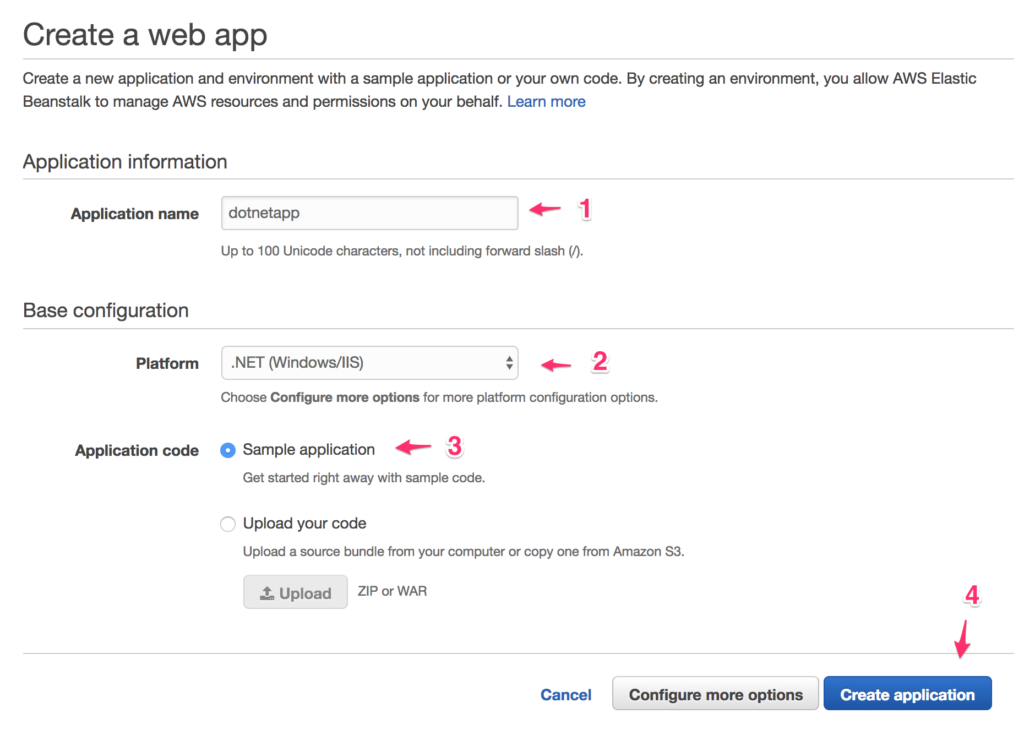
A new screen will appear. This is where you’ll start configuring the application. For the name of the application (noted in the callout as “1” in the image below), I typed “dotnetapp,” but you can choose a more meaningful name. Choose the “.NET (Windows/IIS)” option for the platform (callout 2 below). Unfortunately, AWS doesn’t currently offer a preconfigured platform for Linux. Since we don’t have an application yet, select the “Sample application” option (callout 3). This will allow you to see the “Hello World” application in EB. Click on the blue “Create application” button (callout 4):
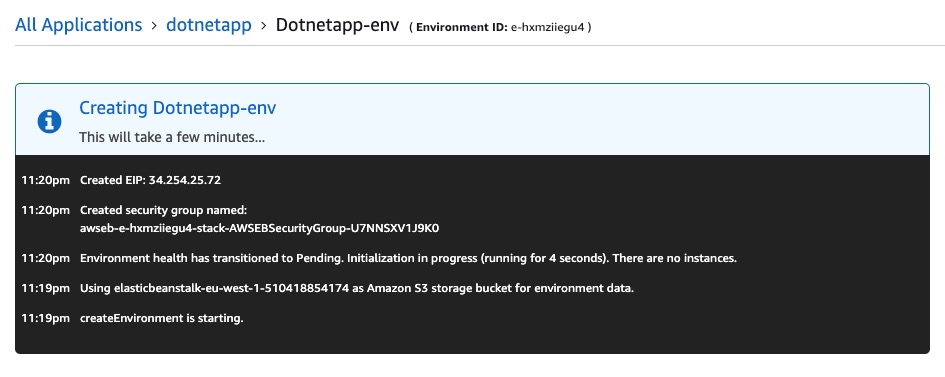
Let’s wait a few minutes for the environment to be ready. In the meantime, you can take a look at the logs to see what’s happening:
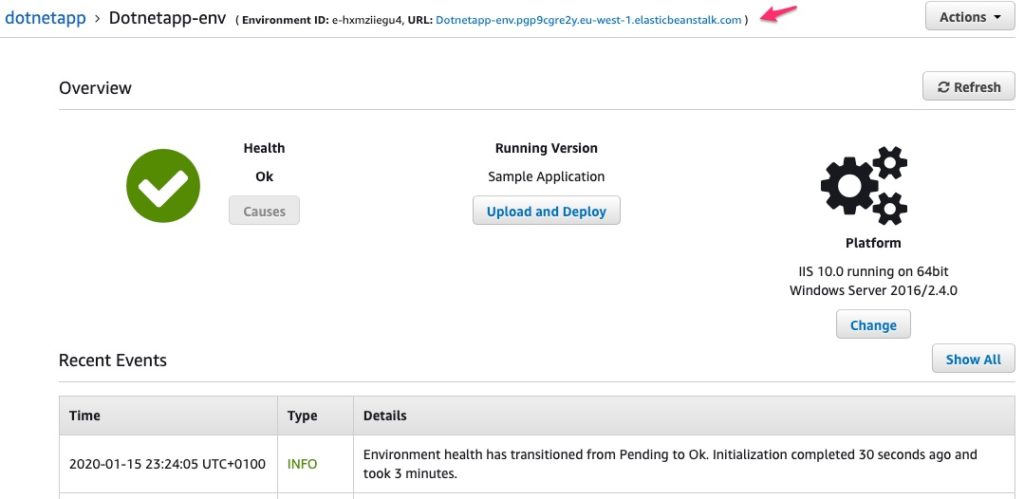
After five minutes or so have passed, you’ll see that the environment is healthy. In the following screen, you can get the URL for the environment. If you decide to use a custom subdomain, the subdomain should then point to this URL.
Click on the URL indicated by the arrow above and you’ll see the following congratulations page for the sample application:
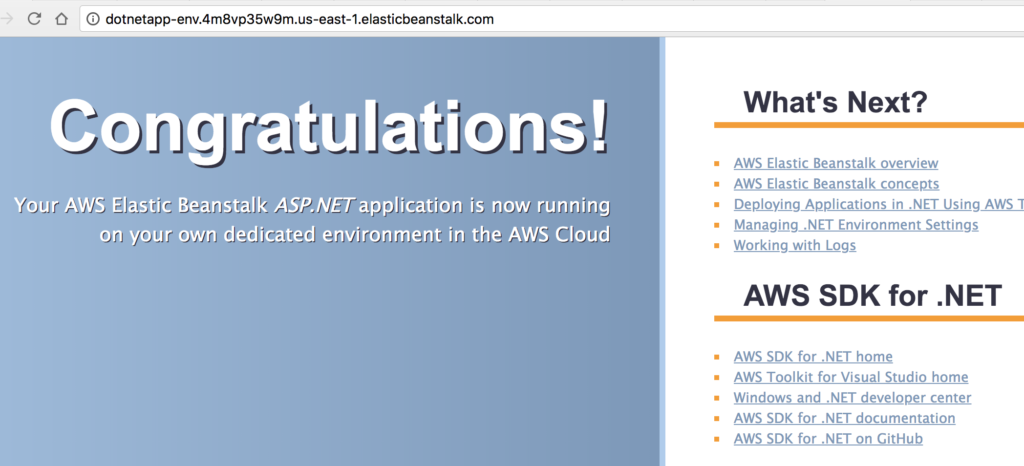
And that’s it! You’ve created a simple .NET application. That was easy, right? Then let’s make things more interesting and replace the sample app with one that we’ll create.
Let’s use Visual Studio’s .NET Core templates and create a Razor application using the default template. But first, let’s create a folder for the application and go to that folder. To do so, run the following commands in the terminal:
$ mkdir dotnetapp
$ cd dotnetapp
Create the application using the Razor template by running the following command:
$ dotnet new razor
We need to tell AWS to replace the existing content with the content we’re uploading to the EB platform. Let’s create a file called “aws-windows-deployment-manifest.json” with the following content:
{
    "manifestVersion": 1,
    "deployments": {
        "aspNetCoreWeb": [
            {
                "name": "dotnetapp",
                "parameters": {
                    "appBundle": ".",
                    "iisPath": "/",
                    "iisWebSite": "Default Web Site"
                }
            }
        ]
    }
}
This file is saying that the compiled code that you’re uploading needs to replace the existing content in the default website of the server.
Now let’s compile the application locally with the following command:
$ dotnet publish -c Release -o site
We need to zip the contents of the folder. How you’ll do this will depend on the OS you’re using. But if you’re using a Mac, you can go ahead and use this command:
$ zip -r -X site.zip site/
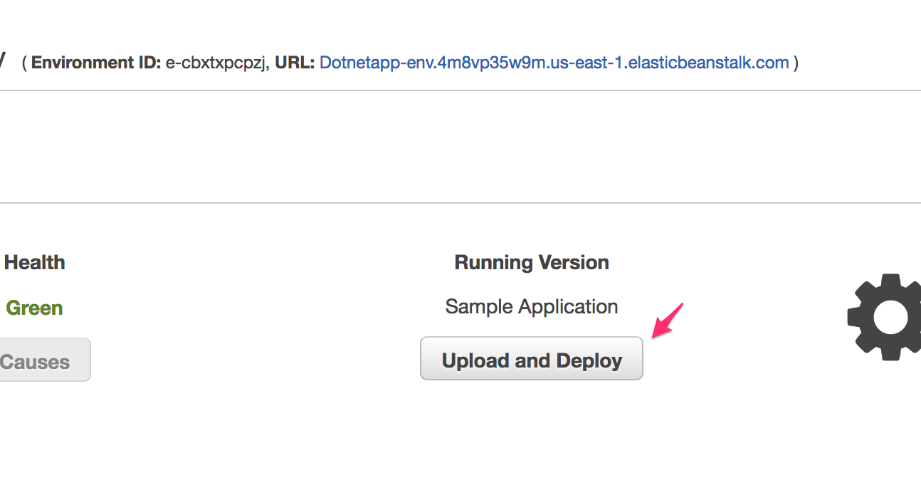
Go back to the AWS Elastic Beanstalk console and upload the zip file you just created by clicking on the “Upload and Deploy” button:
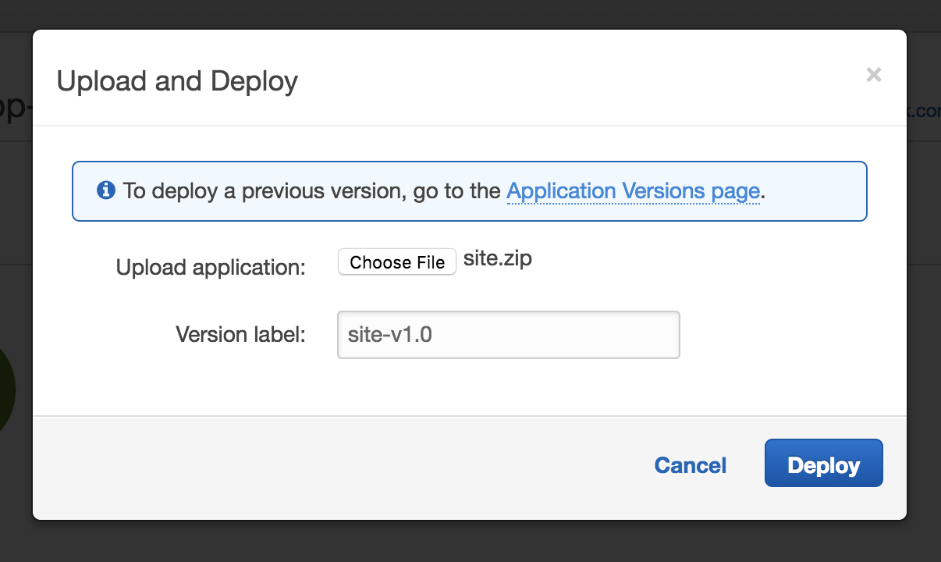
Locate the zip file to upload and click on the blue “Deploy” button:
You’ll see that AWS starts to upload the zip file and update the servers.
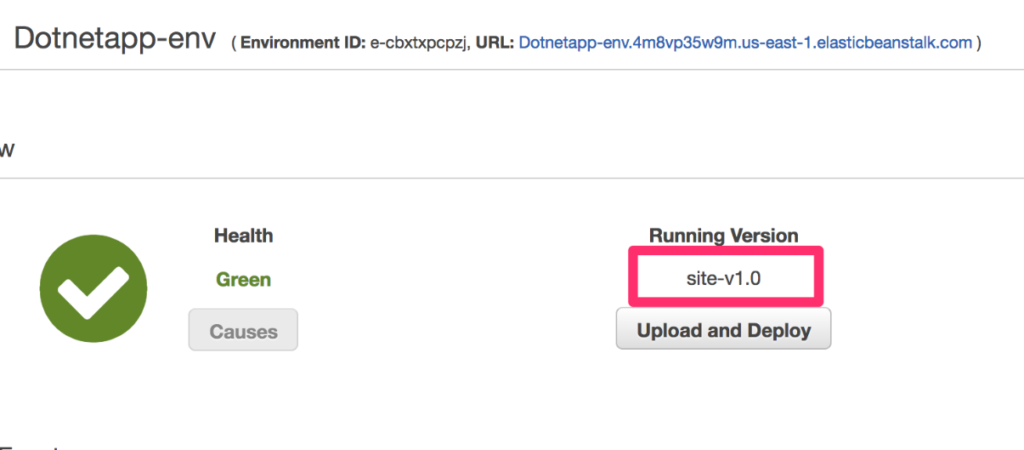
When the console shows that the environment is healthy (above) and that it’s using the version you just uploaded, click on the URL again to see the new app live:
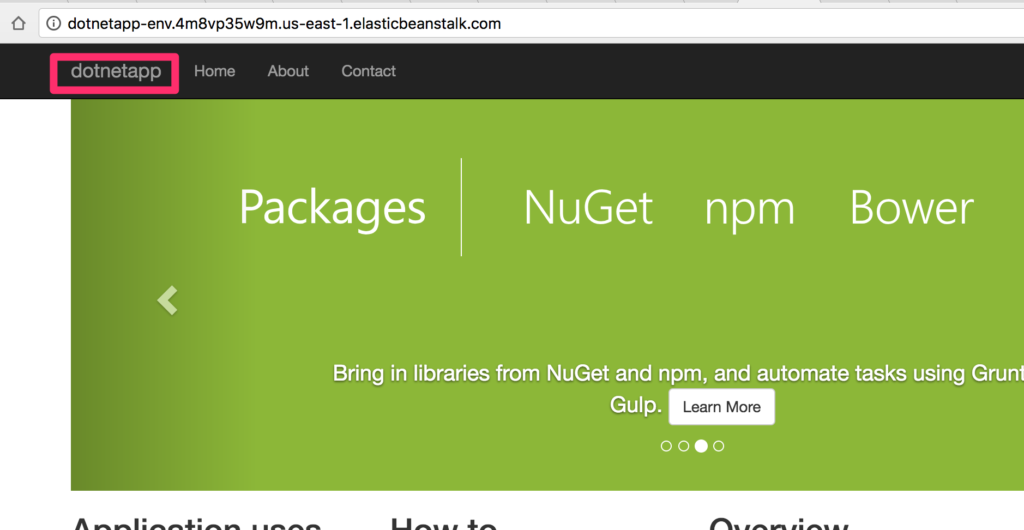
Congrats! You’ve just deployed a custom .NET Core application to AWS Elastic Beanstalk.
NOTE: If for some reason the update doesn’t work, try to zip the files manually instead of using a command. I’ve struggled with this a few times because it seems that the zip file was uploaded incompletely so the application didn’t get updated. My slow internet connection at the time could have contributed to the issue as well.
At the beginning of this post, I talked about applications and environments. Now I’d like to show you how these look in the AWS console.
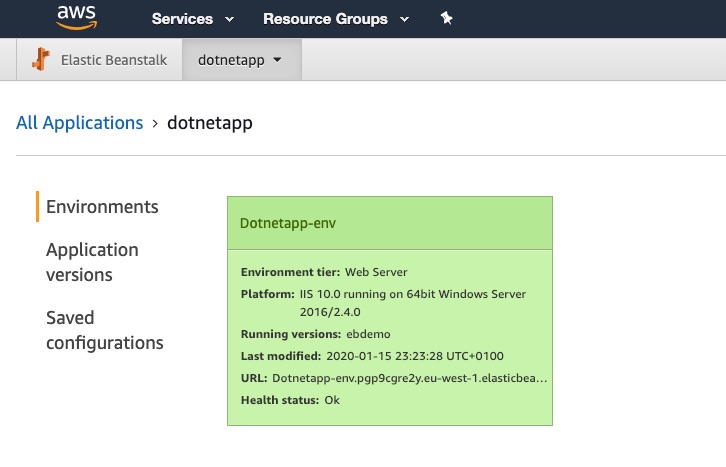
In the above screen, you can see that the only application is the “dotnetapp” I just created. Below that app, there’s a list of environments for the application. In this case, the default one is for development. Note that you can have more than one to safely promote artifacts to production. You just need to upload the application once and then redeploy it in the other environments.
Now let’s take a look at some other options that will be useful, especially if you’re new to AWS and/or infrastructure. Go back to the environment of the application by clicking on the name of the environment.
In the left panel, there’s a menu for a link to different things you can change in the environment. Let’s start with the “Configuration” section.
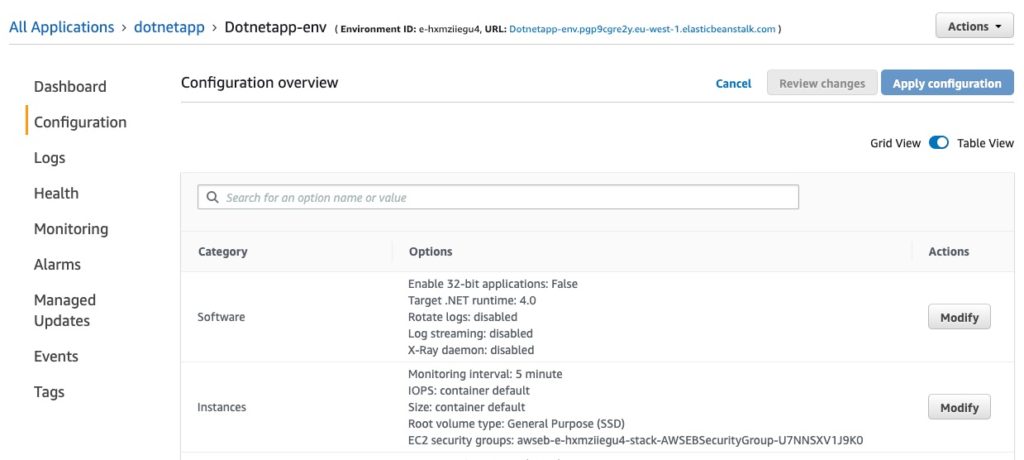
In here, you can change the runtime, enable log streaming, add/change environment variables, change the instance type, make the application private, and configure high-availability, among other things.
You can also take a look at some logs from here. You don’t lose remote access to the infrastructure, but you have the ability to inspect logs without needing more privileged permissions.
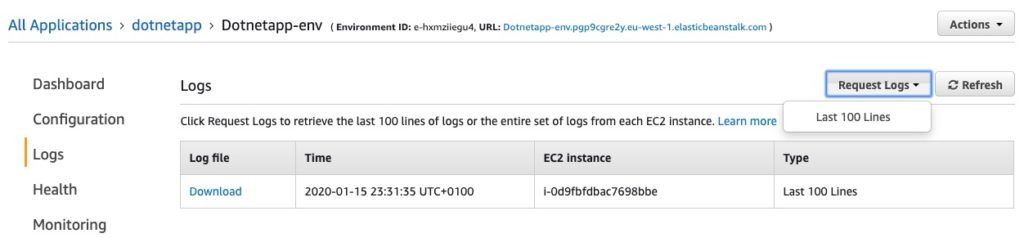
You’ll get logs in batches of 100 lines; you can download the generated logs and analyze them offline.
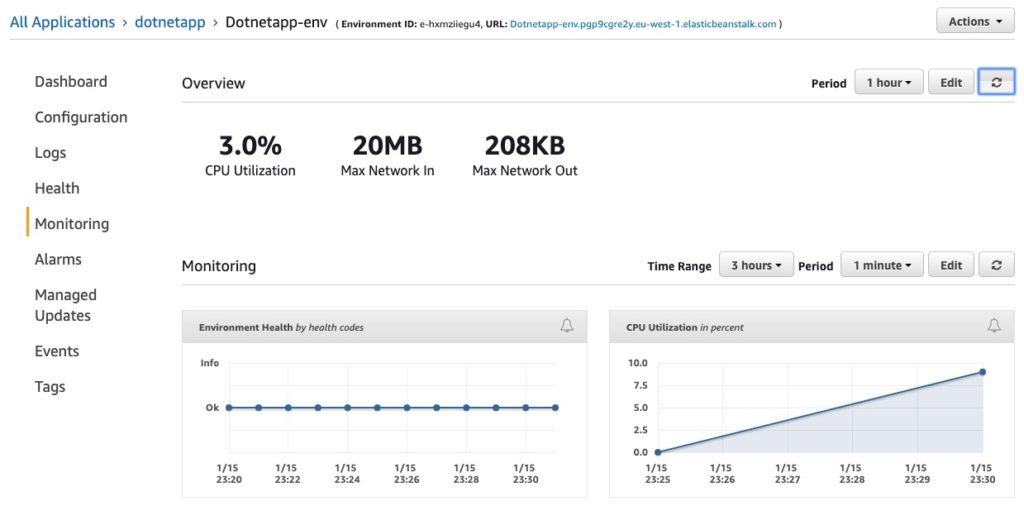
I like the monitoring section the most because even though there aren’t too many metrics, it gives you a quick overview of what’s happening in your application and how it’s being used. You can then go and take a look at the AWS resources that EB created.
It’s also possible to configure alarms when something bad happens, like if CPU consumption goes up or networking traffic increases. This behavior might just mean that you’re receiving more genuine traffic and you simply need to set things up to grow/shrink on demand after an alarm has been triggered.
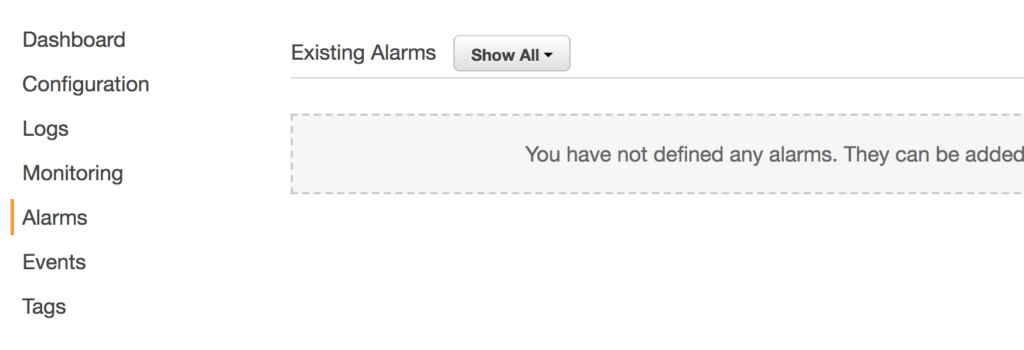
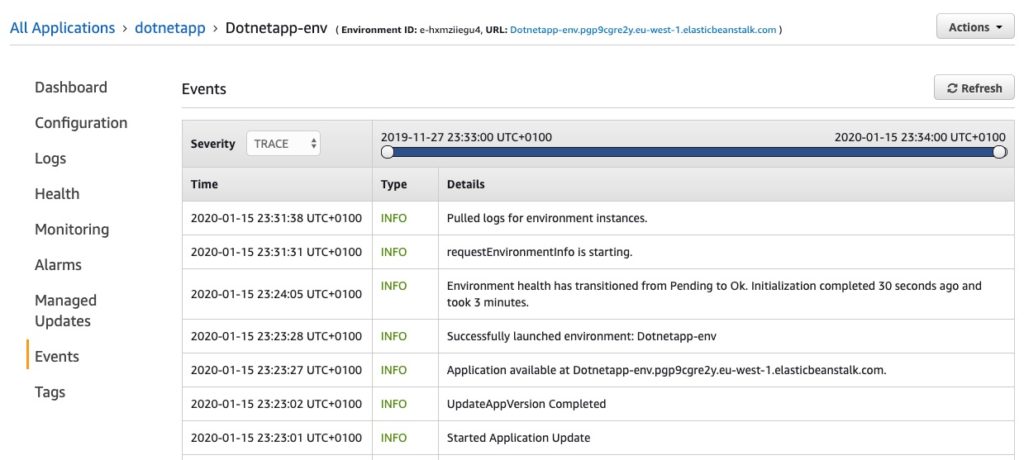
Lastly, you have events. These are different than logs because the information recorded here is about the things that happen to the environment. For example, if a new version is deployed or something happened with the infrastructure and it needed to be recreated, you’ll see a log entry here.
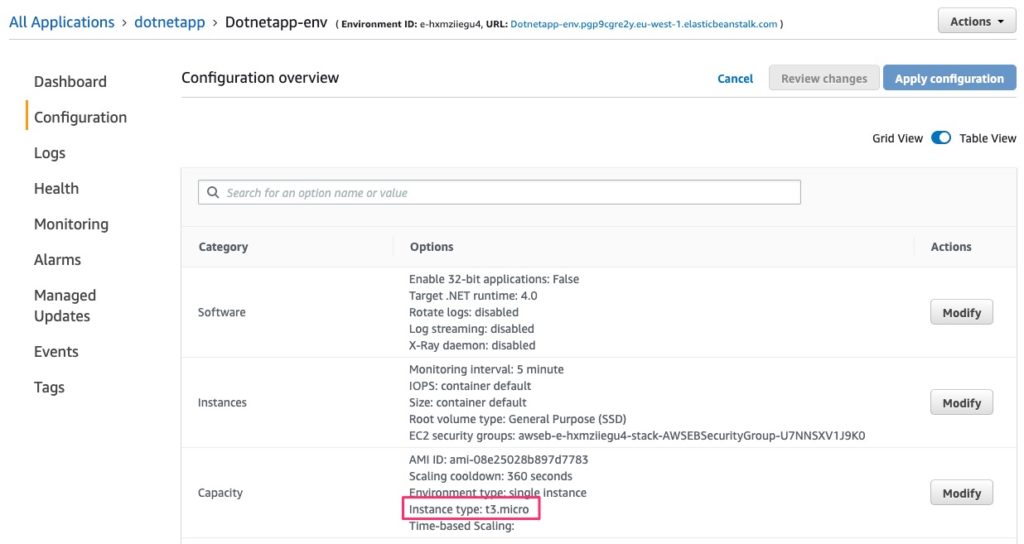
By default, AWS set the instance type as “t1.micro,” but that’s a legacy version and there’s a cheaper instance type called “t2.micro” with the latest virtualization technology. This isn’t actually a big deal if you’re just practicing setting up your first environment. But I want to change it so that you can see how easy it is to alter these types of configurations in EB.
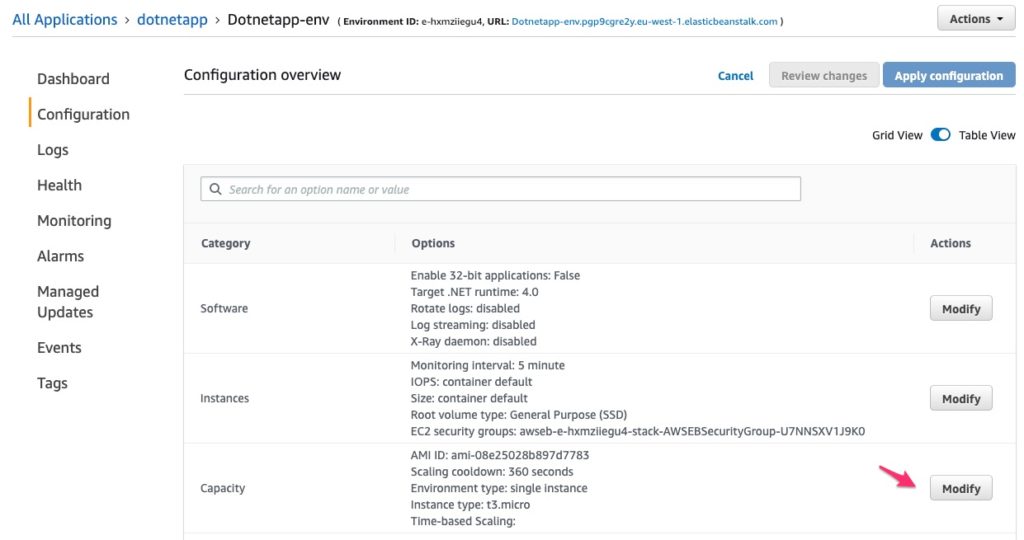
Go back to the “Configuration” section we just reviewed in the previous section and click on “Modify” in the “Capacity” box.
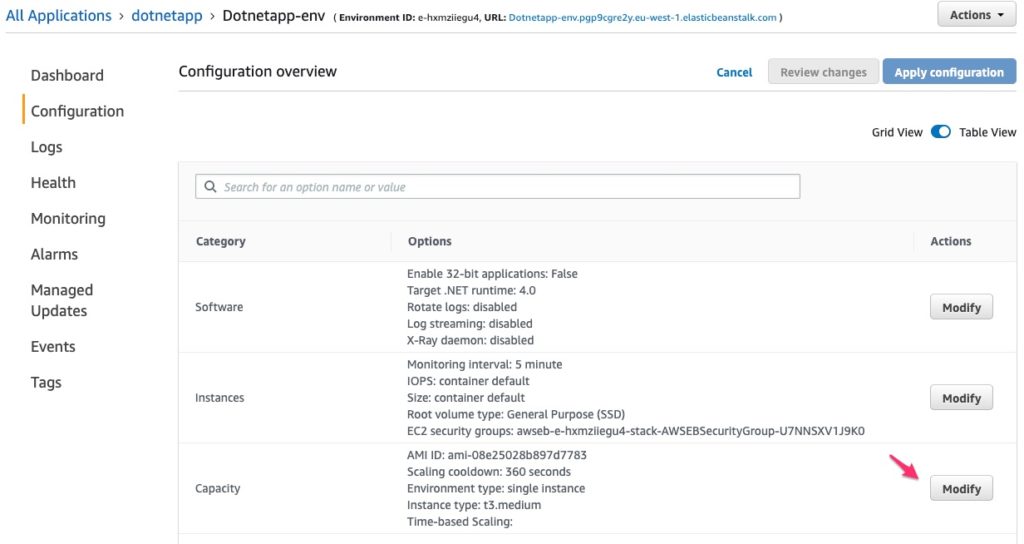
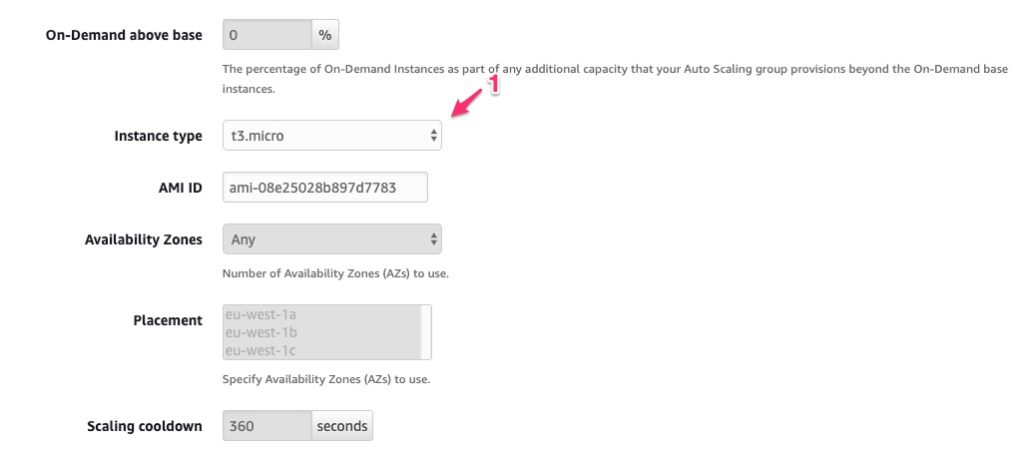
Scroll down a little bit, in the instance type drop-down menu, choose a different instance type—I chose “t3.micro” (see the callout labeled “1” below) because it’s cheaper.
Scroll down a little bit and click on the blue “Apply” button. Click the blue “Confirm” button on the following screen and then wait for a bit. This process will take several minutes even though the console says it’s healthy. AWS recreates the environment by terminating the current instance and then creating the new instance with the same code you uploaded before. You’ll see the changes applied, like on the following screenshot:
When you explore the EC2 service, you’ll see that there’s only one instance. Again, this is because we created our first application and environment using the default options. But you can change this configuration as well and make the application elastic by changing just a few things.
Go back to the “Configuration” section we reviewed before and click on “Modify” in the “Capacity” box.
You can change the configuration of how many instances you need for the application to run smoothly. By default, it’s configured to run with one instance, with an elastic IP address assigned. Let’s change the environment type to “Load balanced.” You’ll see that a number of options will be enabled that will allow you to scale out/in when needed.
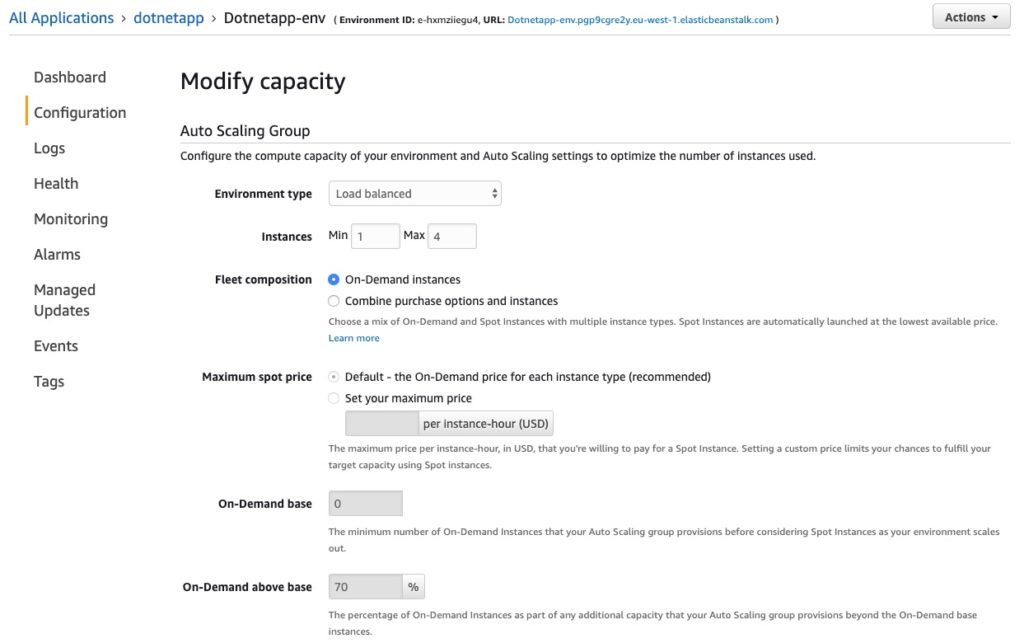
When you modify the capacity, you’re not just preparing to have a resilient application; you’re also giving AWS a chance to do deployments without downtime. Every time AWS needs to deploy a new change, it will either take a server out of the rotation, or it will create a new server and include it in the load balancer when it’s ready.
You could use Visual Studio to deploy new code into EB…but please don’t. Instead, use the CLI so that you can automate deployments in Jenkins or even VSTS. We did everything manually in this guide, with the intention of showing you how everything is connected. That way when you’re automating deployments, you’ll understand what the EB CLI is doing.
If there’s something special you need to have in the servers, you can extend this configuration with the .ebextensions. The .ebextensions functionality is really powerful because you no longer have to make changes manually. Next time the environment needs to be rebuilt because something happened in AWS, you don’t have to worry about setting things up again.
When you use AWS Elastic Beanstalk, you leave all the heavy lifting to AWS.
Stackify's APM tools are used by thousands of .NET, Java, PHP, Node.js, Python, & Ruby developers all over the world.
Explore Retrace's product features to learn more.


